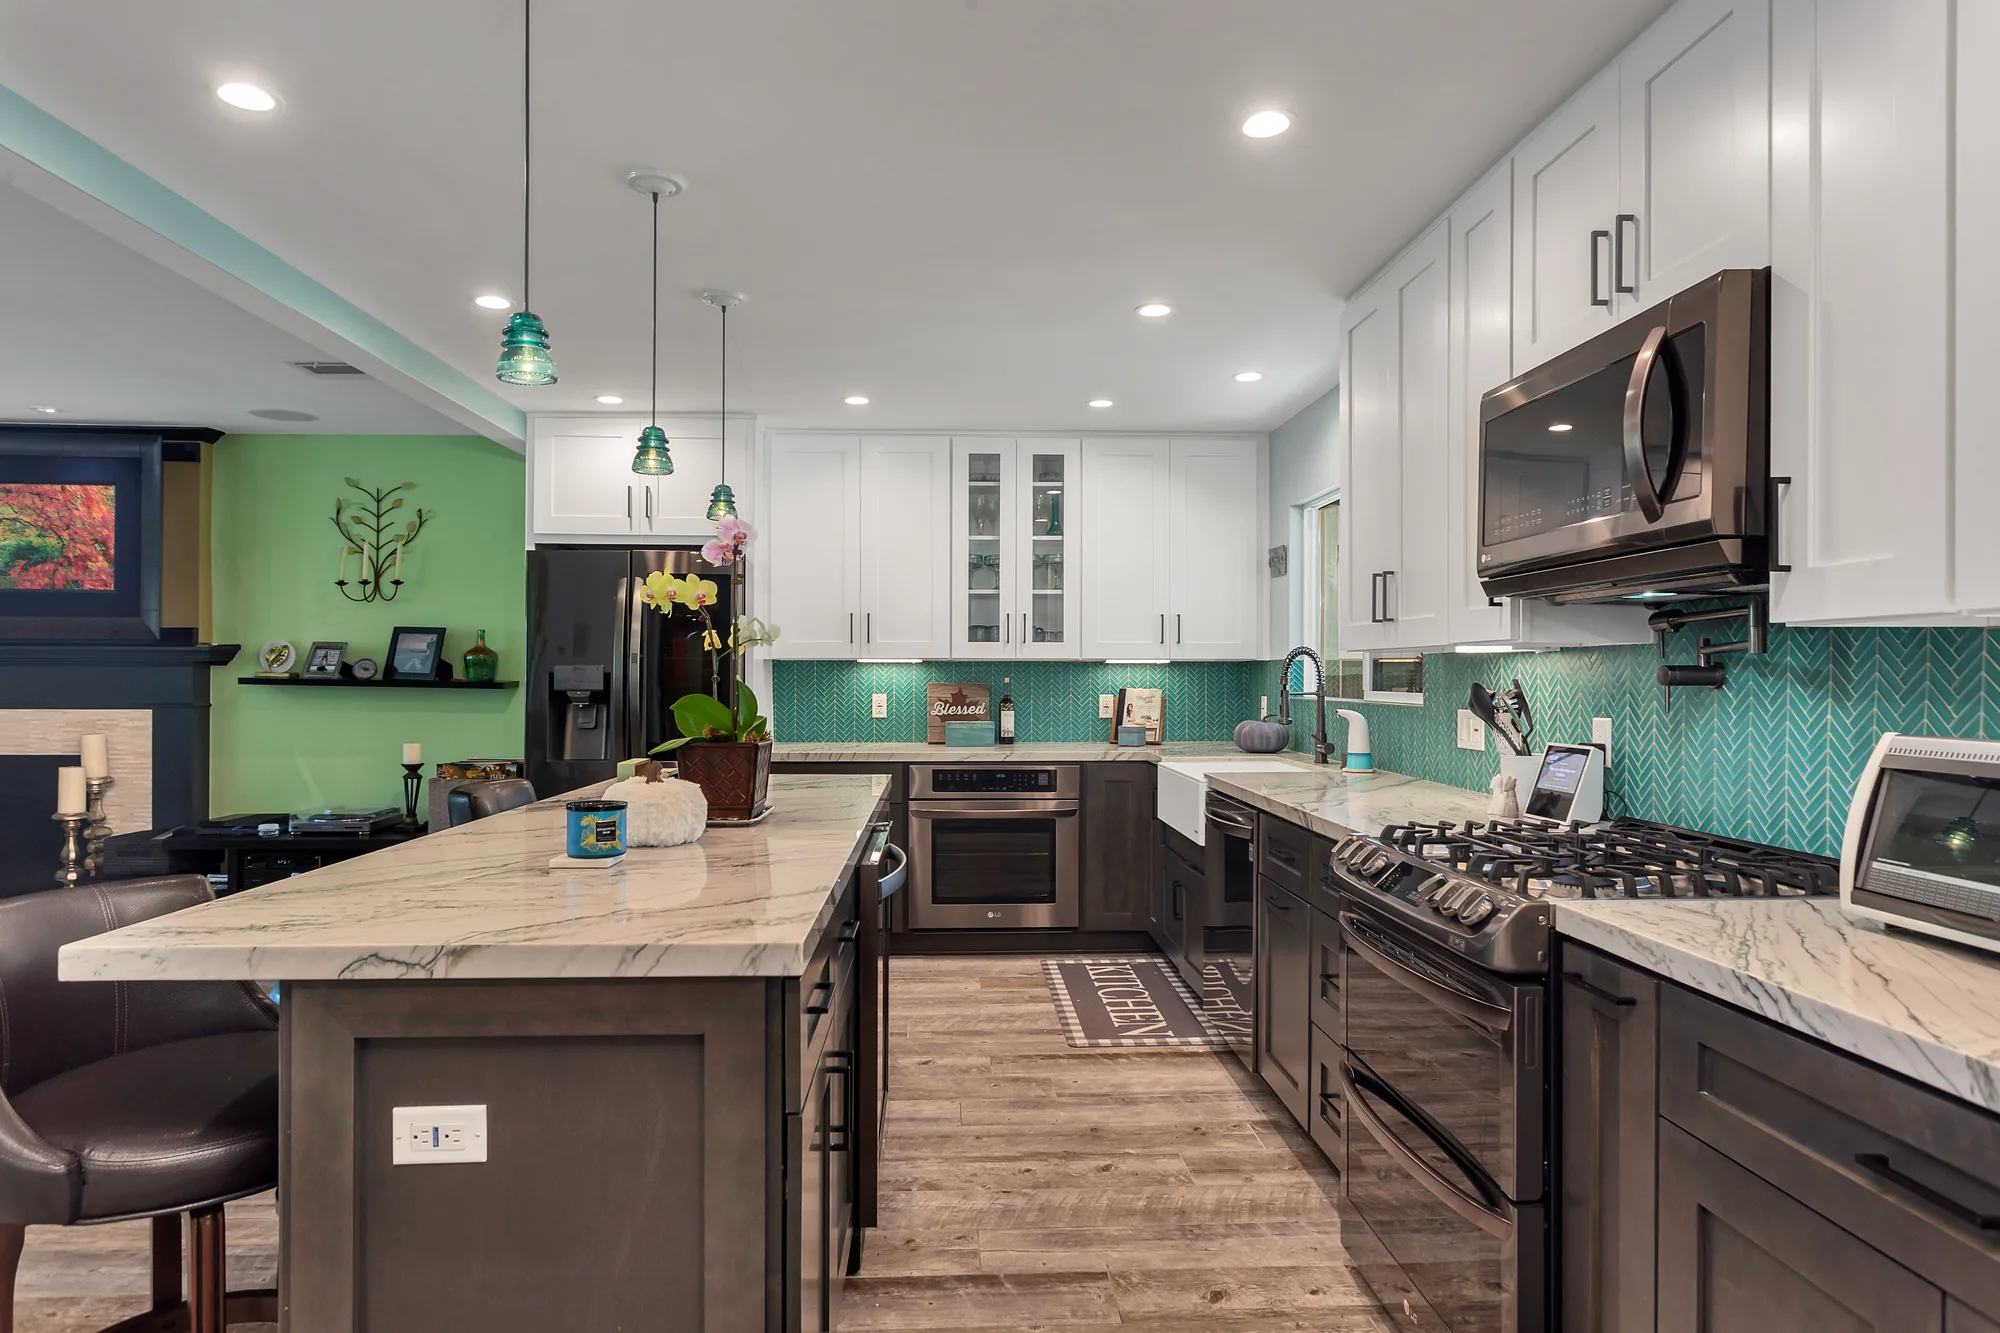
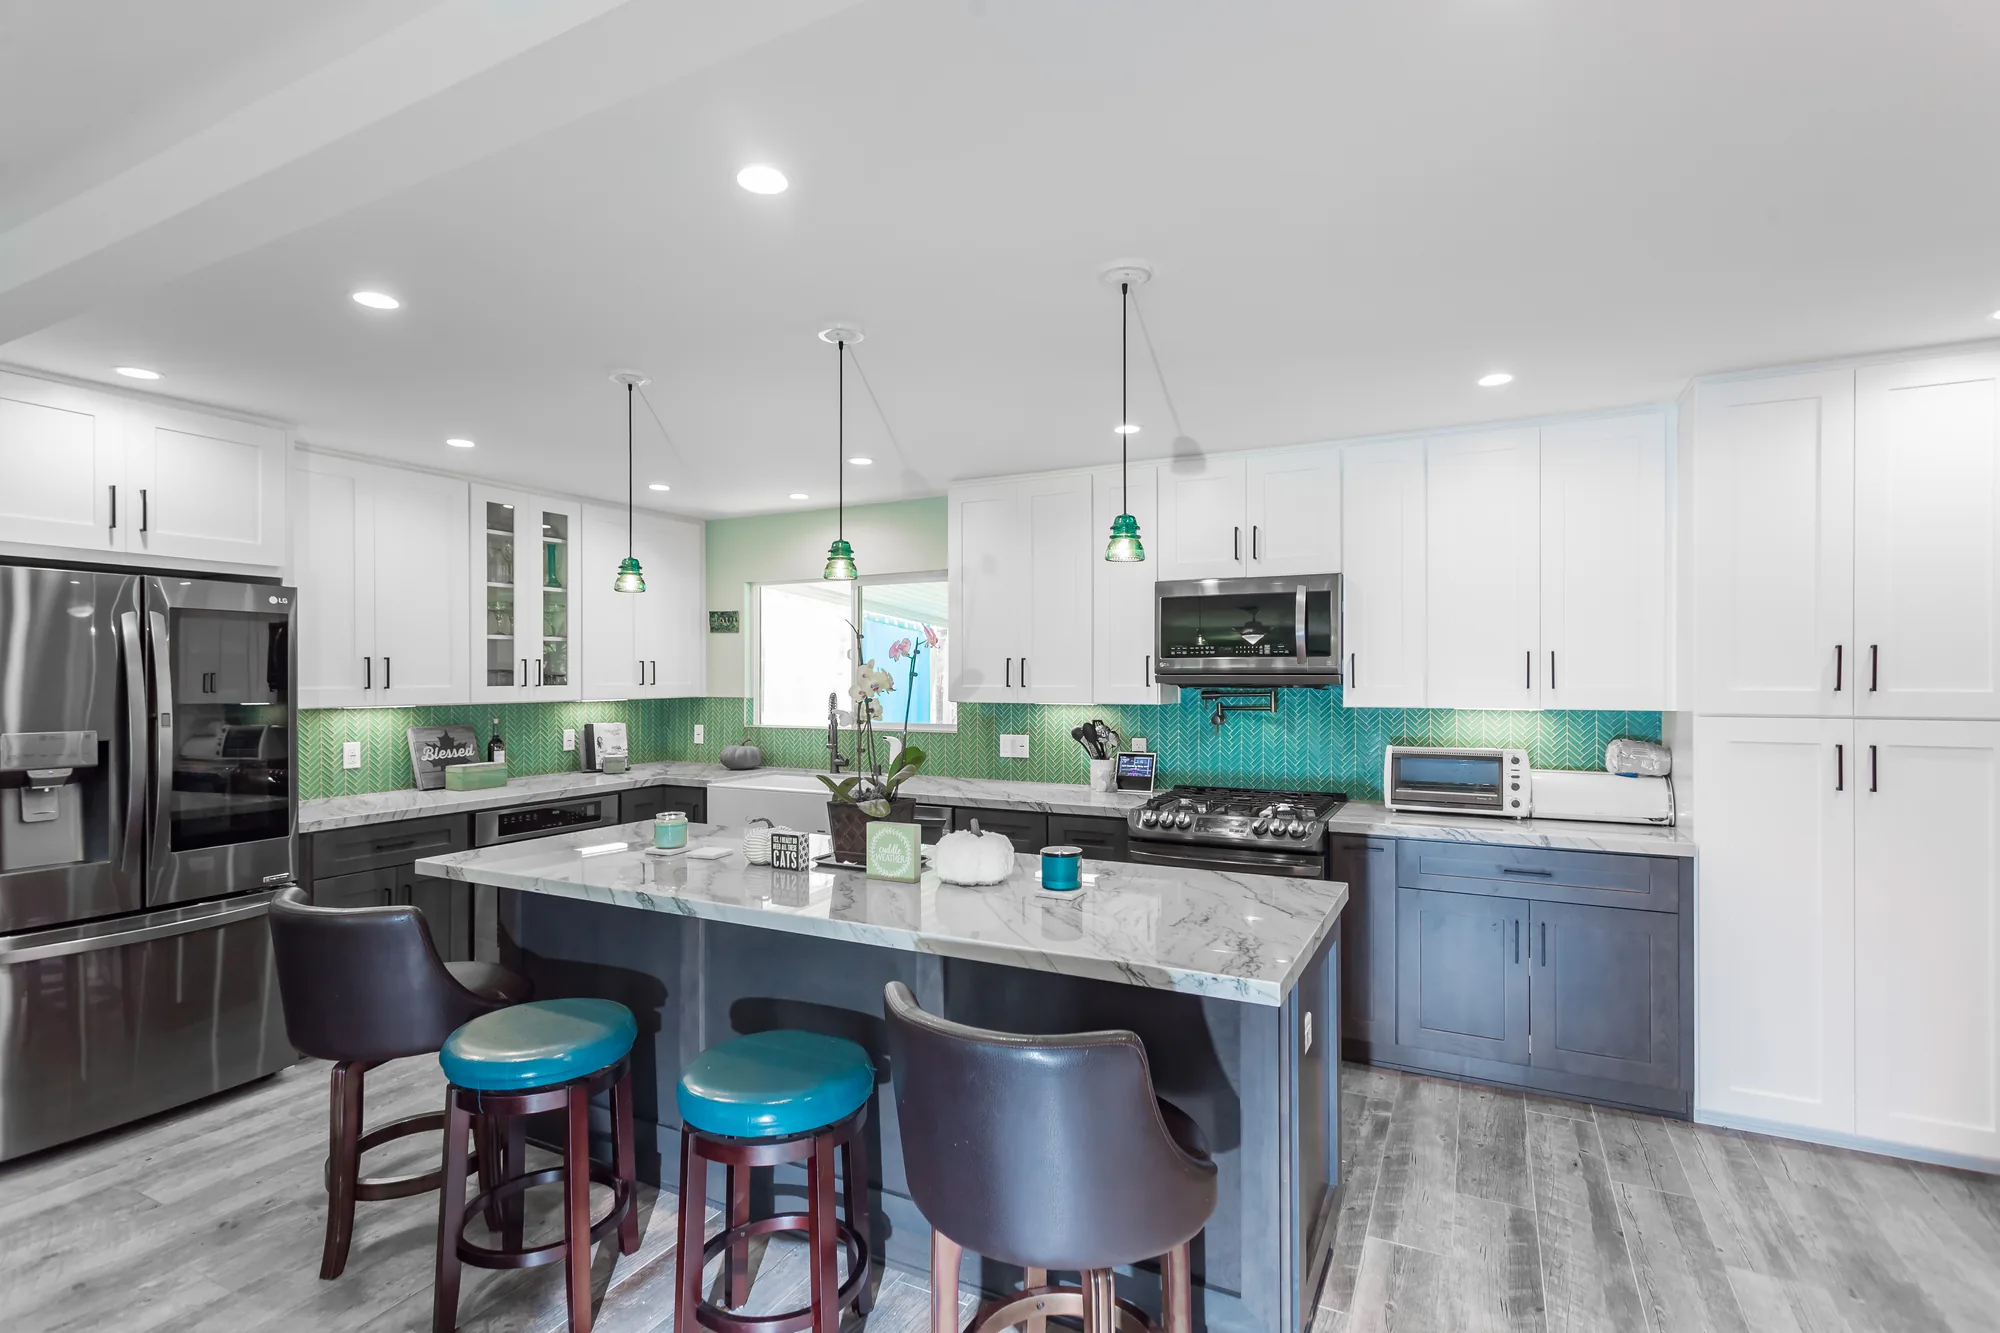
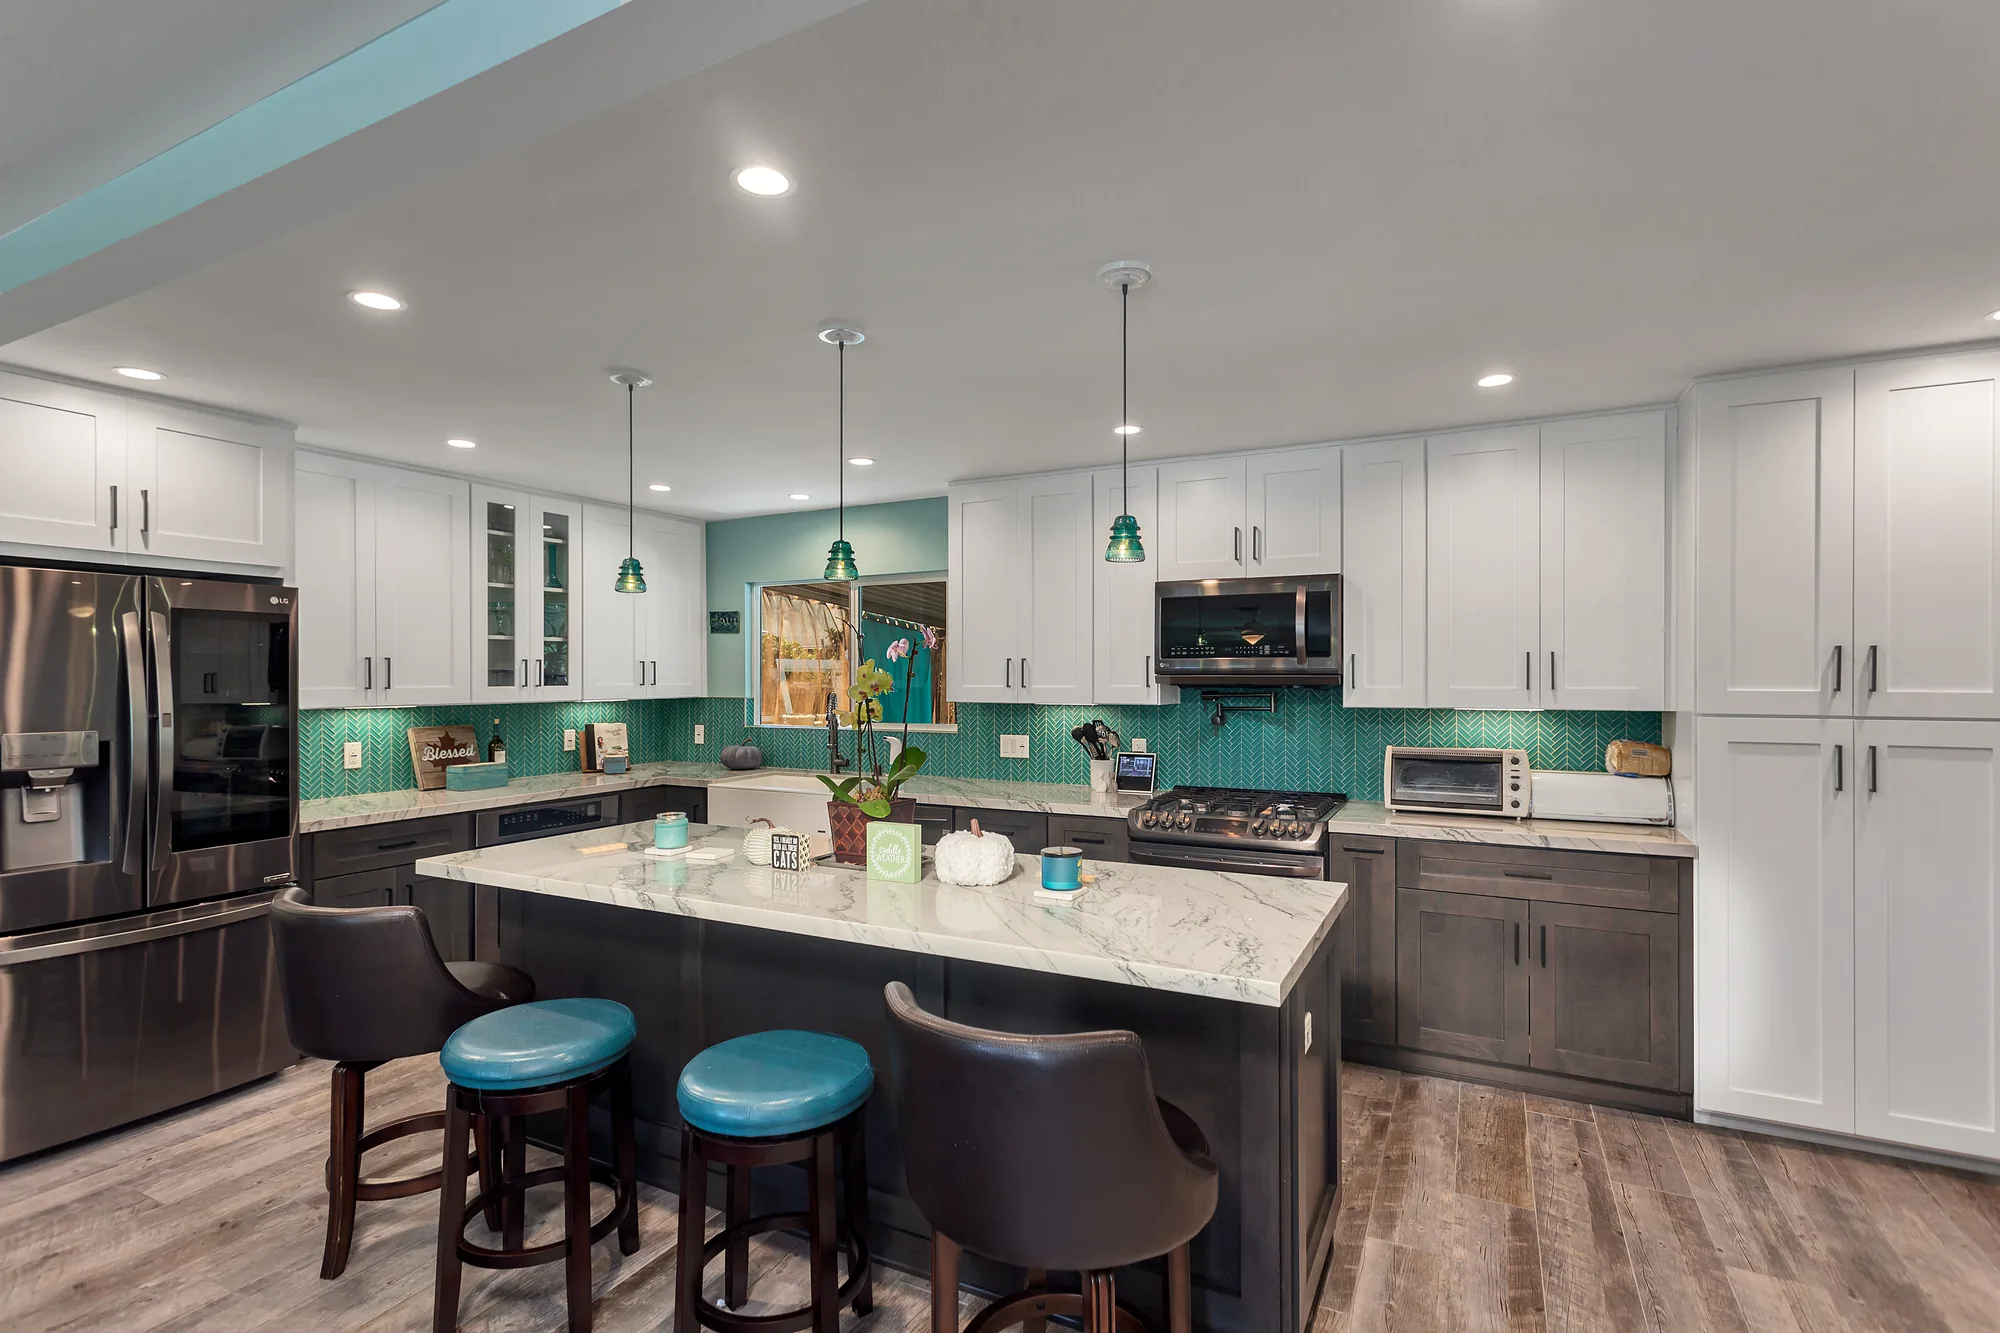
Close view along the island countertop showing heavy gray veining and teal upholstered stools.
Kitchen Remodeling

Custom Kitchen Islands Built Around How Your Kitchen Actually Works

An island has to work as prep space, storage, seating and traffic control at once. Sky Pro Remodeling designs islands around the measurements that decide whether a kitchen feels easy or crowded, then builds them with structure, power and plumbing accounted for from the start.

Overview

The Island Is a Measurement Problem Before It Is a Design Problem


Most disappointing islands are not ugly. They are the wrong size, in the wrong place, or built with clearances that make two people in the kitchen an irritation. Before door styles or slab colors come up, an island has to answer three blunt questions: how much aisle is left on every side, where does someone carrying a hot pan walk, and can the dishwasher door open without blocking the refrigerator.

The working standard is about forty-two inches of clear aisle for a single cook, and closer to forty-eight where two people pass or where a wall oven and dishwasher swing into the same lane. Those are measured finished face to finished face, which is why islands drawn on a rough plan shrink once cabinet depth, countertop overhang and appliance handles are added in. Most Eastside kitchens can support a genuinely useful island, just not the oversized one first imagined.

Depth matters as much as aisle width. Past roughly four feet front to back, the middle of the counter becomes hard to reach from either side and turns into a collection point for mail and small appliances. Islands that stay within comfortable reach, and gain capacity through length instead of depth, get used every day. That single constraint drives most of what follows.

Design Direction

Island Configurations Worth Considering


Configuration decides how the island functions; the finish only decides how it reads.

Single-level prep island

One continuous counter at standard height, storage on the working side, seating opposite. It gives the largest usable prep surface and the most flexibility, which is why it dominates current work. The tradeoff is that anything left out is visible from the living space.

Two-tier island with raised bar

A raised back counter at bar height screens the work surface and gives seating its own zone. It suits households that entertain while cooking and want cutting boards out of sight. It costs usable counter area and reads more traditional than a flush top.

Cooking island with ventilation

Putting the cooktop in the island turns the cook toward the room instead of a wall. It requires an island hood or downdraft, a wider counter for landing space on both sides of the burners, and seating placed clear of the splatter zone. Ventilation is the expensive part, not the cooktop.

Prep sink island

A smaller secondary sink keeps the main cleanup sink free and shortens the trip between refrigerator, prep area and range. It earns its place in larger kitchens where two people work at once. Plan the plumbing early, because the drain has to reach a stack and that path is not always short.

Furniture-style island

Built to read as a freestanding piece, with turned or tapered legs, a contrasting finish and often a wood or marble top. It suits older Eastside homes and Craftsman remodels where a monolithic block of cabinetry looks imported from another house. Storage capacity drops because legs replace full-height boxes.

Double island

Two smaller islands, typically one for prep and one for seating, used where a single island would be too deep to reach across. It separates cooking traffic from guest traffic cleanly. It only works when the room can give up two full aisles plus both footprints.

Completed Project

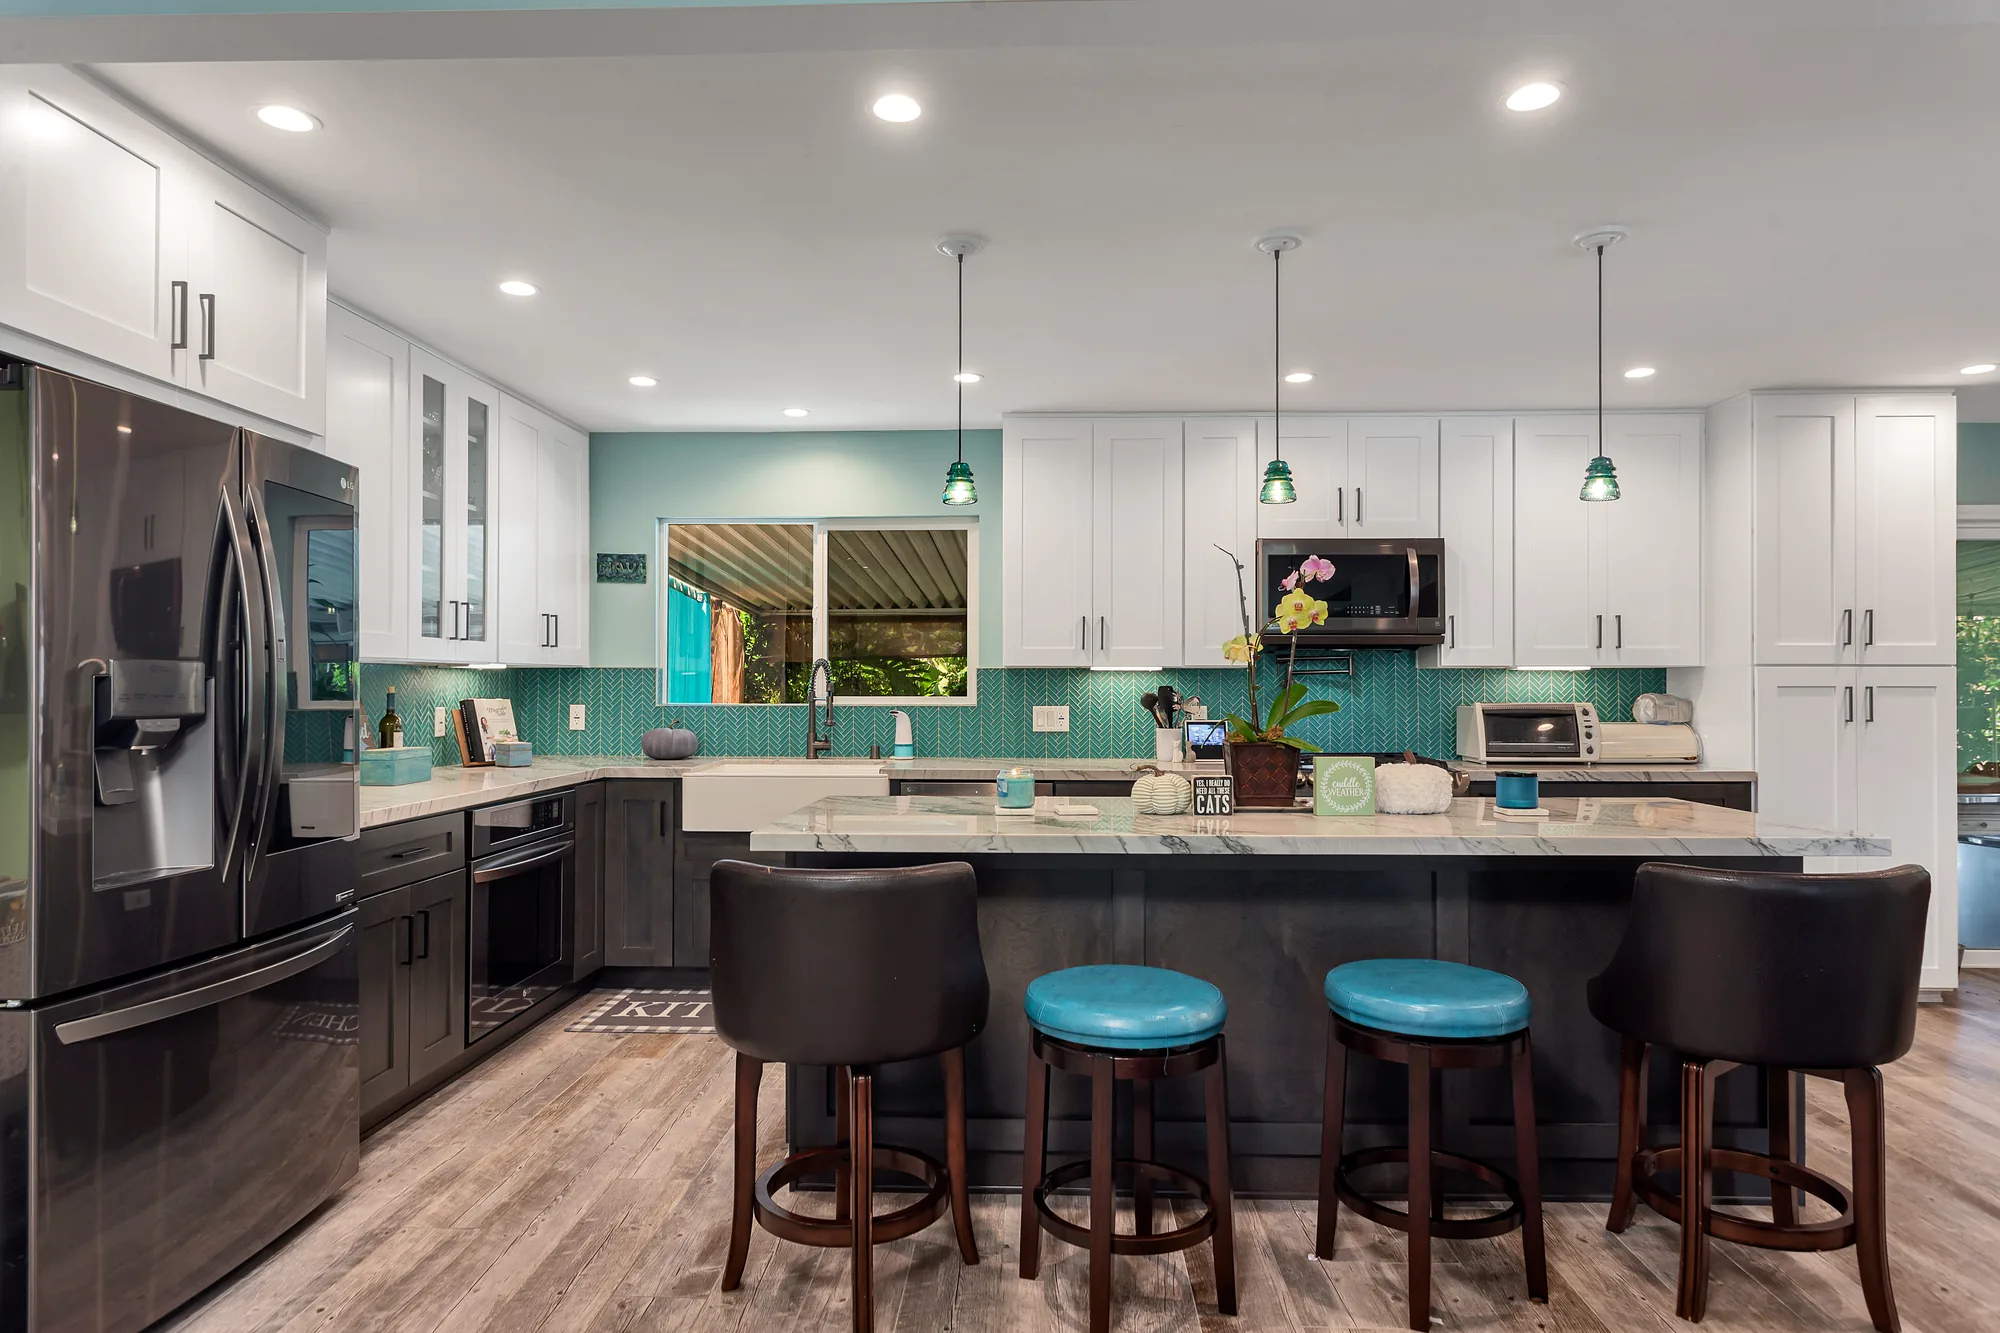
Two-Tone Shaker Kitchen with Teal Herringbone Backsplash


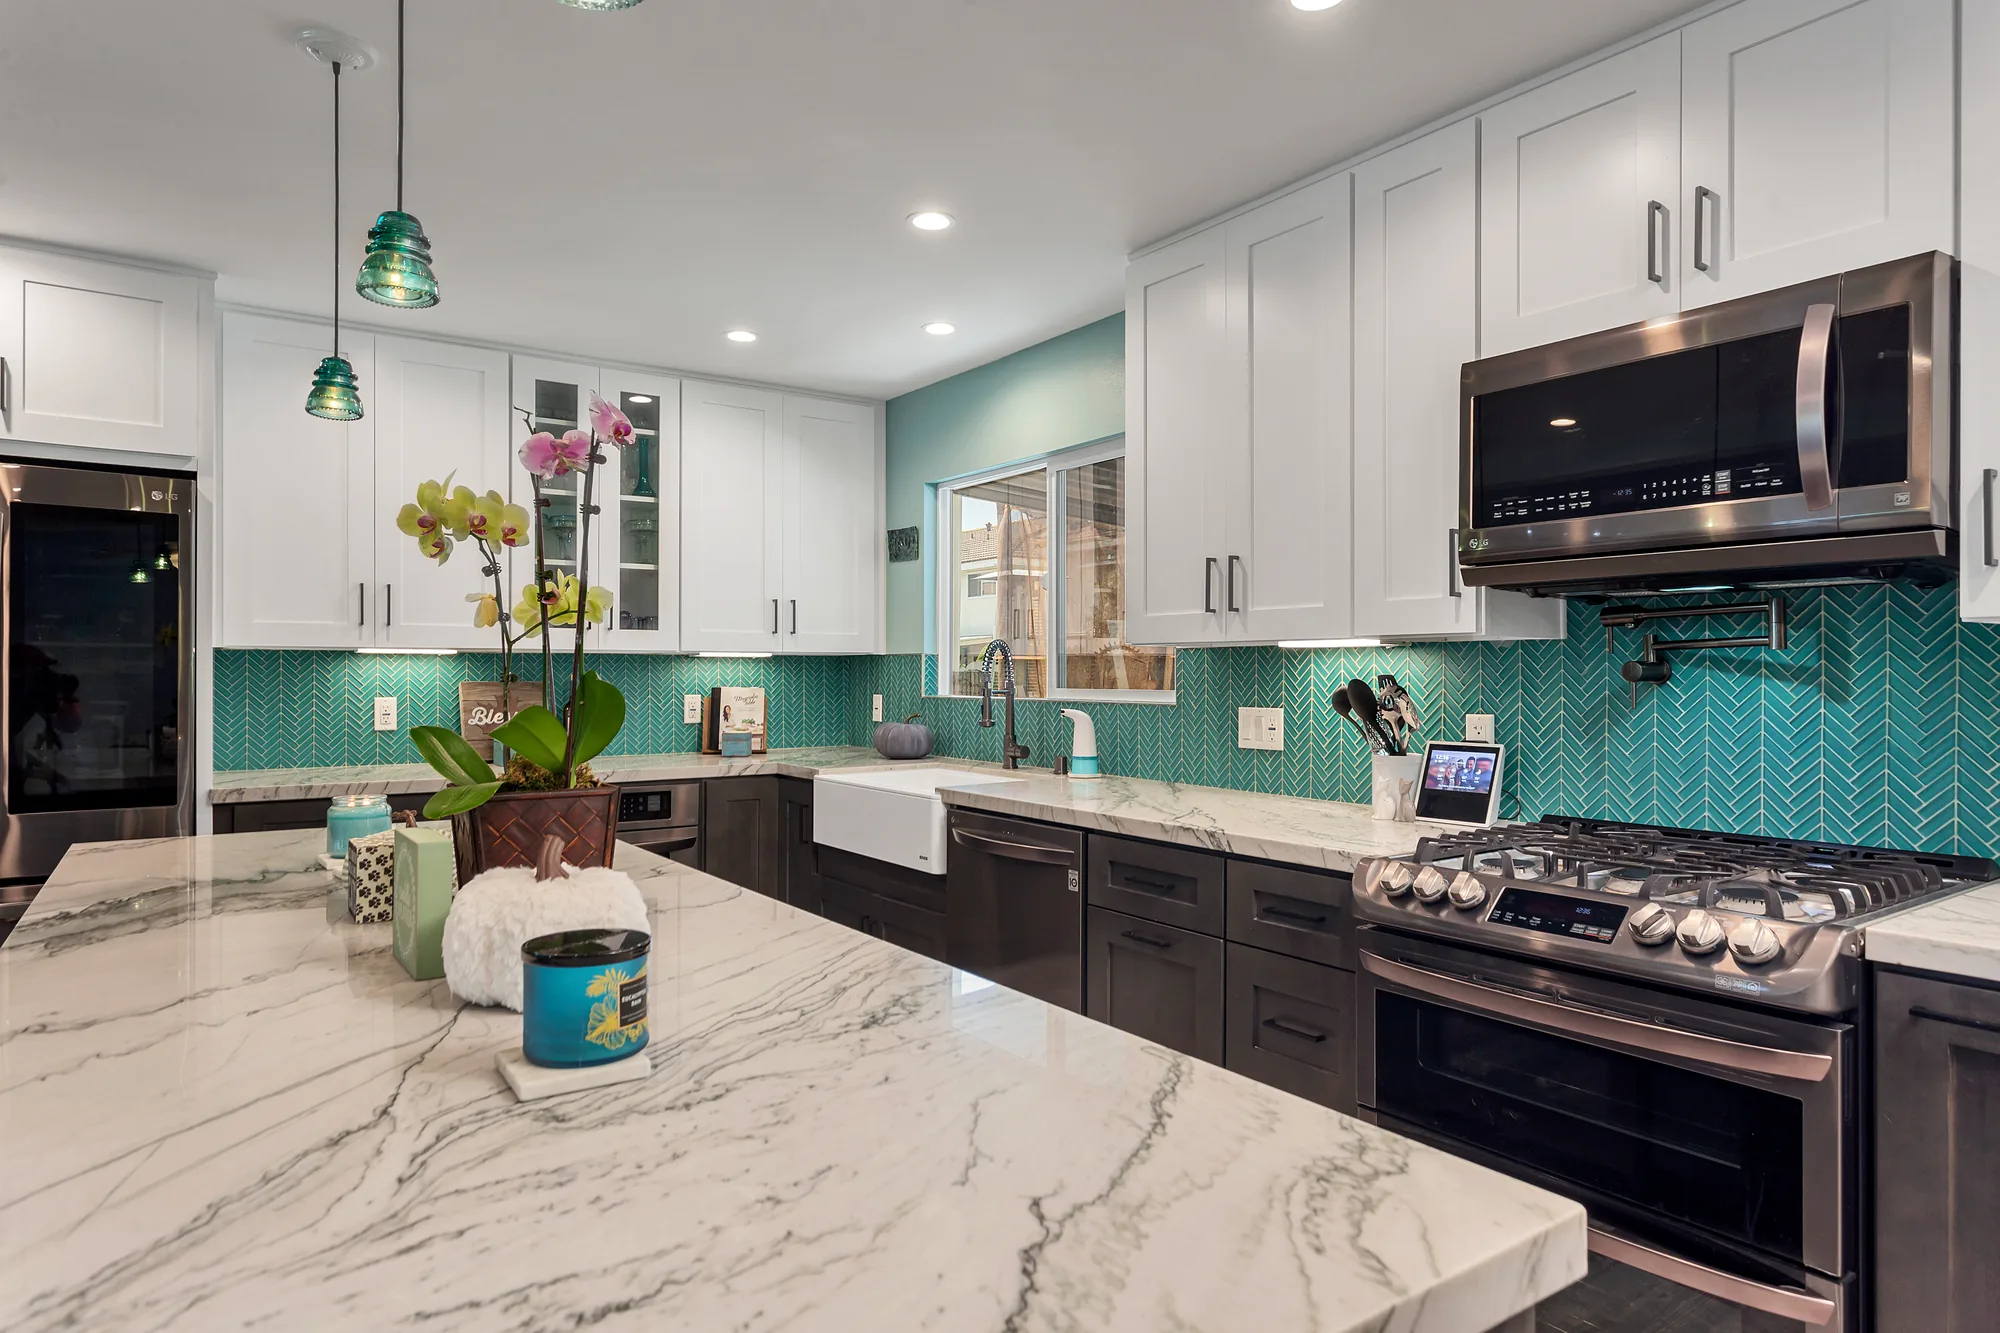
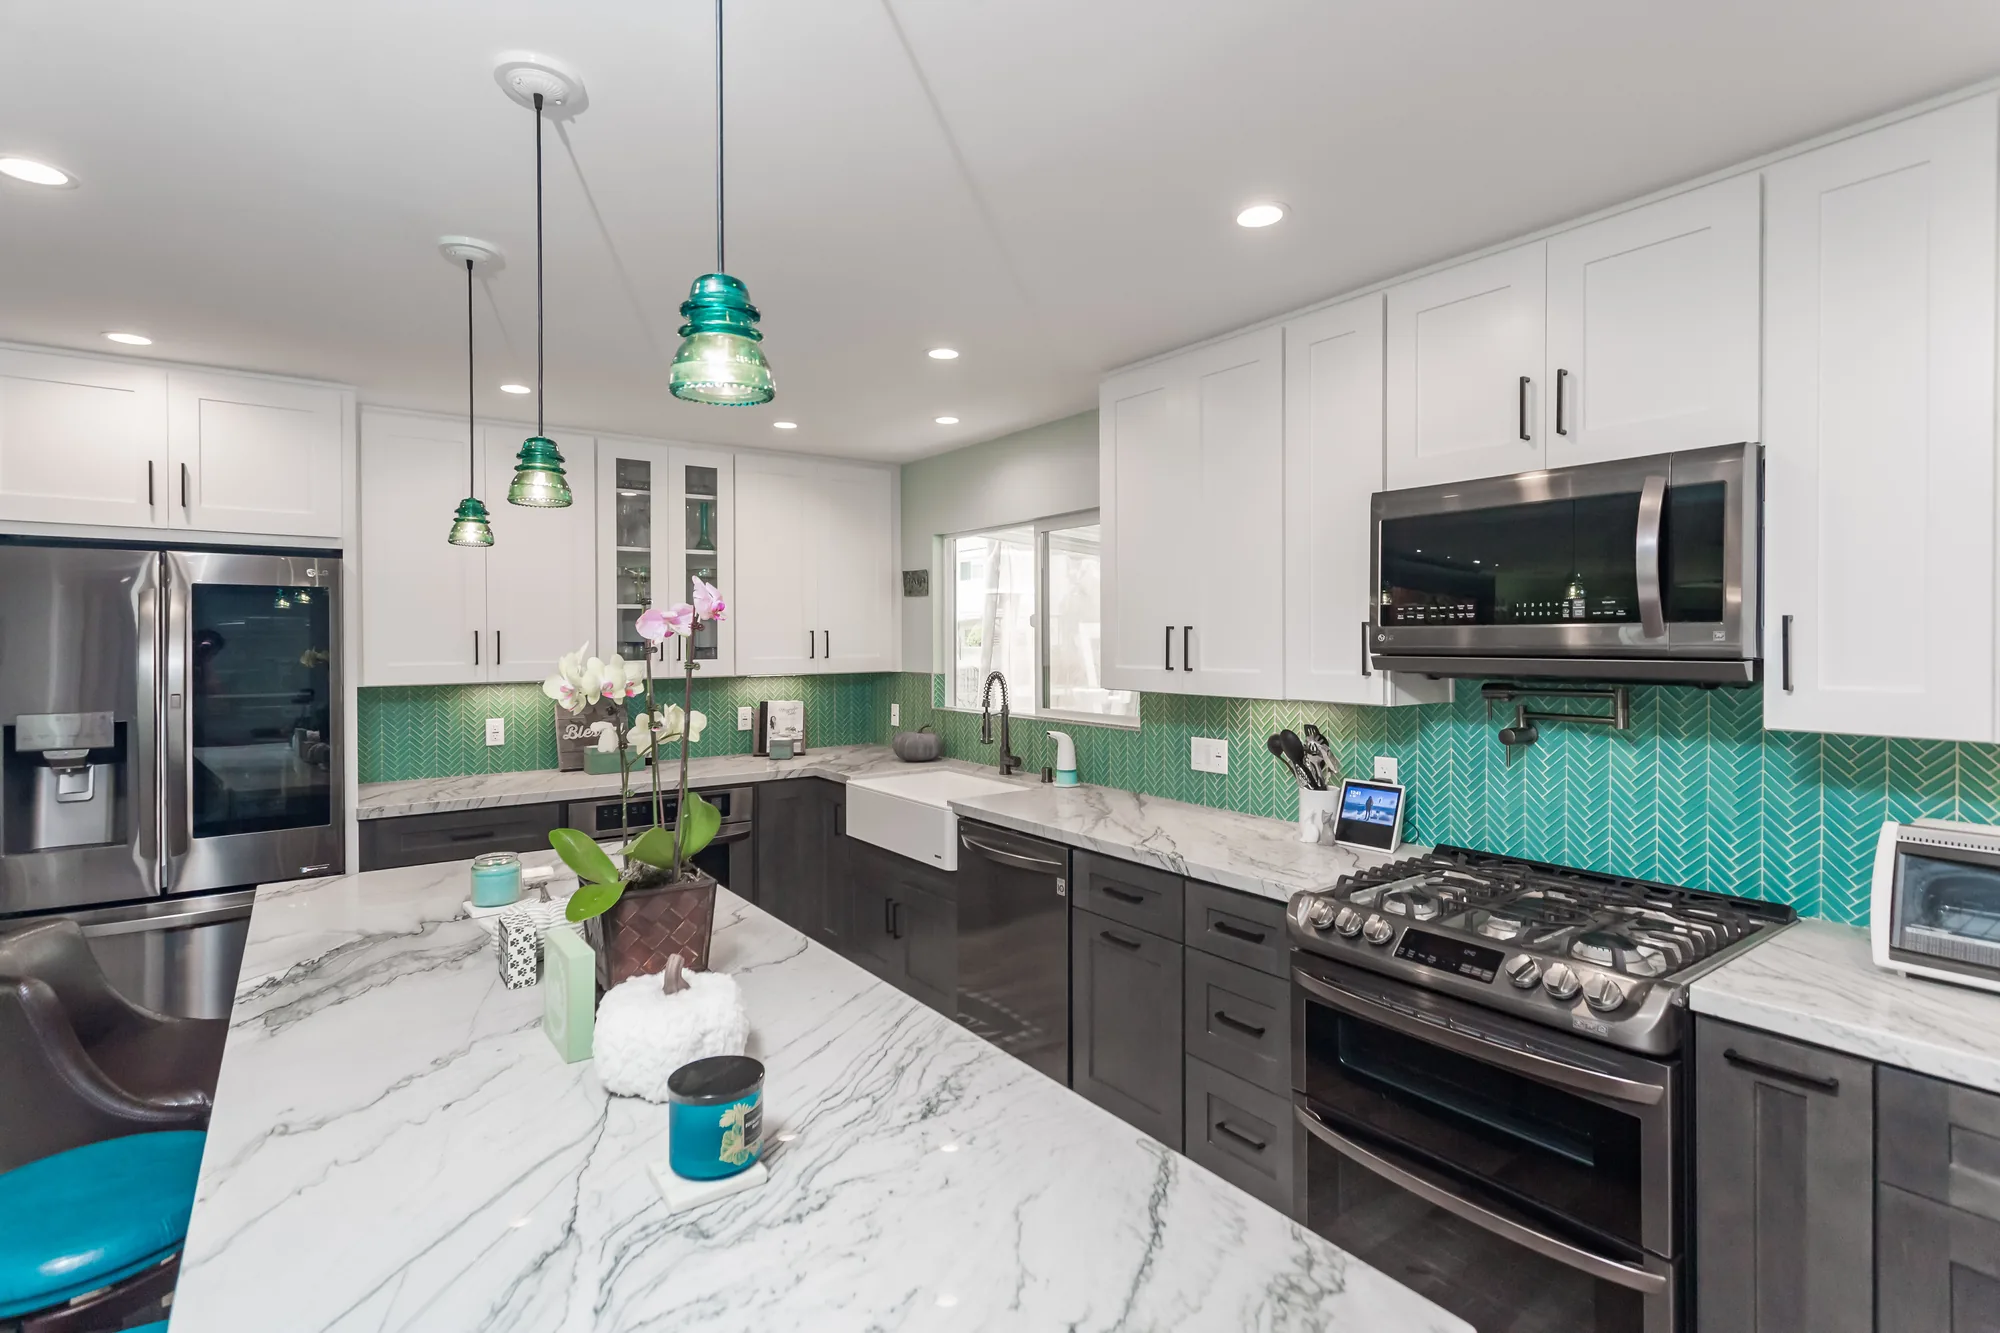
This kitchen was rebuilt as a full-height two-tone cabinetry package, pairing painted white shaker wall cabinets with gray-stained shaker base cabinets and a large seated island. Countertops throughout are a white stone with heavy gray veining, run in long uninterrupted slabs across the perimeter and the island, with a mitered thick edge and a tight undermount cut at the sink. The backsplash is a teal glass mosaic set in a herringbone pattern, carried full height behind the range and wrapped around the window opening and into the corners. Appliance work included a slide-in gas range with an over-range microwave and a backsplash-mounted pot filler, a separate built-in wall oven, a dishwasher, and a glass-door beverage cooler built into the base run. Finish work is visible in the crisp reveals at the glass-front upper doors, the level toe-kick and drawer alignment, under-cabinet lighting, a full recessed can layout, and wood-look plank flooring laid continuous through the kitchen into the adjoining living space.
Style: Transitional

Work Completed

  • Full cabinet replacement in two-tone shaker: white painted uppers, gray-stained bases
  • Large seated island with veined stone top and four-stool overhang
  • White stone countertops with dramatic gray veining on island and perimeter
  • Teal glass herringbone mosaic backsplash run full height behind the range
  • White apron-front farmhouse sink with dark coil-spring pull-down faucet
  • Slide-in gas range, over-range microwave, and backsplash-mounted pot filler
  • Built-in wall oven, dishwasher, and glass-door beverage cooler integrated into the base run
  • Recessed can lighting, under-cabinet lighting, and three glass pendants over the island

Materials & Finishes

  • White painted shaker wall cabinets
  • Gray-stained shaker base cabinets and island
  • Glass-front upper cabinet doors
  • White stone countertops with gray veining (marble-look)
  • Teal glass mosaic tile in herringbone layout
  • White apron-front farmhouse sink
  • Dark gunmetal coil-spring pull-down faucet
  • Matte black bar pulls and drawer handles
  • Green glass insulator-style pendant lights
  • Gray wood-look plank flooring
  • Stainless steel appliances
  • Teal upholstered and brown leather counter stools
Galley view showing a glass-door beverage cooler, built-in wall oven, and stainless gas cooktop.
A glass-door beverage cooler is built into the base cabinet run beside the island.
Detail of a white single-bowl sink with a dark coil-spring faucet against teal herringbone tile.
Close detail of the sink basin, coil-spring faucet, and tight countertop cut.
Stainless gas range and over-range microwave set into teal herringbone tile with a pot filler.
The gas range is centered under the microwave with a backsplash-mounted pot filler above.
Range wall with white shaker cabinets, microwave, and teal tile running the full backsplash height.
Teal herringbone tile carries full height across the cooking wall.
Gas range flanked by gray shaker drawer bases and white stone counters under white upper cabinets.
Deep drawer banks flank the range on both sides of the cooking wall.
Completed Project

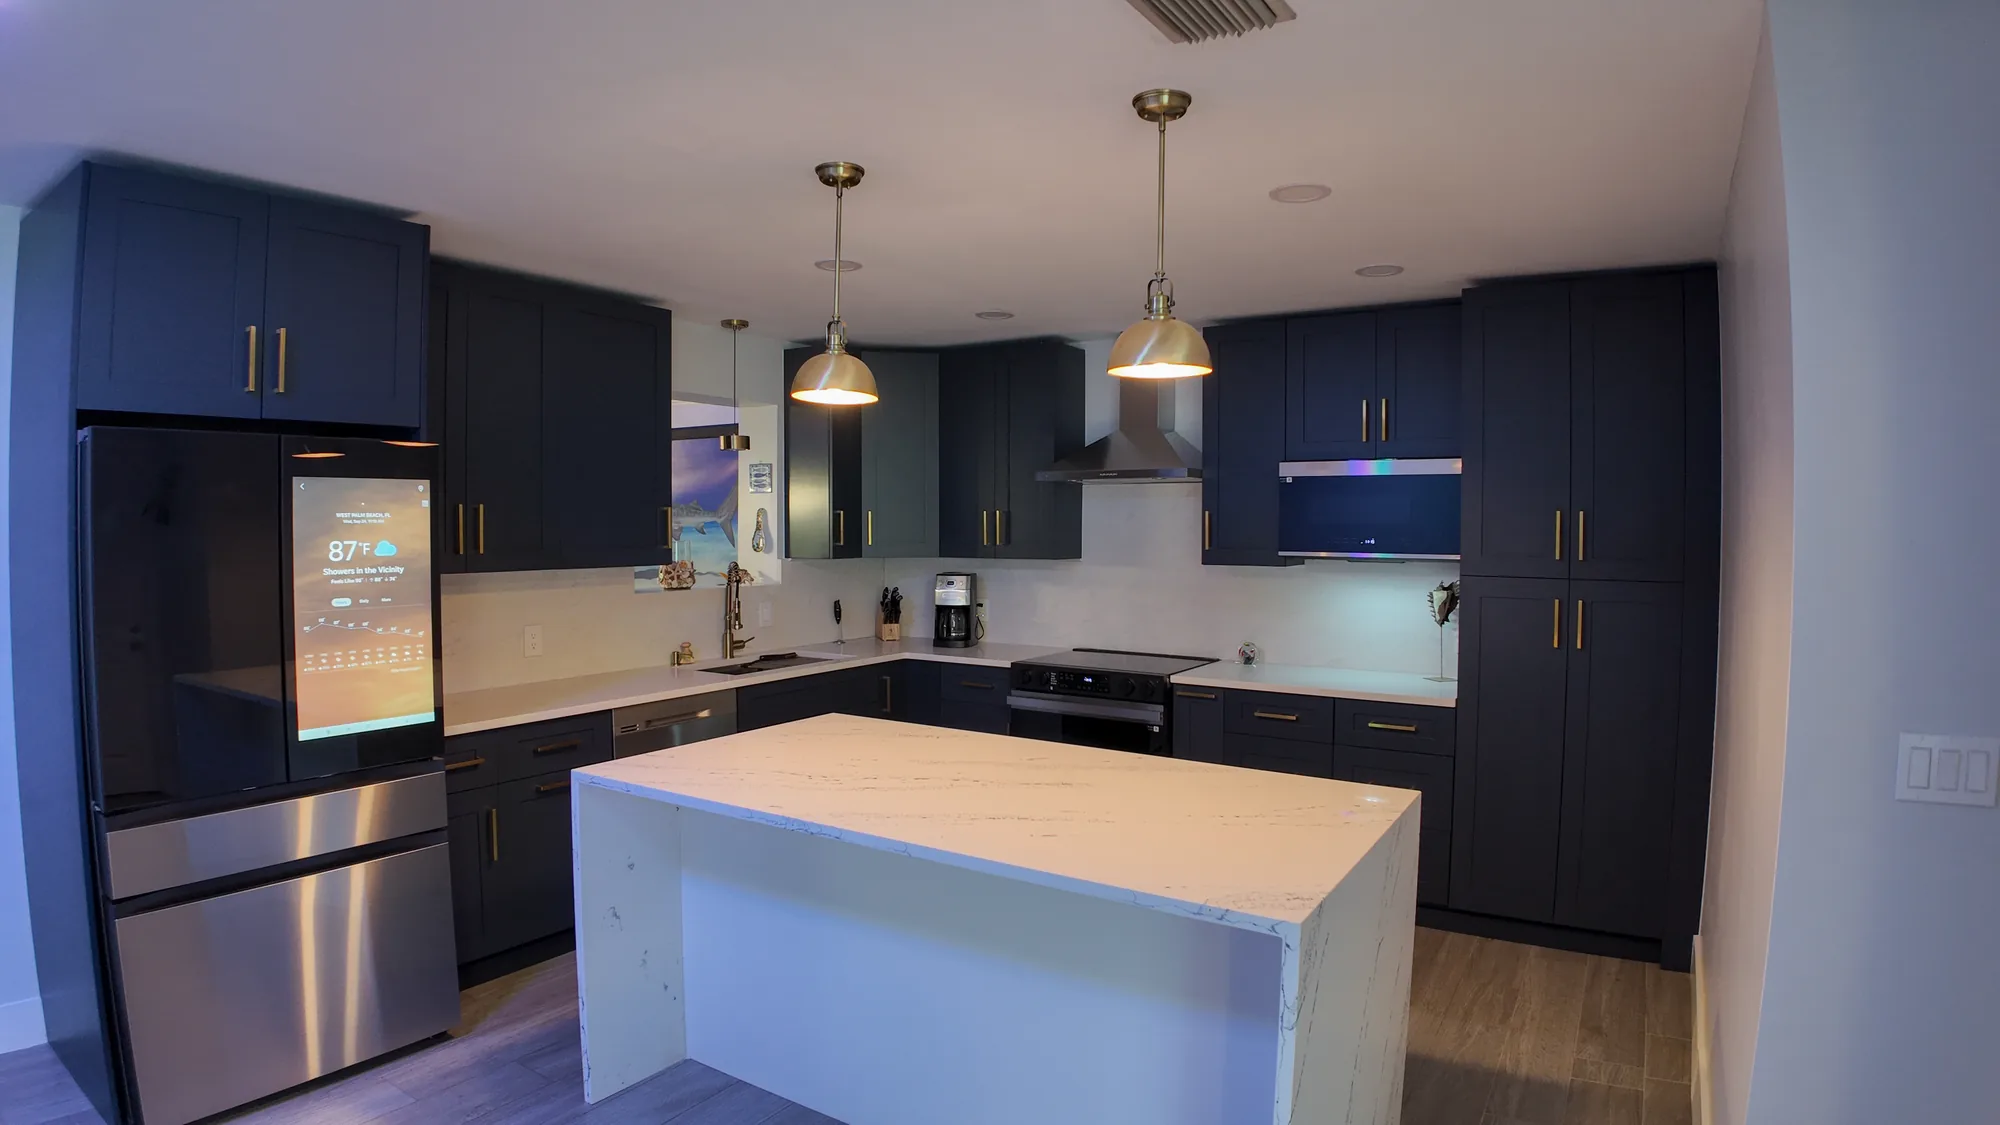
Navy And Brass Kitchen With Waterfall Quartz Island


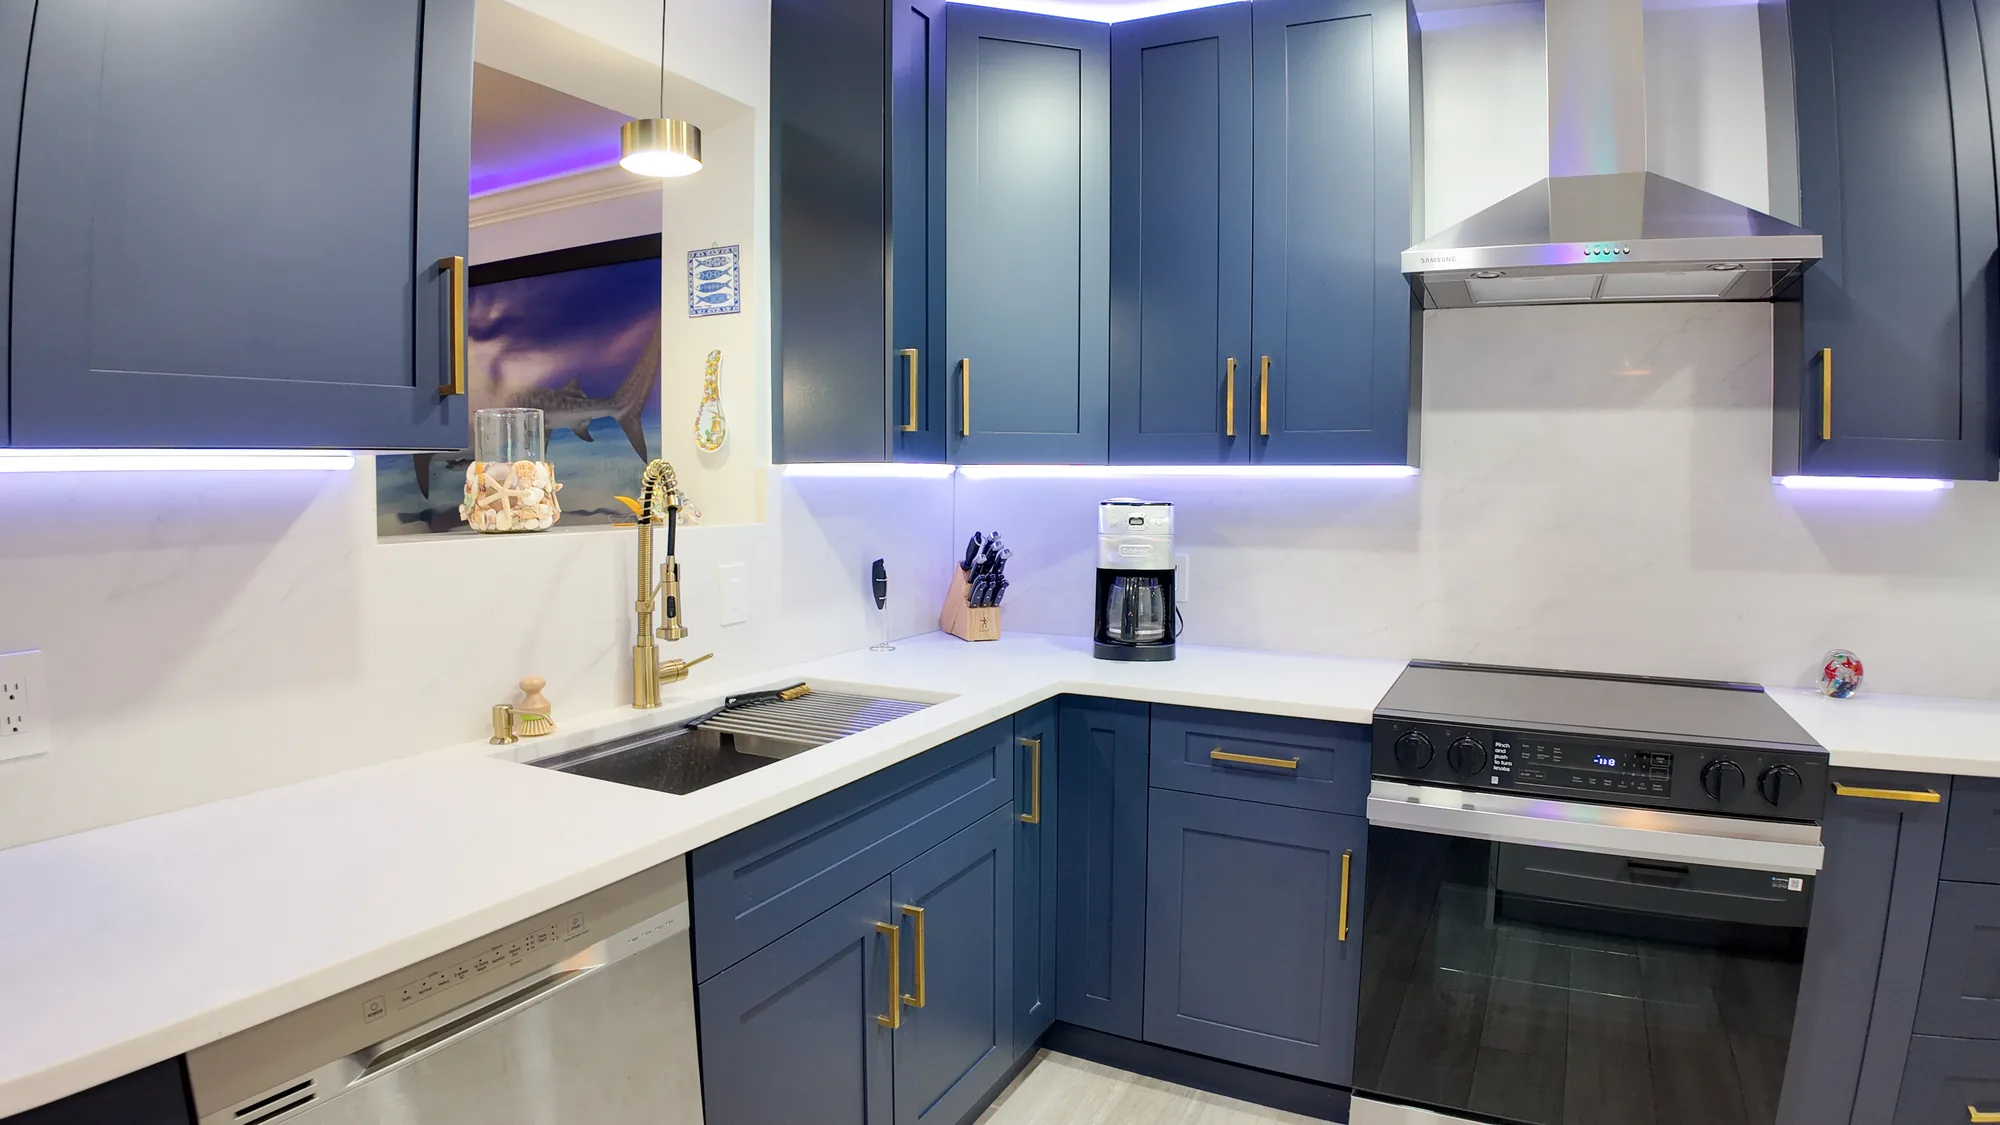
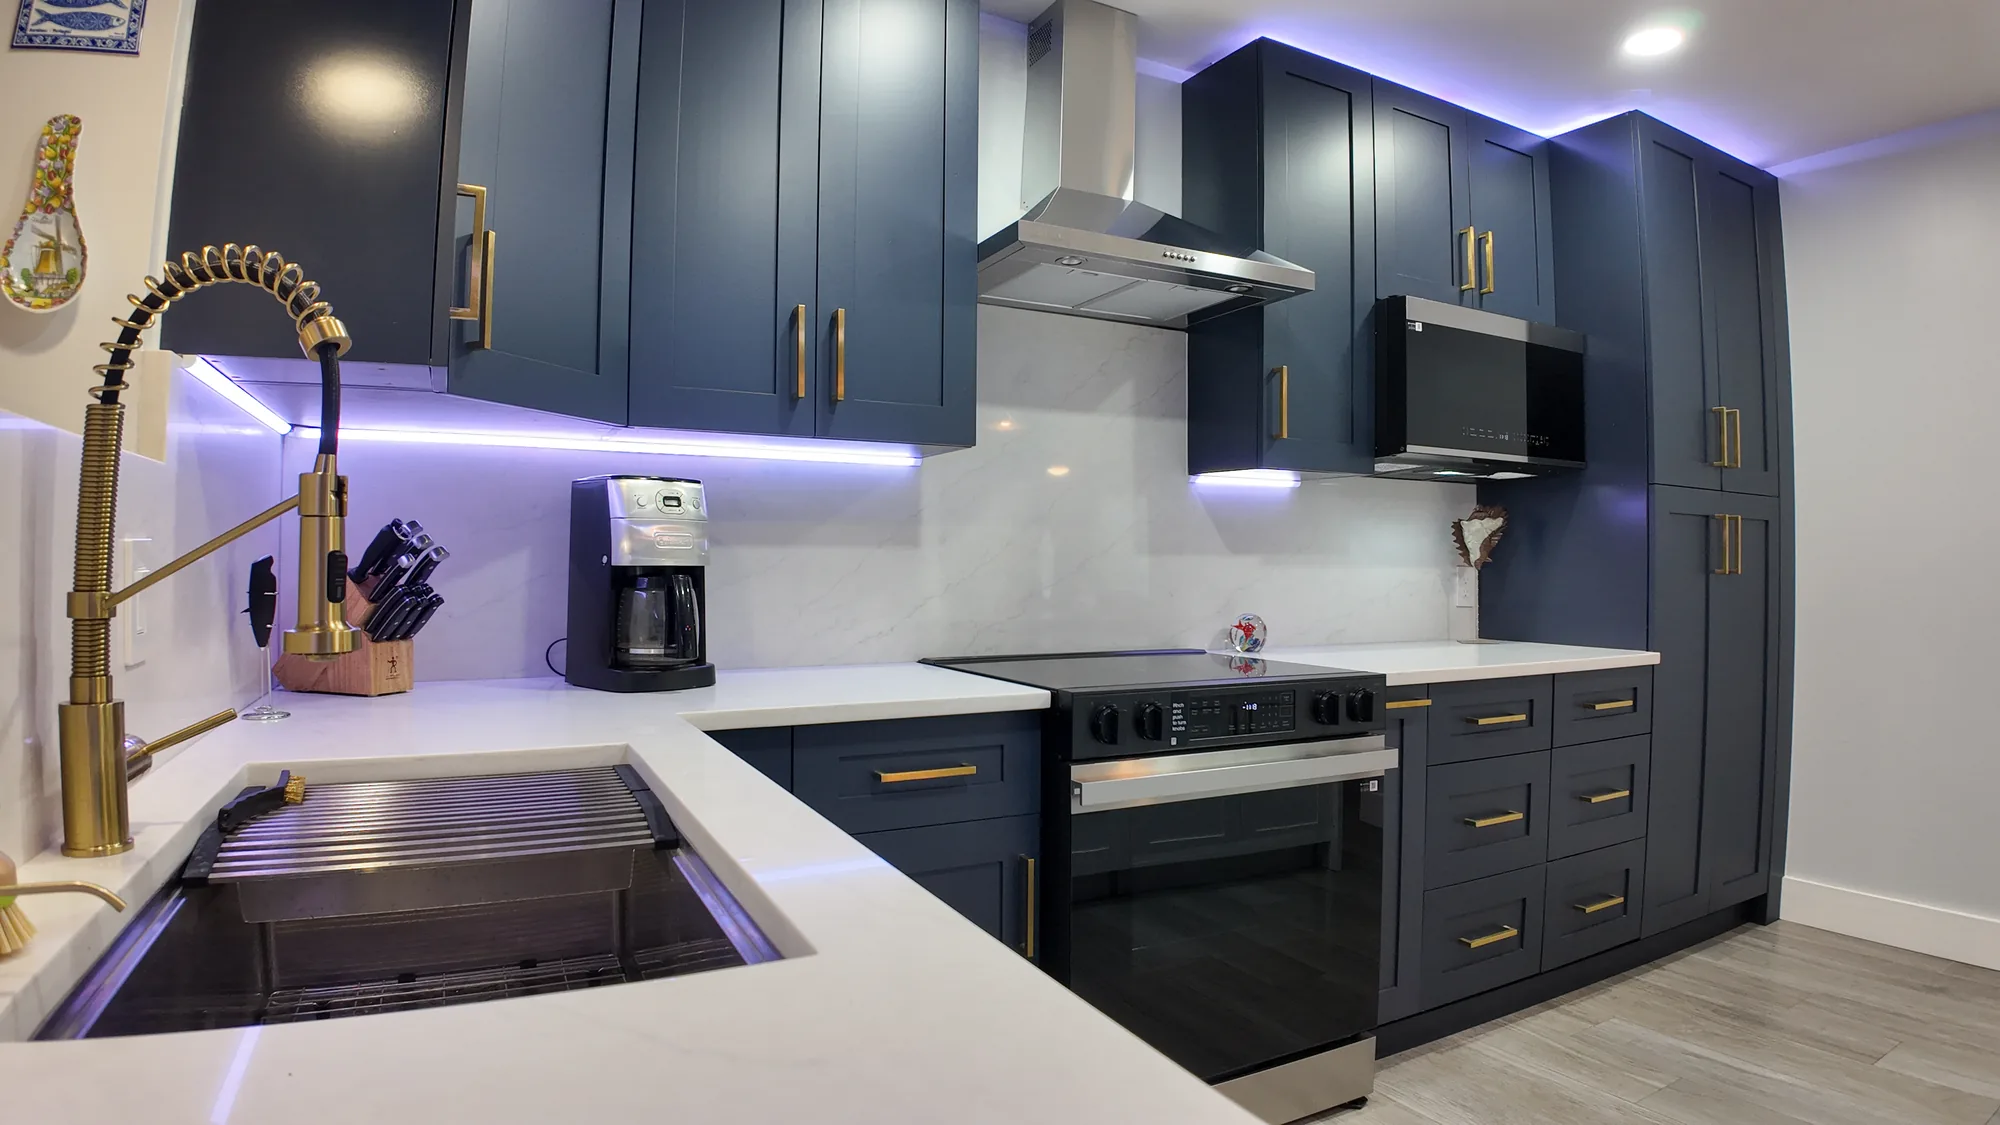
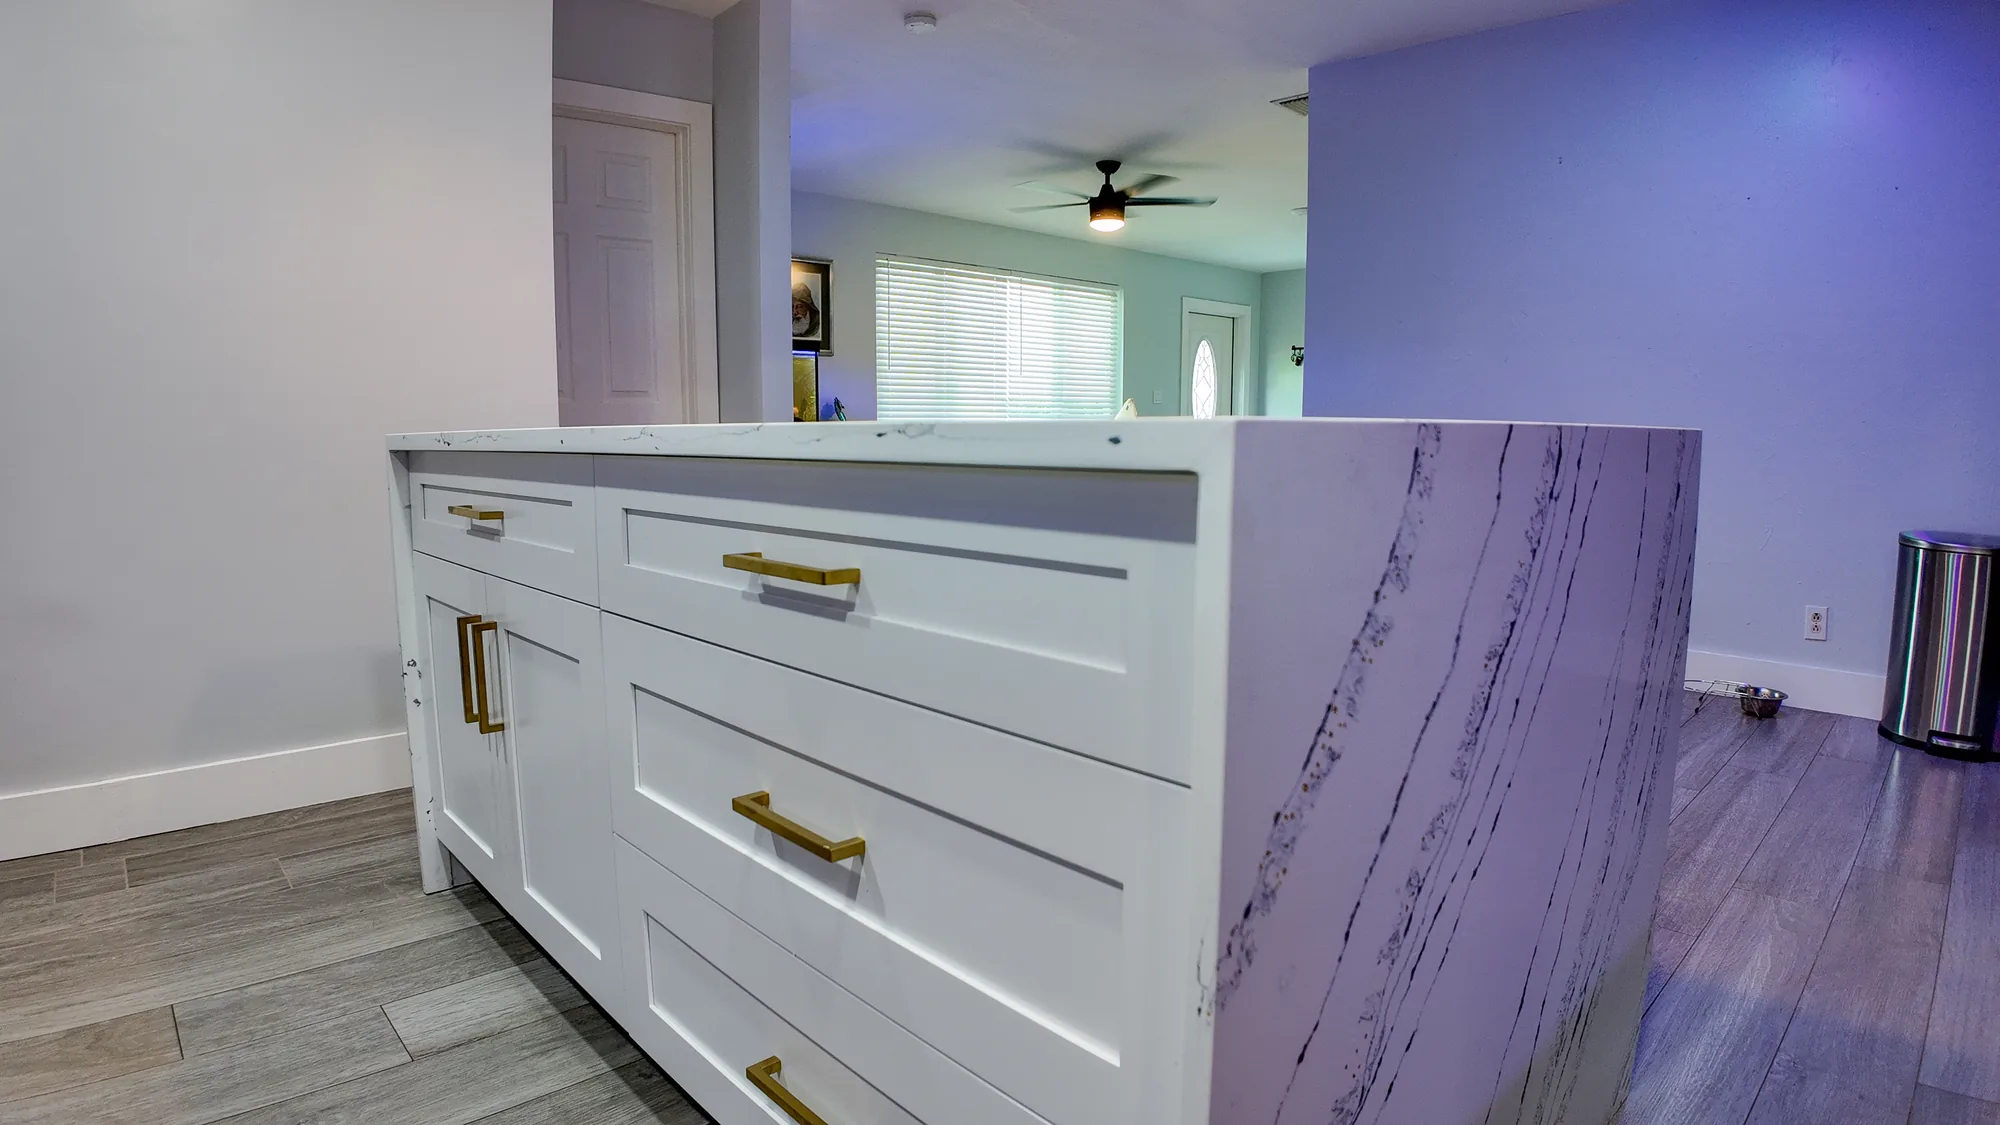
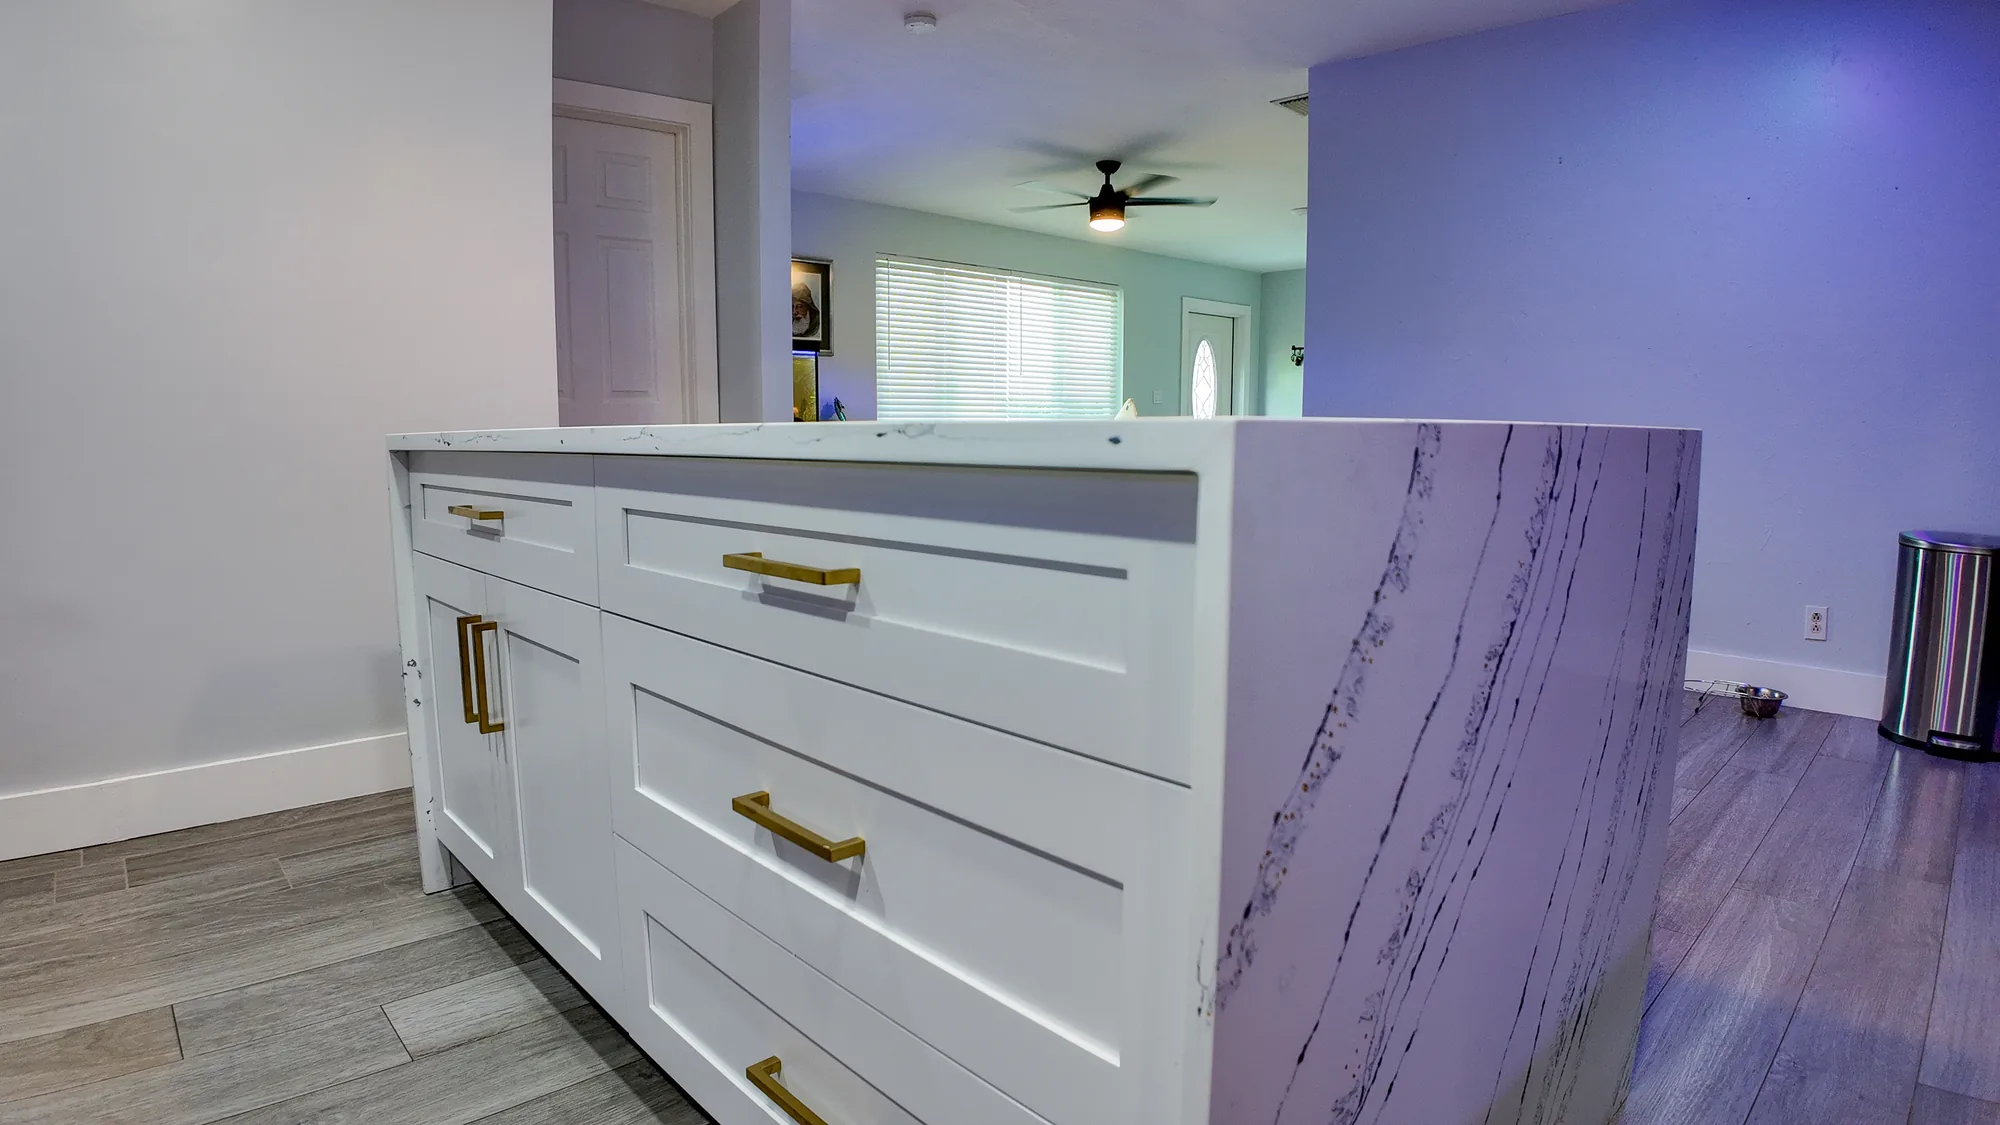
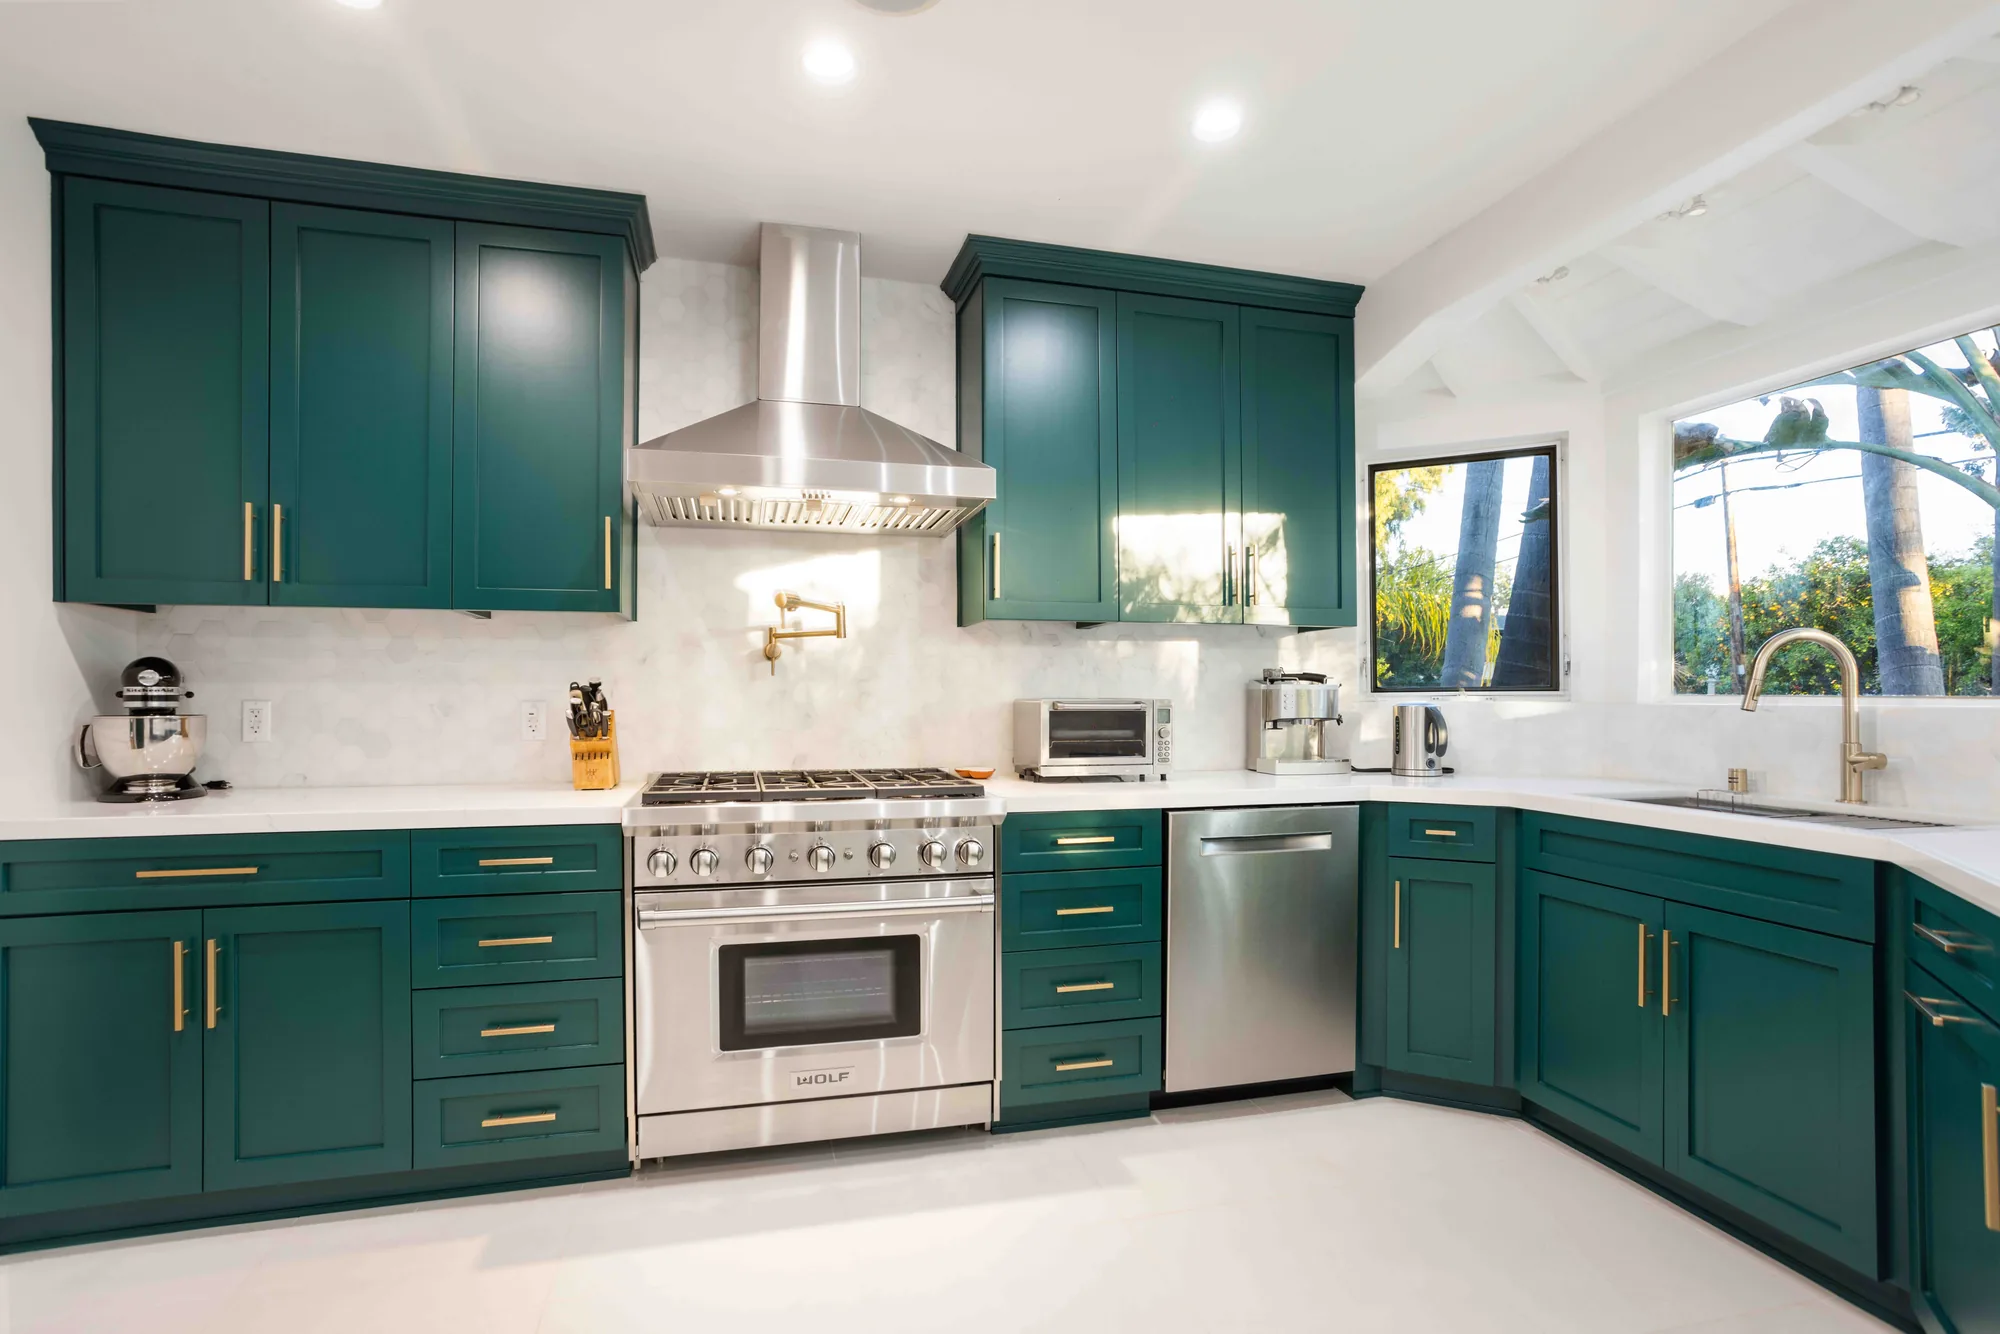
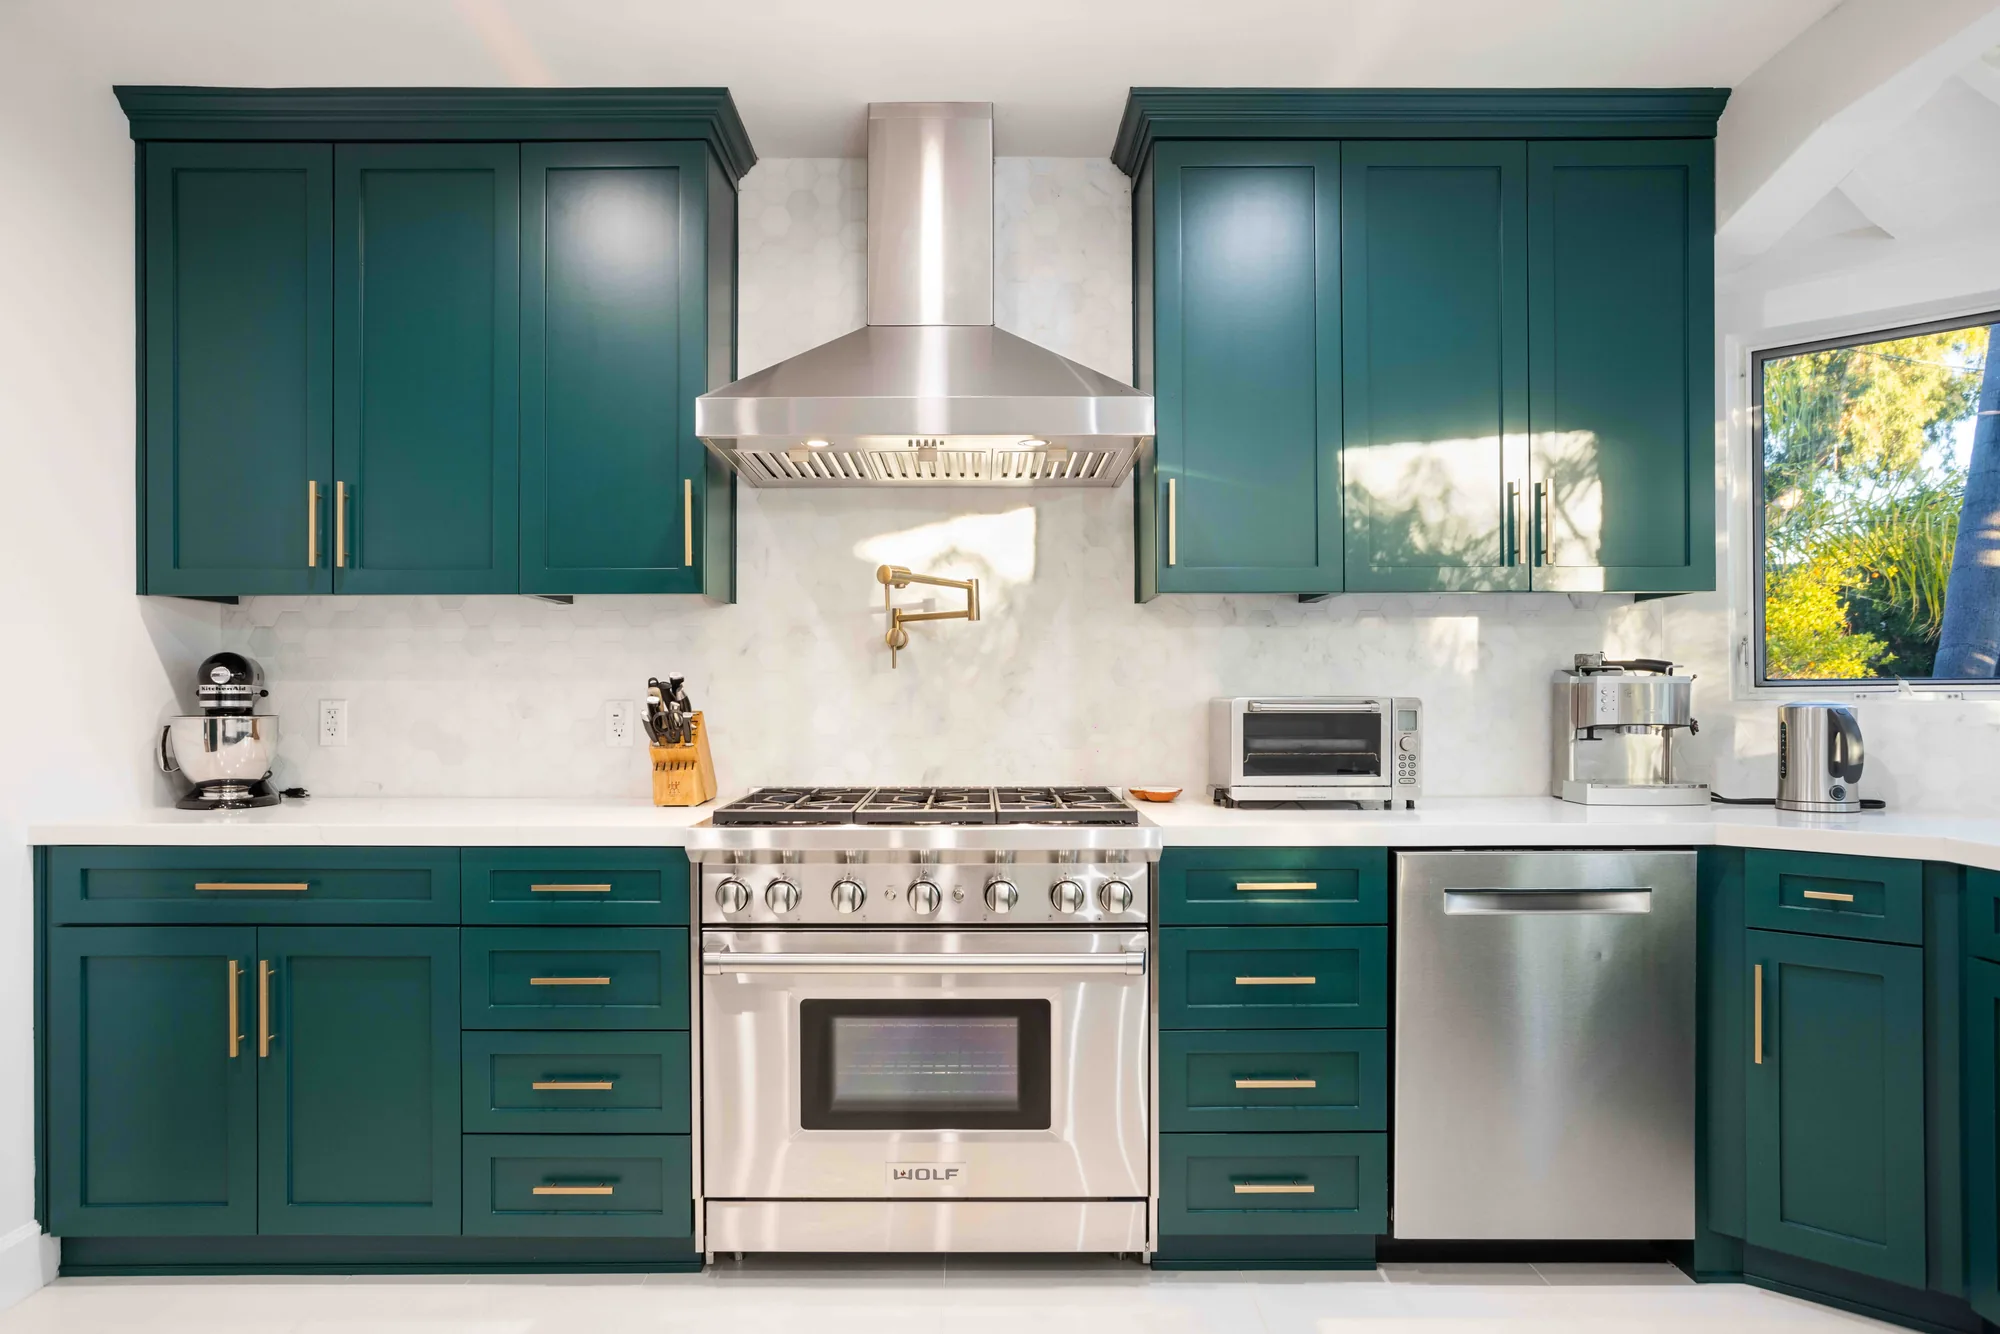
This kitchen received a full cabinet and finish replacement in an L-shaped layout with a new center island. Perimeter cabinetry is navy painted shaker with a contrasting white shaker island, all fitted with brushed brass bar pulls. Counters are a white quartz with soft grey veining, carried up the wall as a full-height backsplash and mitered into a waterfall edge on the island. Electrical was reworked for recessed cans, two brass dome pendants over the island, under-cabinet LED strips and an LED cove above the wall cabinets. Plumbing and appliance work included an undermount stainless sink with a brass spring-coil pull-down faucet, dishwasher, a slide-in range with vented stainless chimney hood, a built-in wall microwave and a flush-set refrigerator surround, all over wood-look plank flooring.
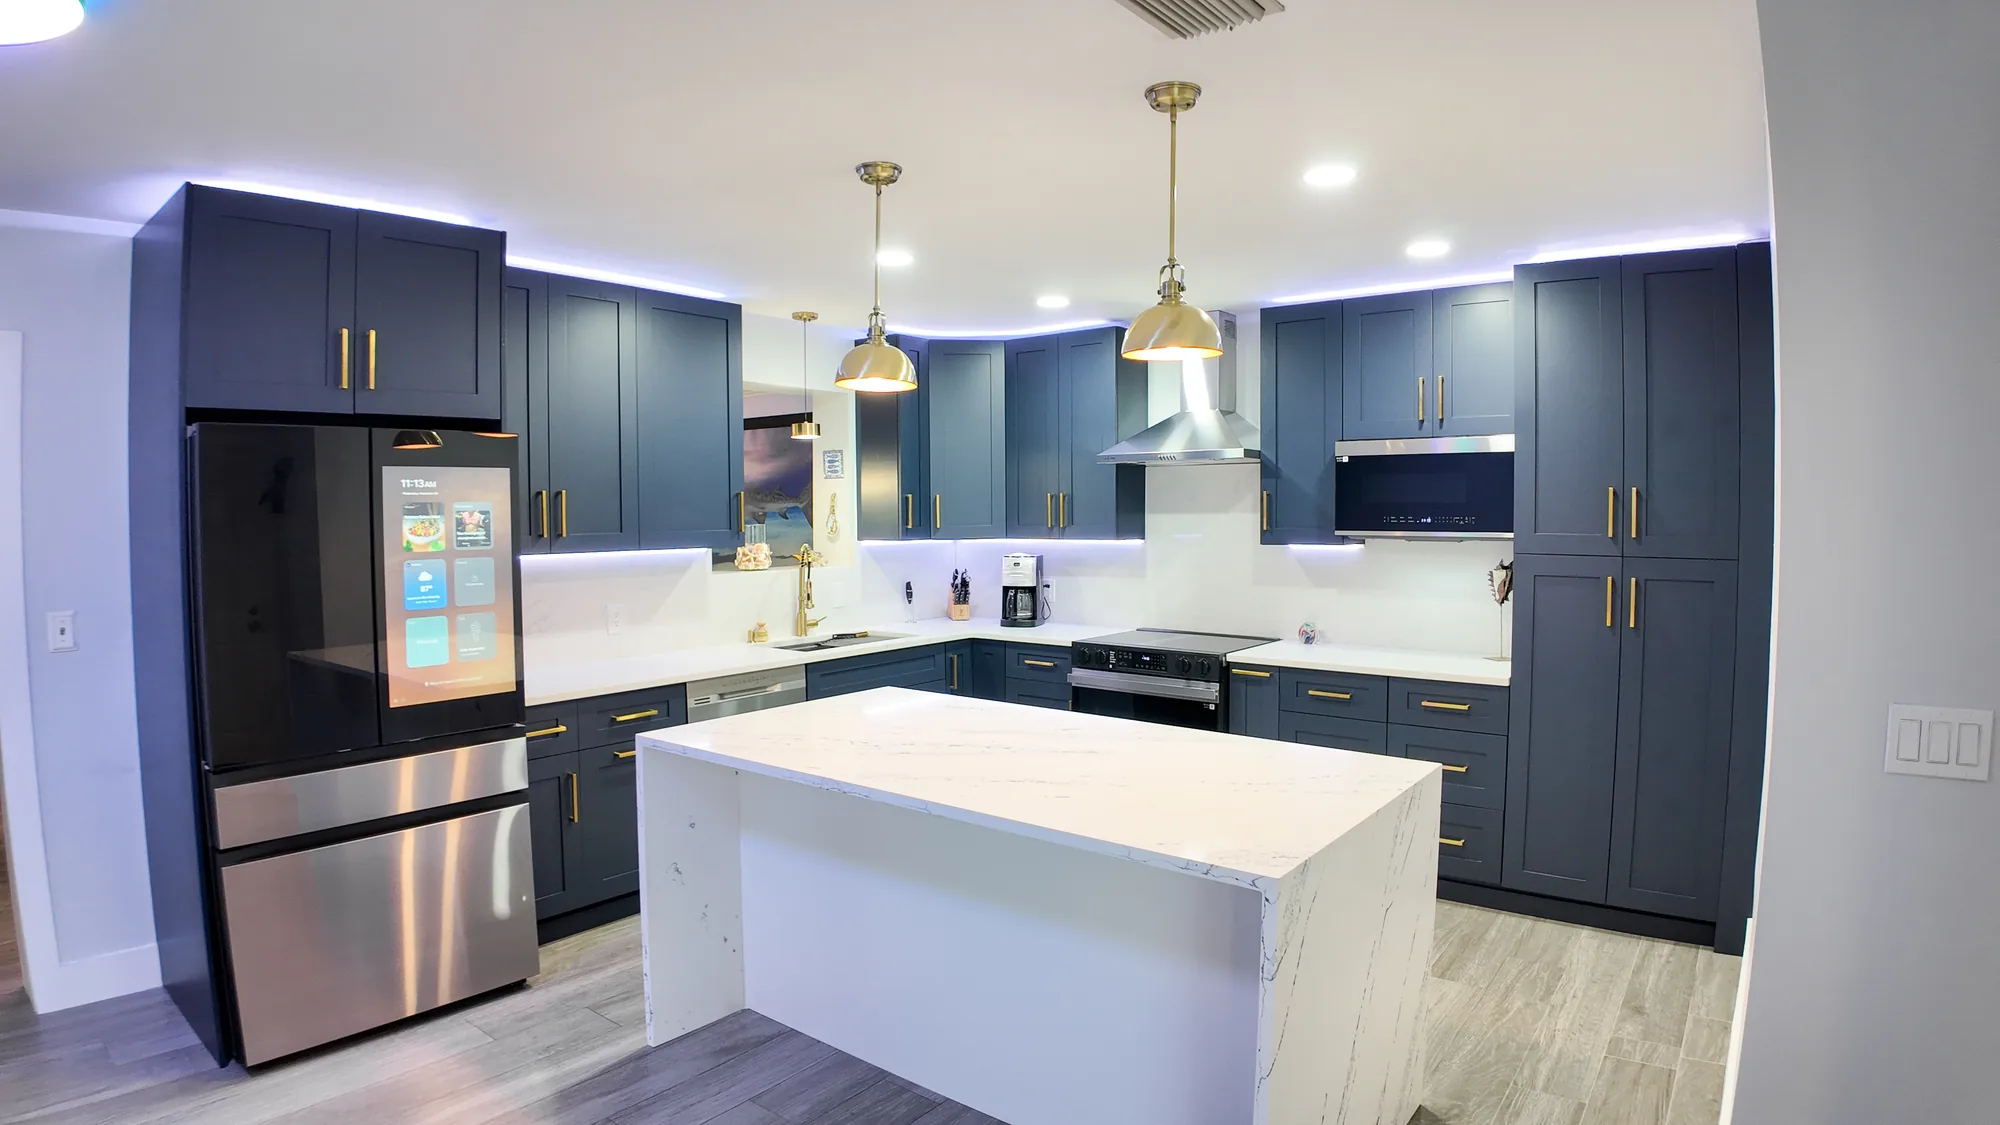
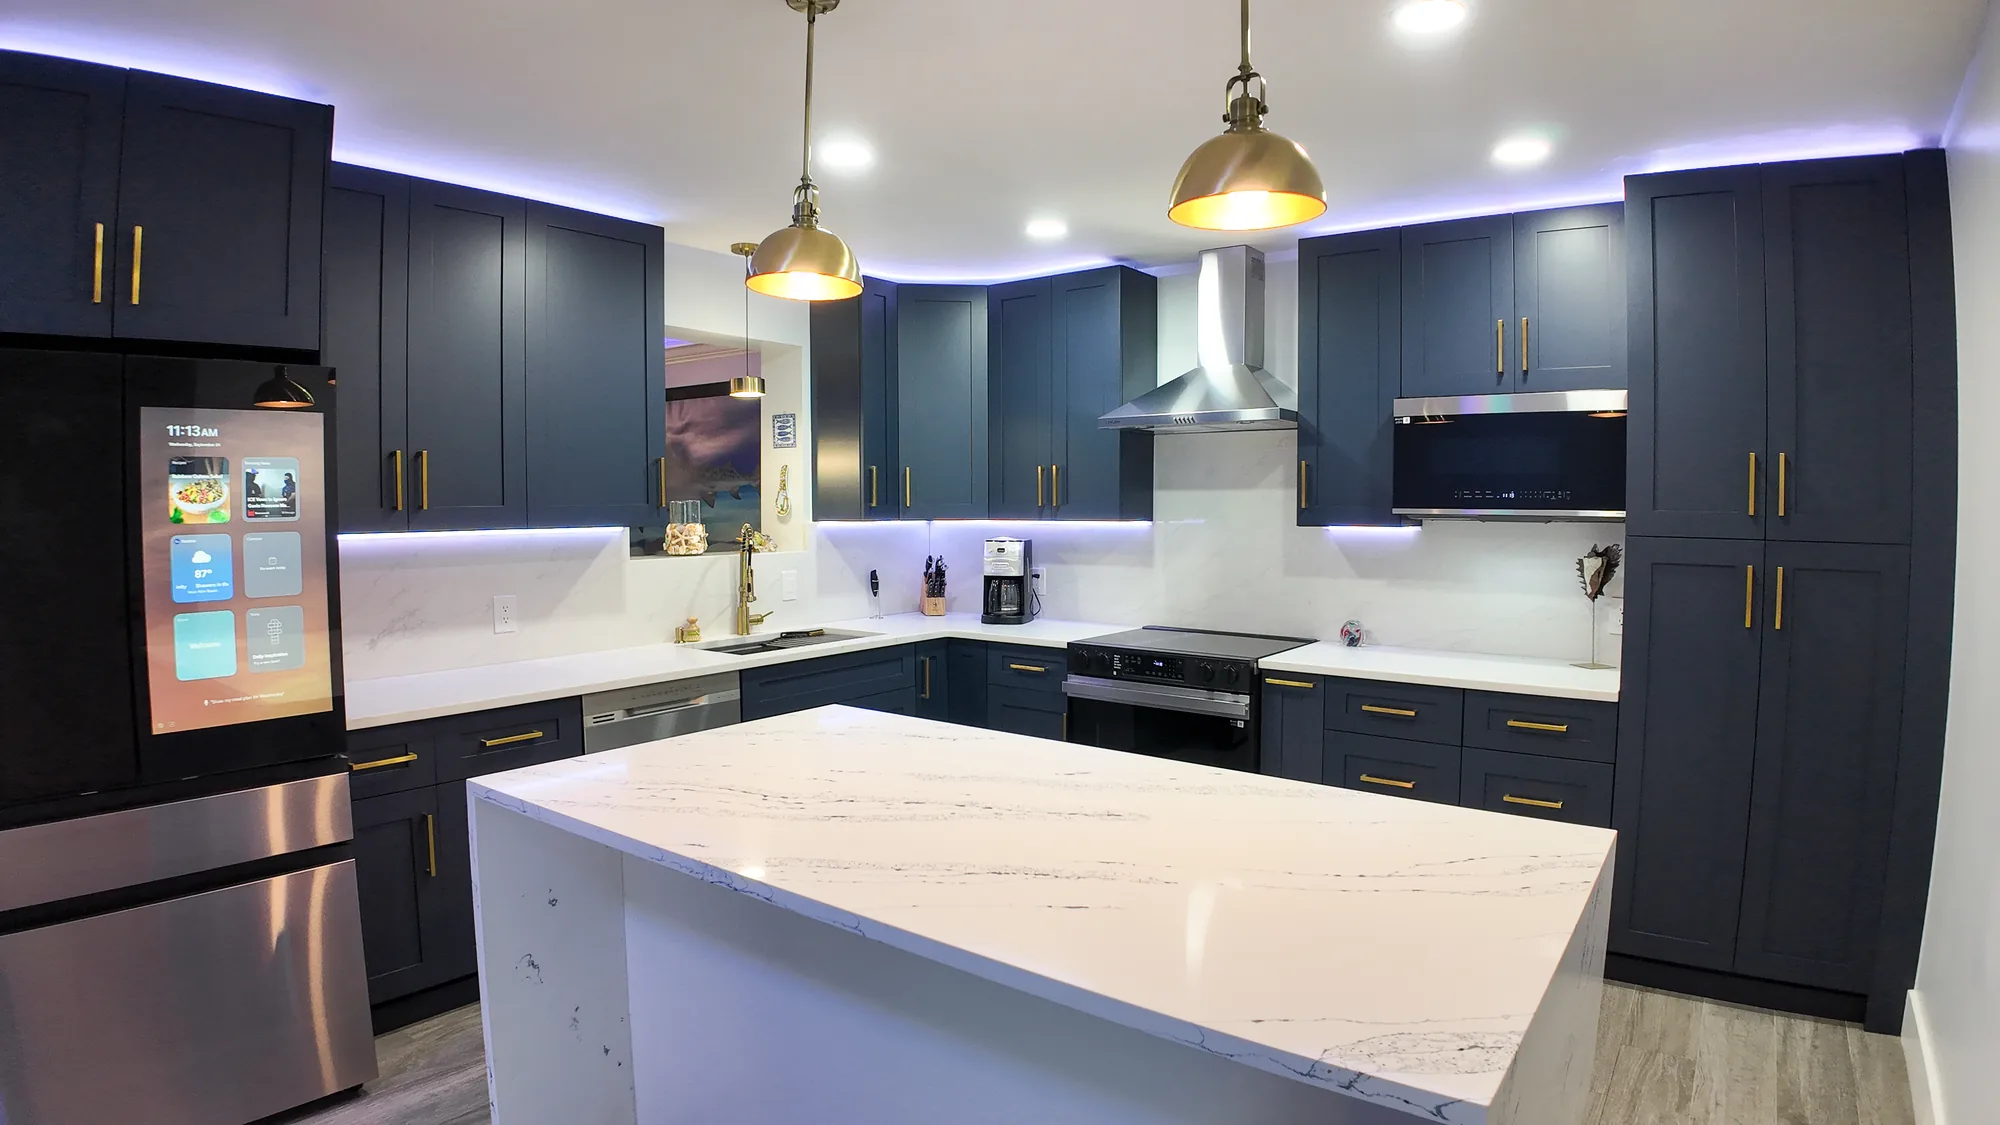
Style: Contemporary

Work Completed

  • Full cabinet replacement in an L-shaped layout with floor-to-ceiling pantry storage
  • Two-tone scheme: navy painted shaker perimeter with a white shaker island
  • White veined quartz counters with a full-height matching backsplash
  • Mitered quartz waterfall edge on the island
  • Layered lighting: recessed cans, brass pendants, under-cabinet and LED cove strips
  • Undermount stainless sink with a brushed brass spring-coil pull-down faucet
  • Stainless range with vented chimney hood, built-in wall microwave and dishwasher
  • Wood-look plank flooring with brushed brass bar pulls on all cabinetry

Materials & Finishes

  • navy painted shaker cabinets
  • white shaker island cabinets
  • white quartz with grey veining
  • full-height quartz backsplash
  • brushed brass bar pulls
  • brushed brass spring-coil faucet
  • brass dome pendant lights
  • LED strip and cove lighting
  • stainless steel appliances
  • stainless chimney hood
  • undermount stainless sink
  • wood-look plank flooring
Kitchen seen from the refrigerator corner, showing the quartz island, range wall and navy cabinetry.
The island edge and range wall line up cleanly from the refrigerator side of the room.
Close view of the white quartz island top with brass pendants above and LED cove lighting on the cabinets.
The quartz slab is mitered at the waterfall edge so the veining continues down the side.
Detail of navy upper cabinets, an LED light strip and a white quartz counter with matching backsplash.
The quartz backsplash is run in one piece with the counter, with an LED strip mounted under the uppers.
Brass spring-coil pull-down kitchen faucet at a stainless sink with a quartz backsplash behind it.
A commercial-style spring faucet in a brushed brass finish serves the stainless sink.
Stainless cooktop and hood beside a wall microwave, deep drawers and a tall navy pantry cabinet.
Deep drawer storage flanks the range, with the microwave set into the cabinet run above.
Two-tone kitchen with a white shaker island in front of navy cabinets and a stainless refrigerator.
The white island plays against the navy perimeter cabinets, tied together by brass hardware throughout.
What You Get

What Goes Into an Island Project


An island touches cabinetry, stone, electrical, plumbing, ventilation and sometimes framing, so the scope is broader than it looks.

Layout and clearance study

We measure the room, appliance swings and door approaches, then test island footprints against real walking paths. This sets maximum size before any cabinet is ordered.

Island cabinetry and finished panels

Island boxes need finished backs and sides, since every face is visible. End panels, toe kick treatment and any decorative legs are specified with the cabinet package rather than added later.

Countertop templating and fabrication

The slab is digitally templated after cabinets are set and leveled, which is the only way to get tight seams and accurate overhangs. Waterfall ends, mitered edges and sink cutouts are detailed at this stage.

Electrical rough-in and outlets

Island receptacles are routed through the floor or a chase and placed where code allows, since outlets can no longer be installed face-up in a countertop. Options include side-mounted, recessed pop-up units and outlets tucked under an overhang.

Plumbing for prep or main sinks

A sink or dishwasher in the island needs supply, drain and vent runs reaching the middle of the floor. We confirm that route through the crawlspace, basement or slab before committing to the location.

Structural support and blocking

A stone-topped island is heavy, and unsupported overhangs need steel or corbels rather than the slab alone. Framing reinforcement and point loads are planned into the schedule, not discovered mid-install.

Find Out What Size Island Your Kitchen Can Actually Hold

A short on-site measure answers the clearance question everything else depends on. Call (206) 825-2773 to set up a visit.

How We Work

How We Take an Island From Sketch to Set Stone


The order of operations matters, because several decisions cannot be reversed once the slab is cut.

On-site measure and assessment

We measure the room, check floor level, and look underneath at the crawlspace, basement or slab to see which plumbing and electrical routes are realistic. Floors out of level change how the base has to be shimmed and scribed.

Function interview

We ask who cooks, how many people are in the kitchen at once, whether seating needs to handle homework, and what currently annoys you. Those answers set seating count, storage type, and whether a sink or cooktop belongs in the island at all.

Layout options and drawings

You see two or three footprints drawn to scale with actual aisle dimensions called out. Seeing forty-two inches against thirty-six inches on paper, with the dishwasher door swung open, settles most size debates quickly.

Permits and structural review

If the work removes a wall, relocates plumbing or adds circuits, we determine what your jurisdiction requires. Bellevue, Kirkland, Redmond, Seattle and unincorporated King County each run their own review, and structural changes in this seismic region call for engineered framing details.

Rough-in work

Circuits, drain and supply lines, and any framing reinforcement go in while the floor is open or the crawlspace is accessible. Blocking for the island base is set now so it can be anchored rather than left resting on finished flooring.

Cabinet set and leveling

Boxes are fastened together, anchored to the floor and leveled precisely, because the countertop telegraphs any error. Finished panels, toe kicks and any support steel for overhangs go in at this stage.

Template and fabrication

The fabricator templates the leveled cabinets, and for waterfall or heavily veined stone we review slab layout so grain runs continuously around the corner. Cutting starts only once the sink, faucet and cooktop are on hand.

Install, trim and final connections

Stone is set and seamed, plumbing and electrical are made up and tested, and pendants are hung and adjusted to the finished counter height. We walk the island with you and correct anything not sitting right.

Project Video

See Island Work in Progress


A short walkthrough showing how island cabinetry, countertop templating and finish details come together on a real project.

Kitchen Project Highlights

Highlights from a completed kitchen remodel.

Kitchen Remodel — On-Site Clip 1

On-site footage from a completed kitchen remodel showing cabinetry, counters and finish work.

Materials & Finishes

Comparing Island Countertop Surfaces


The island slab takes more abuse and more attention than any other surface in the kitchen.

OptionBest ForConsiderationsRelative Cost
Engineered quartzBusy family islands and waterfall endsNon-porous, no sealing; consistent pattern makes mitered waterfall seams easier to match, but it can discolor under prolonged direct heatModerate to high
GraniteDurable everyday work surfacesHandles heat and scratching well and every slab is unique; needs periodic sealing, and heavy movement in the stone complicates seam matchingModerate
QuartziteA natural look with high durabilityHarder and more scratch resistant than marble, but still porous, prone to etching, and slower to fabricate because of its hardnessHigh
MarbleBaking stations and furniture-style islandsUnmatched depth and coolness for pastry work; it etches and patinates from lemon, wine and vinegar, so it suits homeowners who accept that characterHigh
Butcher block or slab woodWarmth under grey Northwest lightAdds warmth stone cannot; requires oiling or a film finish, must be kept clear of standing water, and moves with seasonal indoor humidityLow to moderate
Porcelain slabLarge islands and ultra-thin edge profilesExtremely heat and UV stable with minimal upkeep; color runs through only in some products, so exposed edges and waterfall miters need careful specificationHigh
Poured or precast concreteCustom shapes and integral sinksFormed to almost any dimension with integrated details; sealing is ongoing, and fine hairline crazing is normal to the material rather than a defectModerate to high

Final material choice depends on site conditions and a written estimate.

Why Sky Pro

Reasons Homeowners Bring Us the Island


An island exposes shortcuts faster than almost any other part of a kitchen.

We size it against your actual room

Clearances are measured and drawn, not estimated, and we will say plainly when the island you want is larger than the space can carry. Harder conversation up front, better kitchen afterward.

Utilities are planned before demolition

We look under the floor early to confirm a drain can reach a stack and circuits can be routed cleanly. Finding a plumbing dead end after cabinets are ordered is what turns projects into arguments.

Overhangs get real support

Unsupported stone spans crack, usually when someone leans on the edge months later. We size steel or corbels for the actual overhang instead of hoping the slab holds.

Slab layout is reviewed, not assumed

For veined stone and waterfall ends we look at where seams and grain will land before cutting. That review separates a waterfall that reads as one continuous piece from one that looks assembled.

Familiarity with older Eastside housing stock

Mid-century ramblers and split-levels around Bellevue and Kirkland routinely have out-of-level floors and walls carrying more load than they appear to. We plan for those conditions rather than being surprised by them.

Lighting is treated as part of the island

Under grey Northwest winter light, an island lit only by recessed cans casts shadows onto the work surface. Pendant placement, height and layered task light are planned with the island, not left to the end.

Investment

What Moves the Number on an Island


Two islands with identical dimensions can differ enormously in cost, for reasons invisible in a photograph.

Whether utilities move

An island with no plumbing and a simple power feed is a fraction of the work of one with a sink, dishwasher and dedicated circuits. Running drain and vent to the middle of a floor, especially over a slab, is the largest single swing factor.

Structural work

If a bearing wall comes out to make room, the project now includes a beam, posts, a continuous load path to the foundation, and engineering. That work precedes any cabinet and changes both cost and schedule.

Countertop material and edge detail

Slab price is only part of it. Waterfall ends consume extra slab and require mitered fabrication, built-up edges double the visible material, and veining that must match around a corner limits which slabs can be used.

Overhang and its support

Seating overhangs past roughly ten to twelve inches of unsupported stone need steel plate, rod support or corbels. Concealed steel costs more than visible brackets and must be built into the cabinets rather than added afterward.

Cabinet construction and interior fittings

Stock boxes with finished end panels sit at one end of the range, full custom drawer banks and appliance garages at the other. Soft-close systems, cutlery inserts and pull-out shelving add up quickly across an island’s many openings.

Ventilation for a cooking island

An island hood must capture a plume with no wall helping it, so it needs more capacity and a longer duct run, usually up through the ceiling and roof. Higher-capacity hoods can also trigger makeup air requirements under Washington’s mechanical code.

No responsible number can be given from a photo or a phone description. Accurate pricing requires an on-site inspection of your floor structure, utility routes and existing conditions, followed by a written estimate that itemizes the scope.

Ready to Talk Through Layout, Seating and Stone?

Bring us your kitchen and your list of frustrations with it, and we will show you scaled options with real dimensions. Reach us at (206) 825-2773.

Common Questions

Frequently Asked Questions


How much space do I need around a kitchen island?

Plan on about forty-two inches of clear aisle where one person cooks, and closer to forty-eight where two people work at once or appliance doors open into the aisle. Measure finished cabinet face to finished island face, including countertop overhang. Behind seating you want extra room so someone can push a stool back and walk past. If the room cannot give that up on every side, a peninsula or narrower island is the better answer.

Can I put a sink or a cooktop in my island?

Usually yes, but feasibility is decided under the floor rather than on the plan. A sink needs supply, drain and vent reaching the middle of the room, which is straightforward over an accessible crawlspace or basement and considerably more involved over a concrete slab. A cooktop needs ventilation, landing space on both sides of the burners, and enough distance that guests are not seated beside a hot pan.

How much overhang do I need for seating?

Allow roughly fifteen inches of knee depth per seat at standard counter height, less at raised bar height and more at table height, plus about twenty-four inches of width per stool. Stone projecting much past ten to twelve inches without support needs steel plate, rod support or corbels. That support has to be designed into the cabinet build, since retrofitting it means lifting the slab. Waterfall panels also eliminate knee room at that end.

Where do the electrical outlets go on an island?

They go on side or end panels, in recessed pop-up units, or tucked beneath an overhang, because current code does not permit receptacles installed face-up in a countertop surface. Side placement is the most reliable and least expensive; pop-ups are cleanest visually but consume cabinet space and cost more. The bigger question is where power comes from, since the circuit normally runs through the floor or a chase to reach a freestanding island.

Do I need a permit for a kitchen island in Bellevue?

A permit is generally required once you alter plumbing, add or extend electrical circuits, or make structural changes such as removing a wall. Replacing an island in the same footprint with no utility work is a different situation than opening up a kitchen. Bellevue, Kirkland, Redmond, Sammamish, Seattle and unincorporated King County each administer their own permitting, and requirements differ. We identify what your scope requires during planning, not after work begins.

Is a waterfall island worth it?

A waterfall edge gives a clean modern look and protects the cabinet end from scuffs, but it costs meaningfully more because it consumes extra slab and requires a precise mitered joint with veining that continues around the corner. It also removes knee space, so it works best on an end that carries no seating. In heavily patterned natural stone it is striking; in plain quartz it is subtle enough that some homeowners spend the money elsewhere.

Will my floor support a heavy stone island?

In most cases yes, but it is worth checking rather than assuming, particularly in older homes with long joist spans. A large slab island concentrates significant weight on a small footprint, so we look at joist size, span and support underneath during the initial assessment. Where reinforcement is needed it is usually modest, such as added blocking or another post and footing in the crawlspace. Handling that during rough-in is straightforward; discovering a sagging floor afterward is not.

Can an island be added without a full kitchen remodel?

Often it can, especially if the layout already has the floor space and you do not need a sink or cooktop in it. The realistic obstacles are flooring and finish matching, since a new or removed footprint usually leaves a gap in the floor that has to be patched convincingly. Electrical is the other consideration, as running a circuit generally means accessing the space below the floor. We are glad to look at a standalone island as its own project.

Client Reviews

What Our Clients Say


Related Services

More Reading on Islands and Kitchen Planning


5 Game-Changing Benefits of Adding a Kitchen Island to Your Remodel

A plain look at what an island actually adds to daily kitchen use, useful if you are still deciding whether one belongs in your layout.

Kitchen Remodeling in Bothell, WA: Custom Island Upgrades, Storage Solutions, and Modern Finishes

Walks through island storage strategies and finish choices in the context of a full kitchen project.

How to Choose the Best Countertops for Your Kitchen

Goes deeper on the material comparison above, which matters most on an island where the slab is visible from every angle.

Service Areas

Island Work Across Bellevue and the Greater Seattle Area


We design and build kitchen islands throughout Bellevue and the surrounding Eastside, including Kirkland, Redmond, Sammamish, Issaquah, Newcastle, Mercer Island and Bothell, along with Seattle and the north-end suburbs. Housing stock varies widely here, from mid-century ramblers with load-bearing walls between kitchen and dining to newer construction already opened up, and the island approach changes accordingly.

Do not see your neighborhood? Call (206) 825-2773 — we regularly work throughout King County.

Where We Work

Serving Bellevue and the Greater Seattle Area


Our service area covers Bellevue, the Eastside communities along the I-405 corridor, Seattle, and surrounding King and Snohomish County neighborhoods.

Get Started

Request an Island Design Consultation


Tell us about your kitchen, how you use it, and what you would like the island to do. We will follow up to schedule an on-site look and a written estimate.

Appointment Request Form

Let us know how we can help you!

Click To Call