Bathroom Remodeling

Bathroom Floors Built From the Subfloor Up


Bathroom floors almost never fail at the surface. They fail because the subfloor flexed, the substrate was never flattened, or water found a path underneath. Sky Pro Remodeling installs tile, stone and resilient bathroom floors on properly prepared assemblies so the finish you picked still looks right a decade later.

  • Tile and stone floors
  • Subfloor repair and leveling
  • Waterproofing membranes
  • Heated floor systems
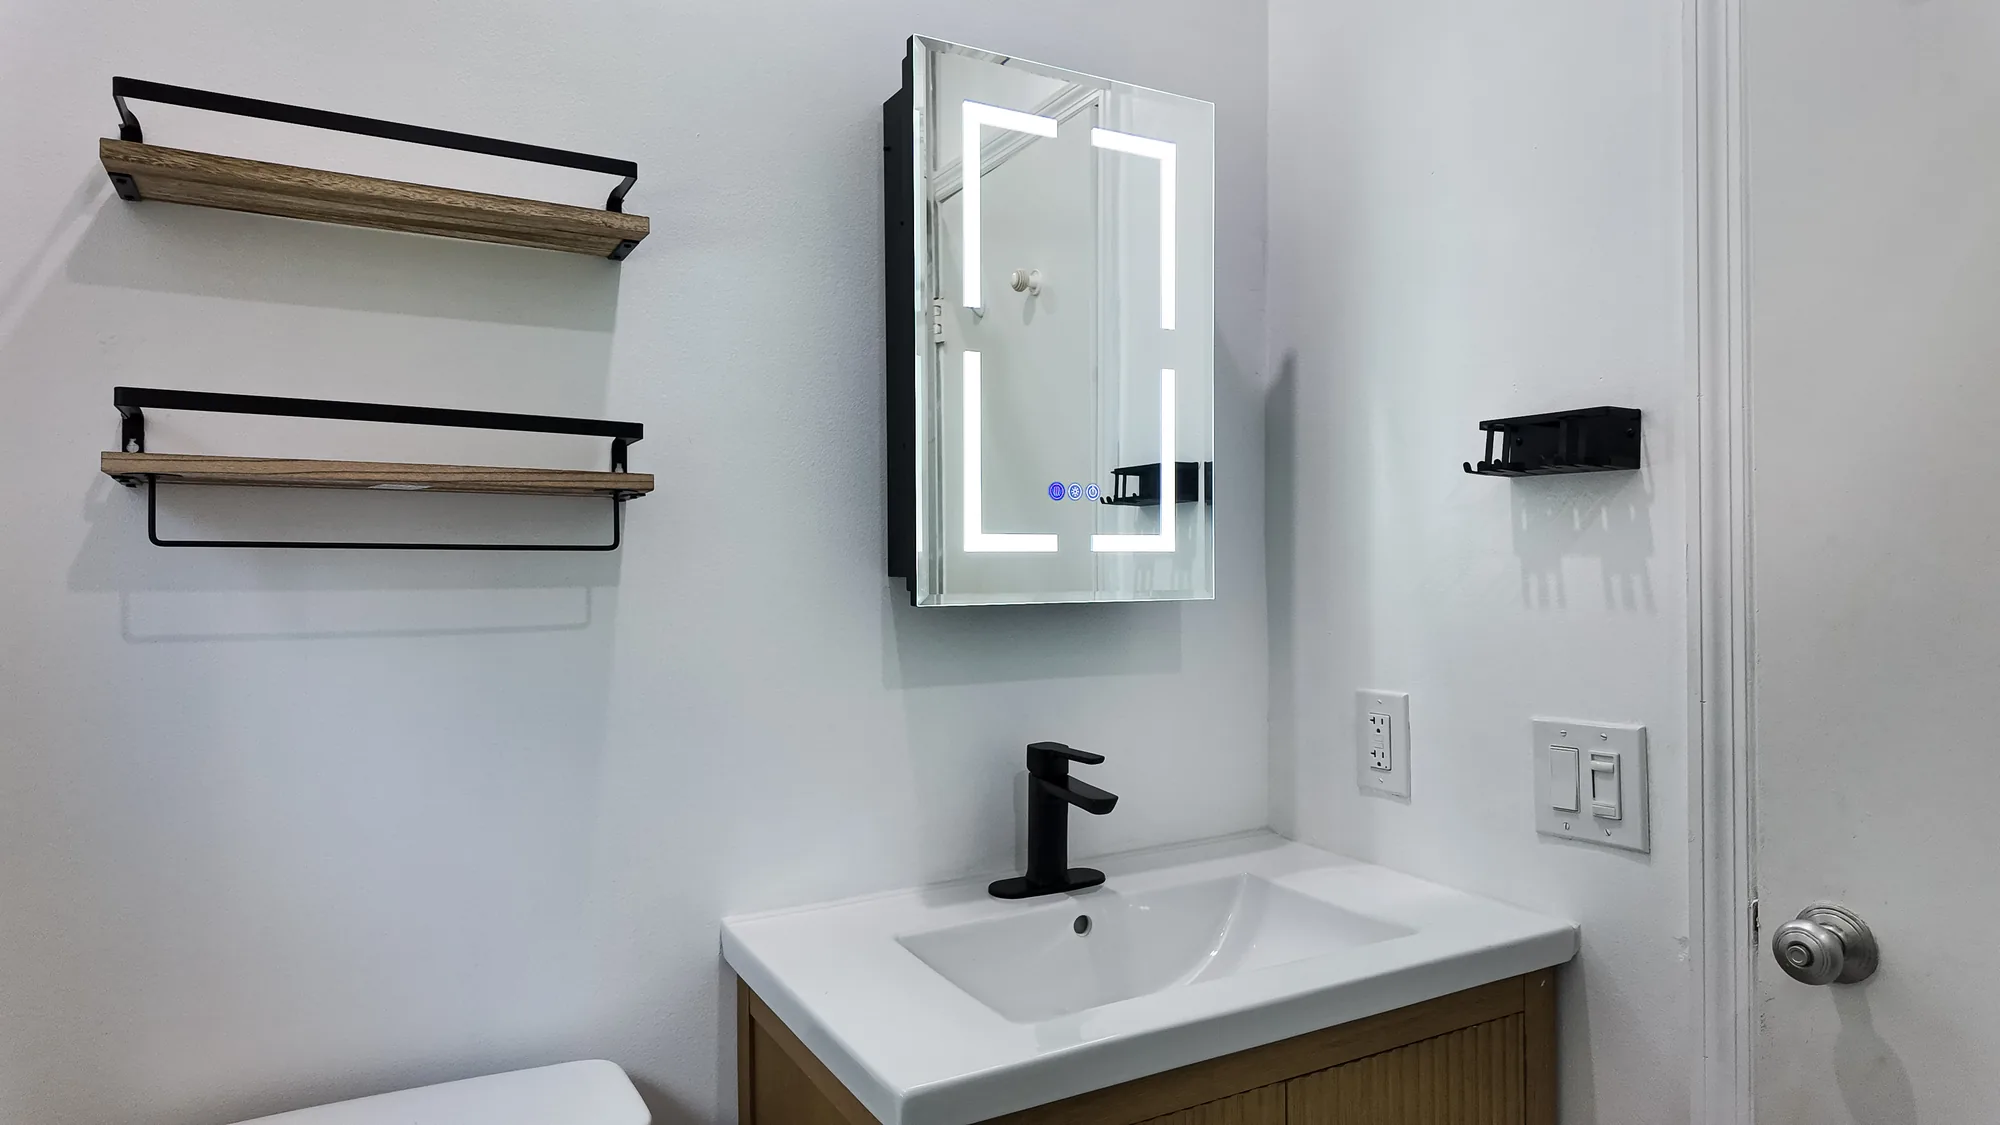
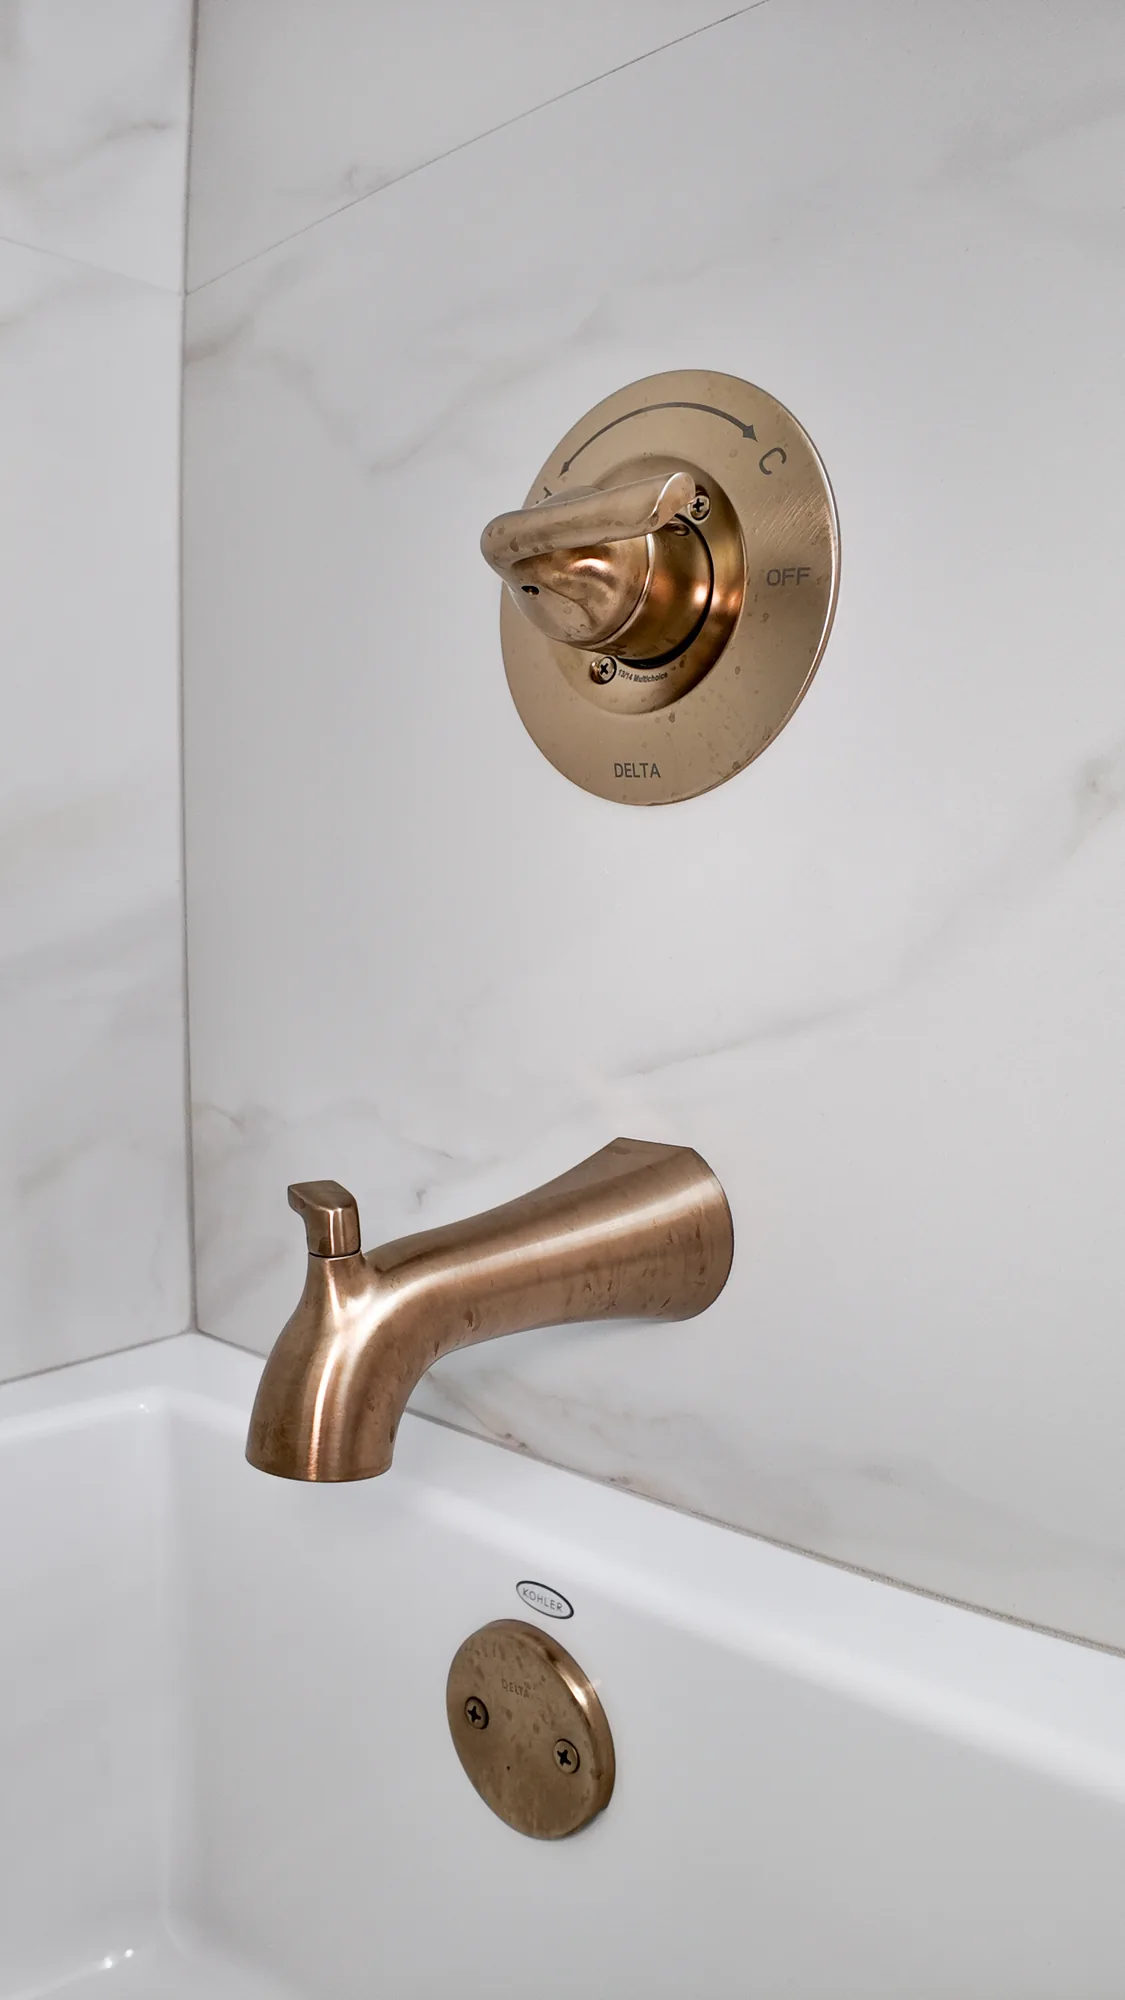
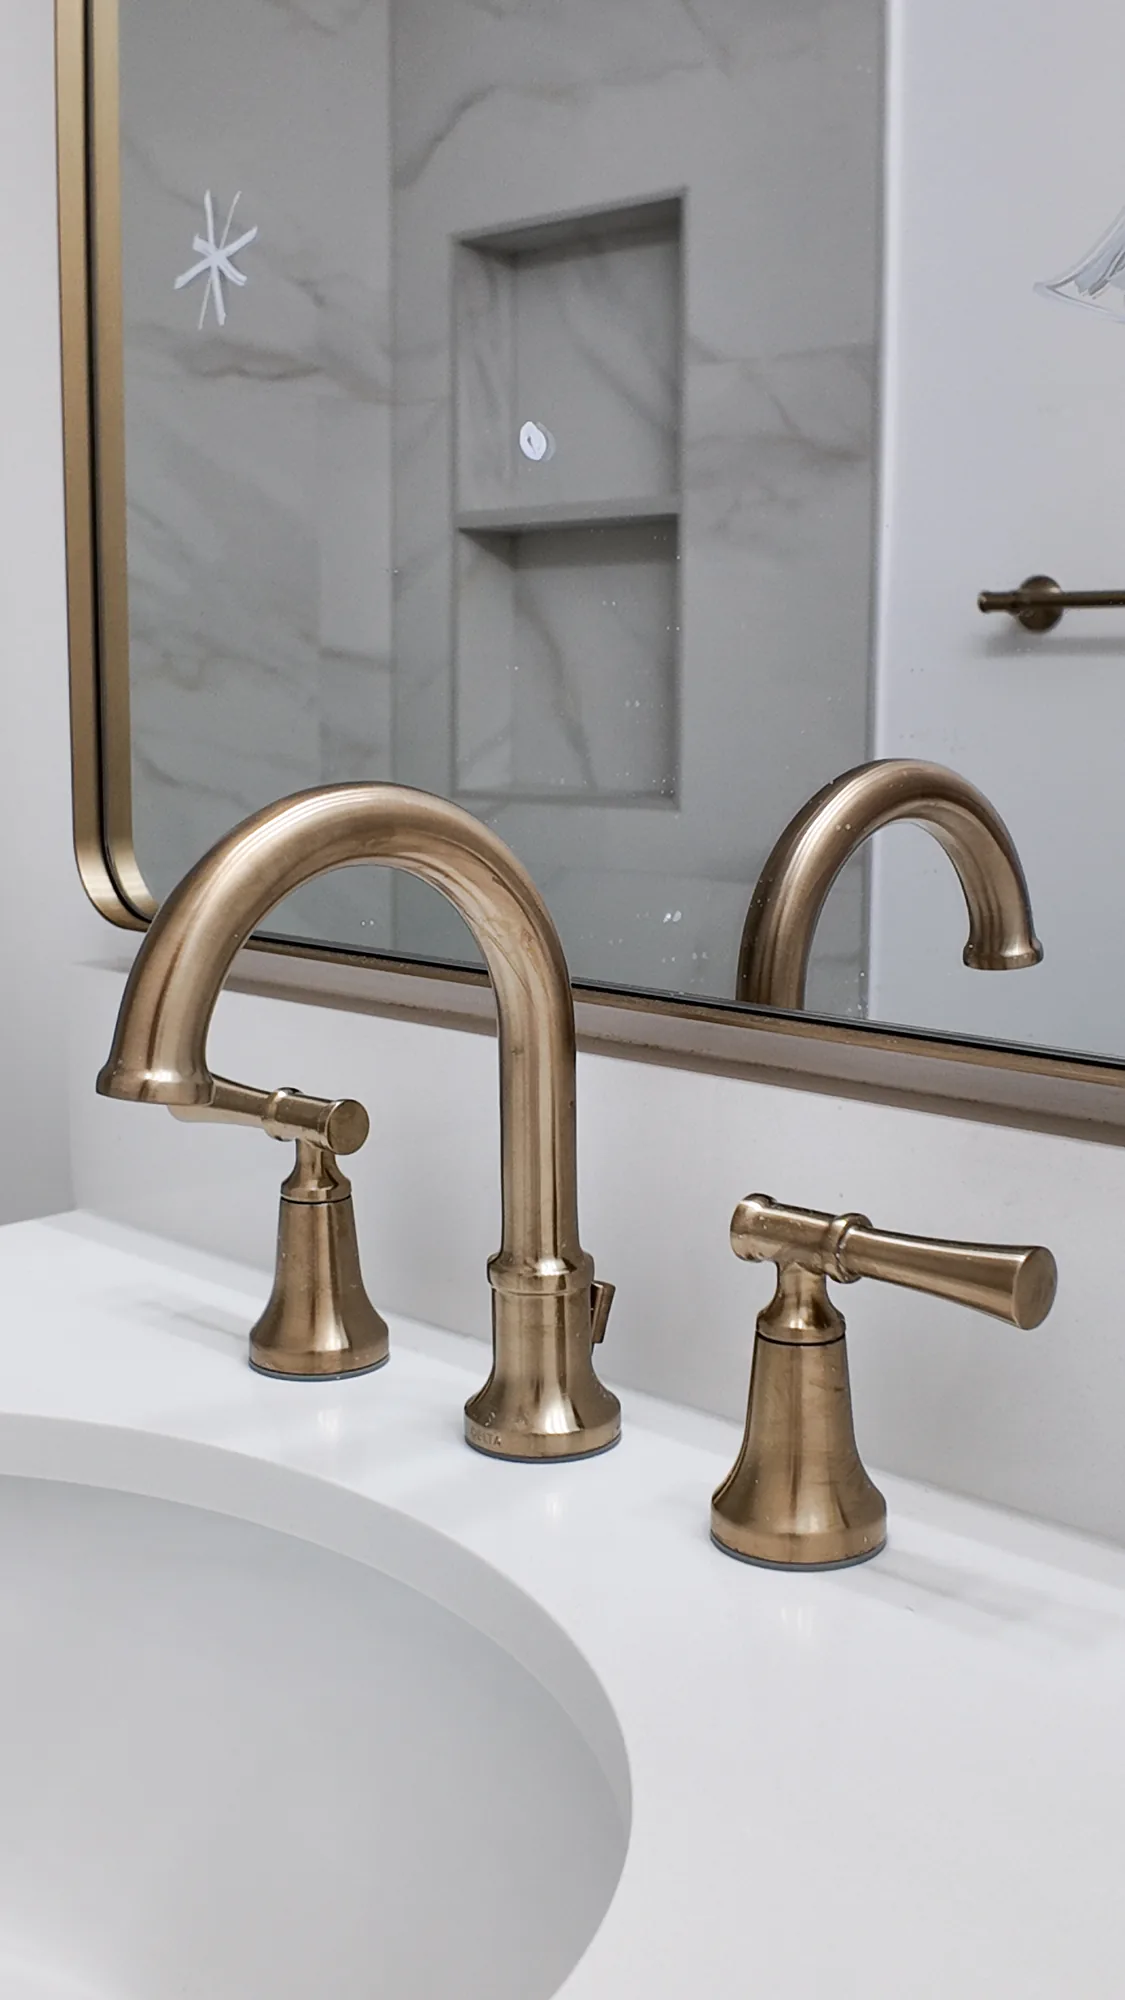
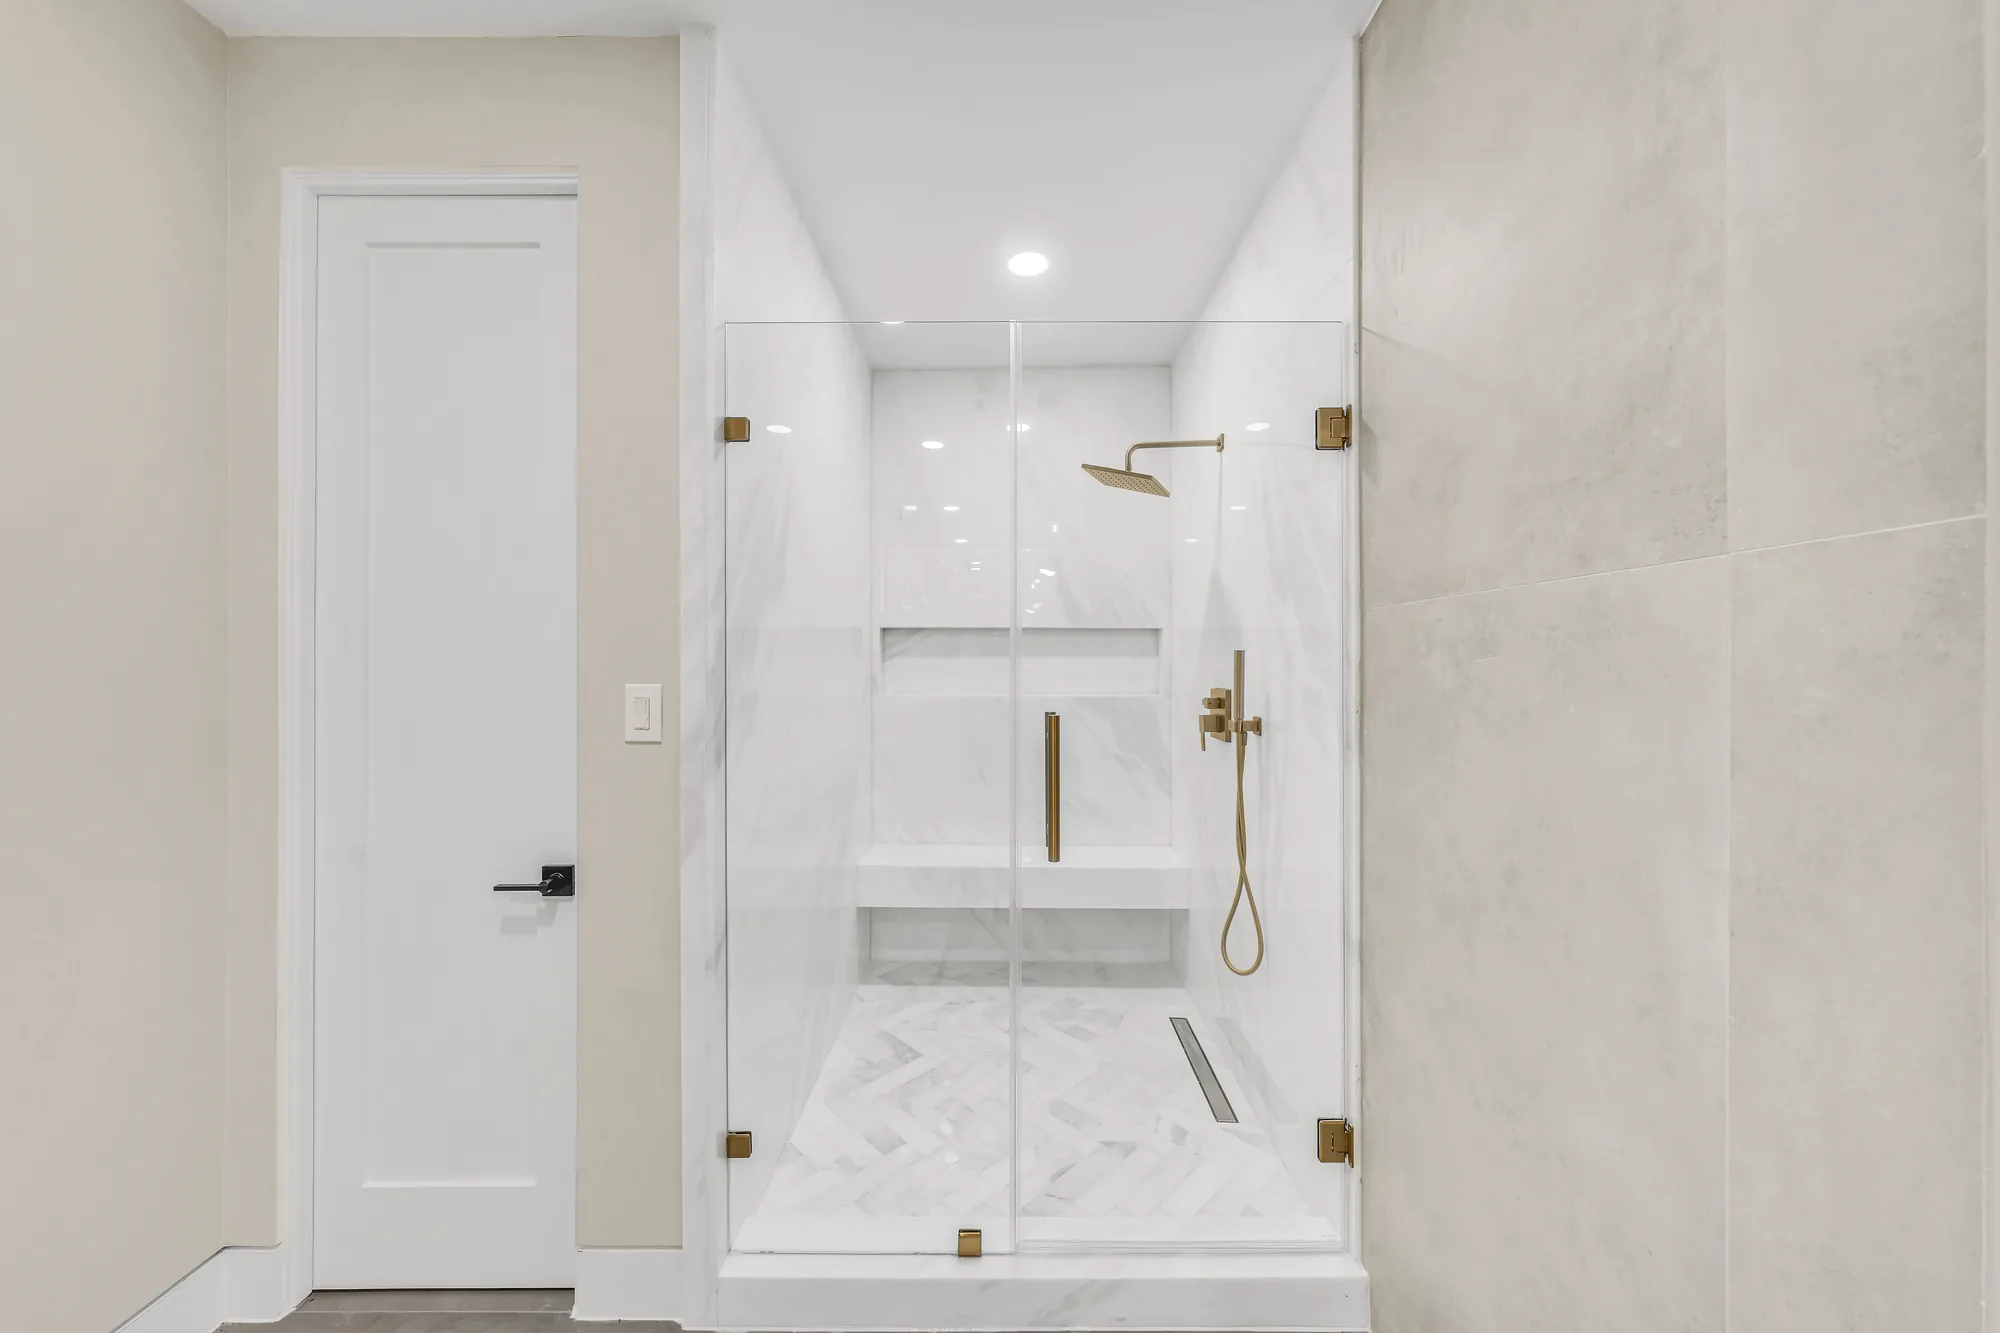
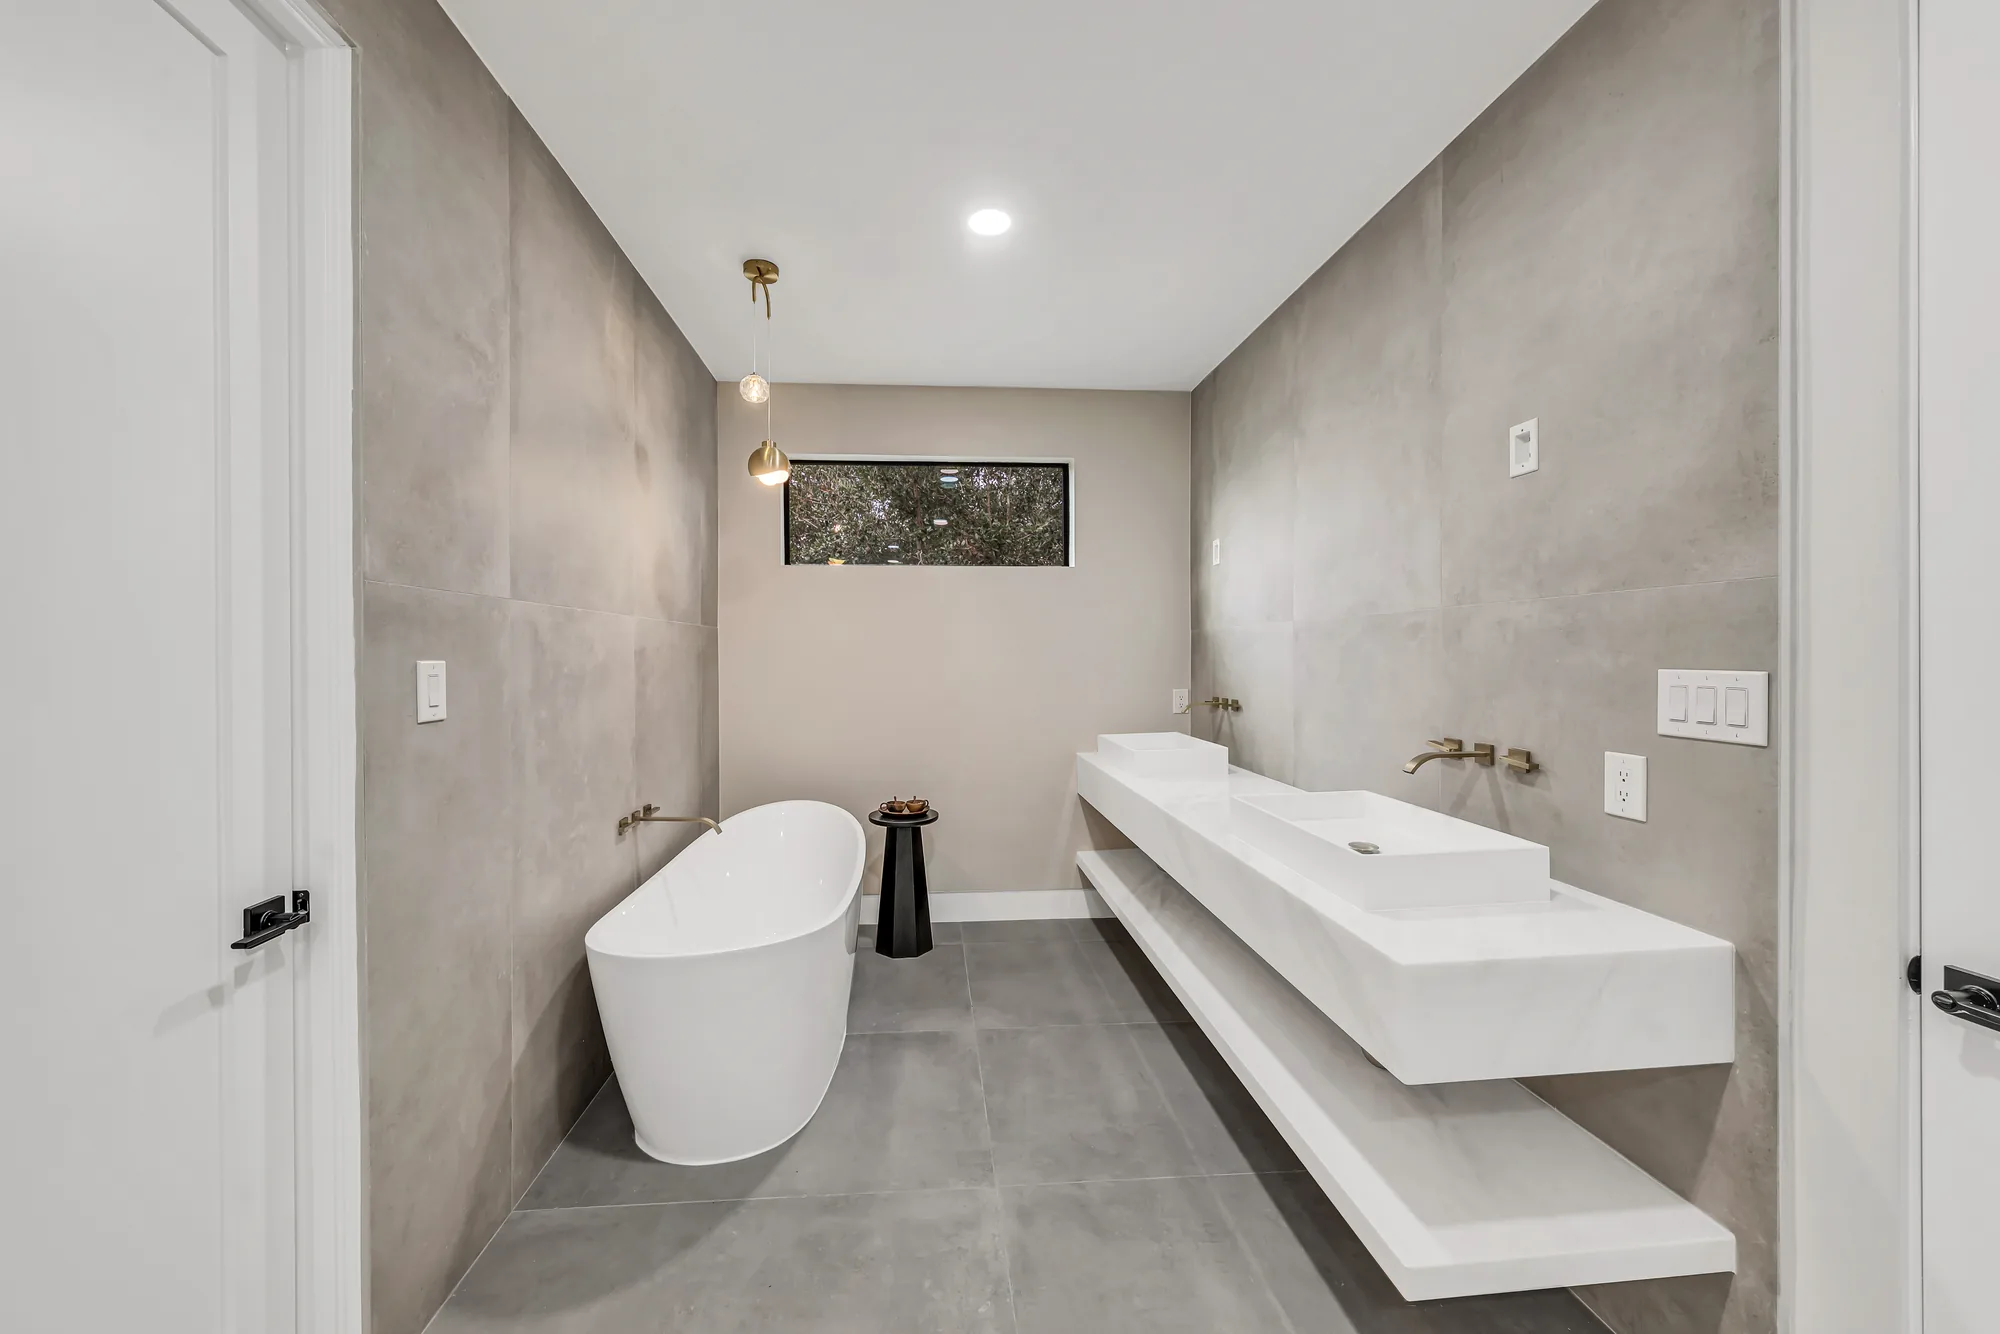
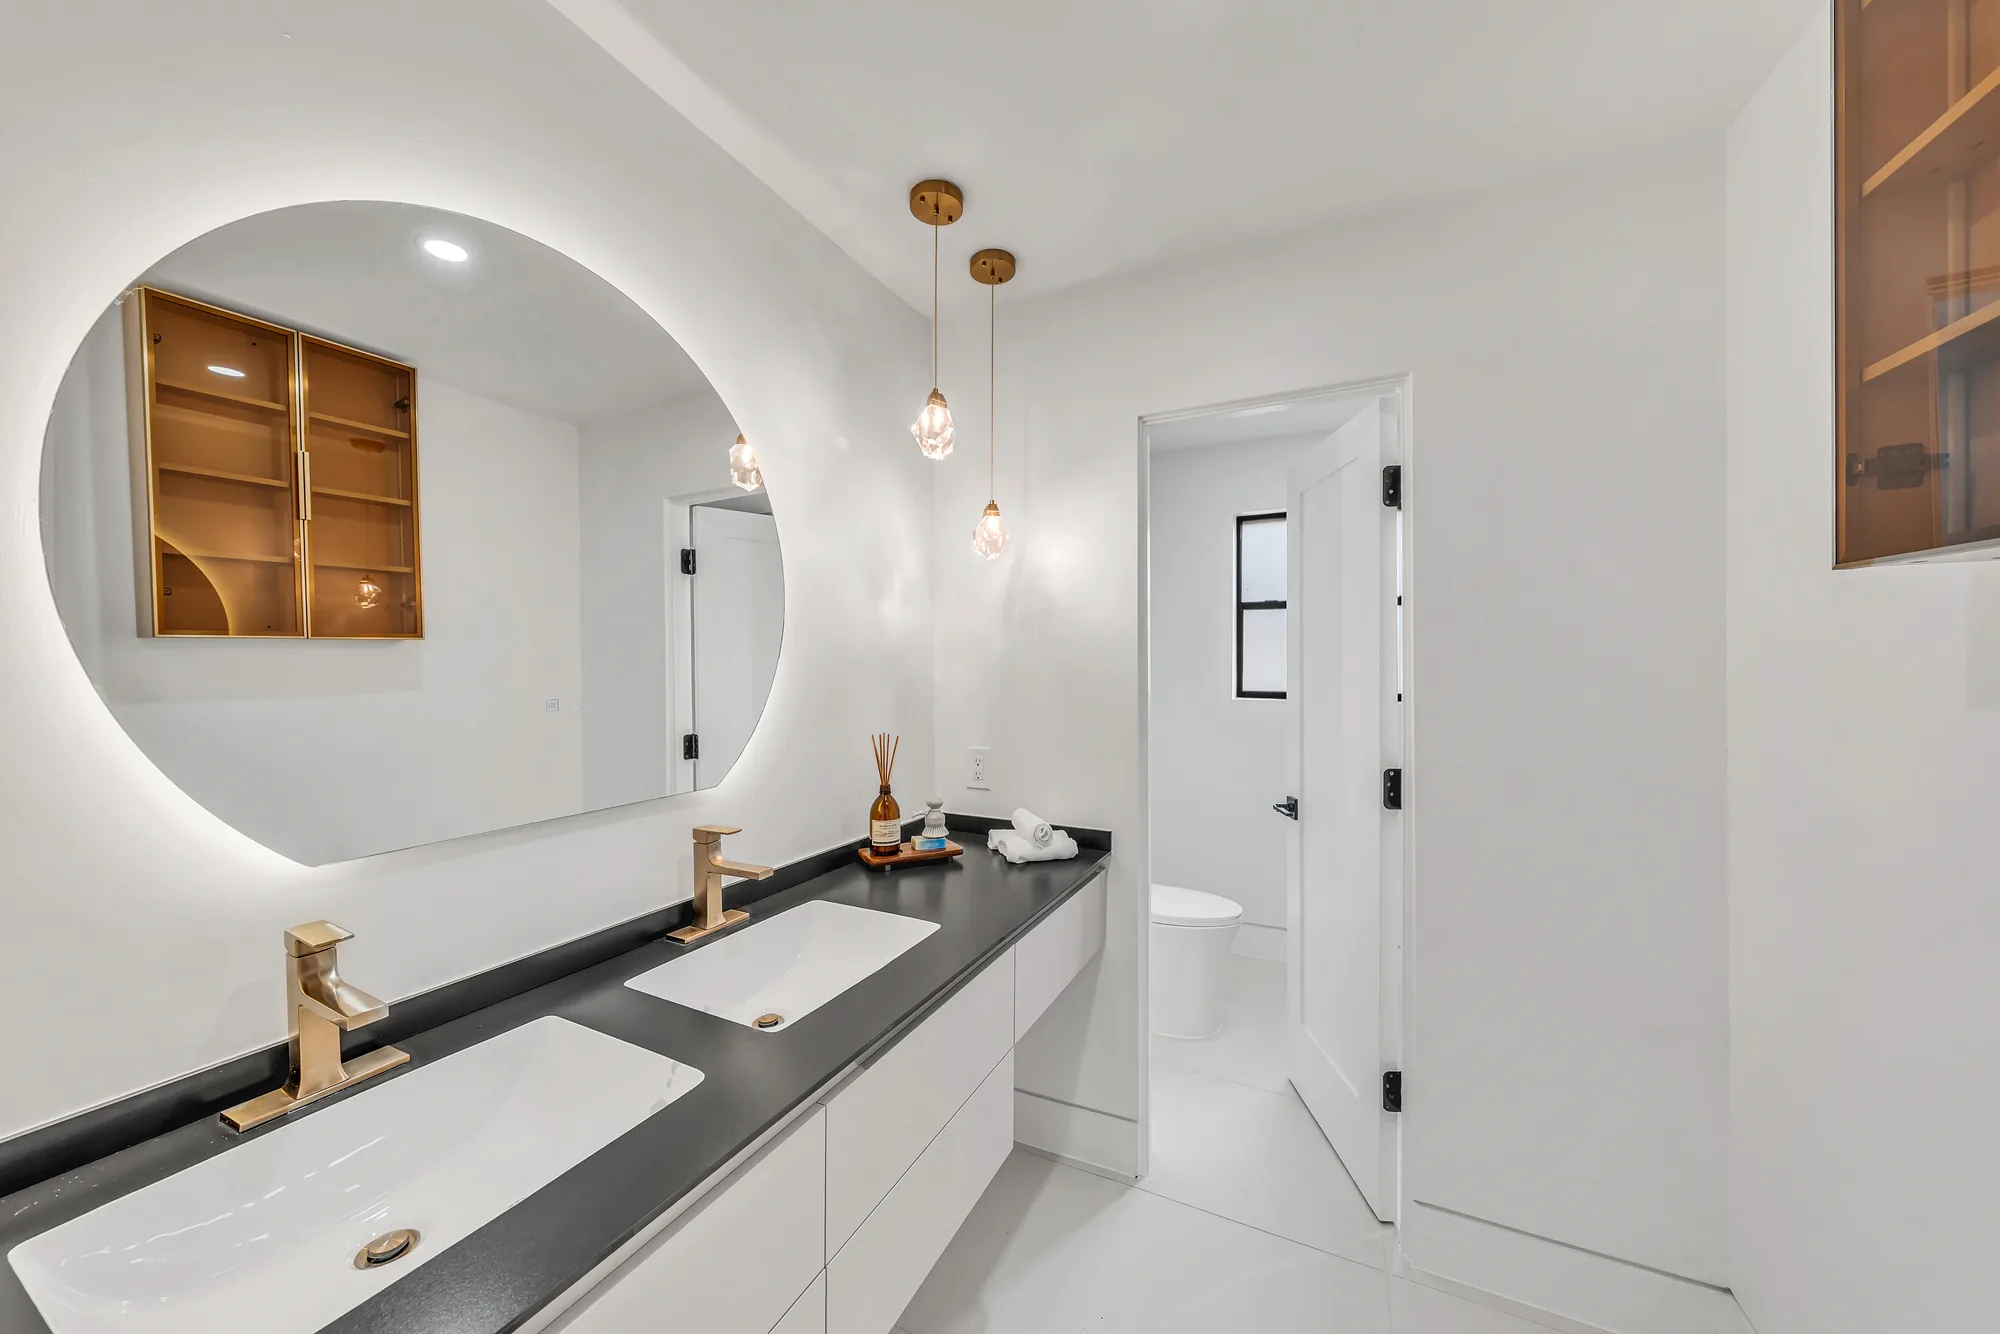
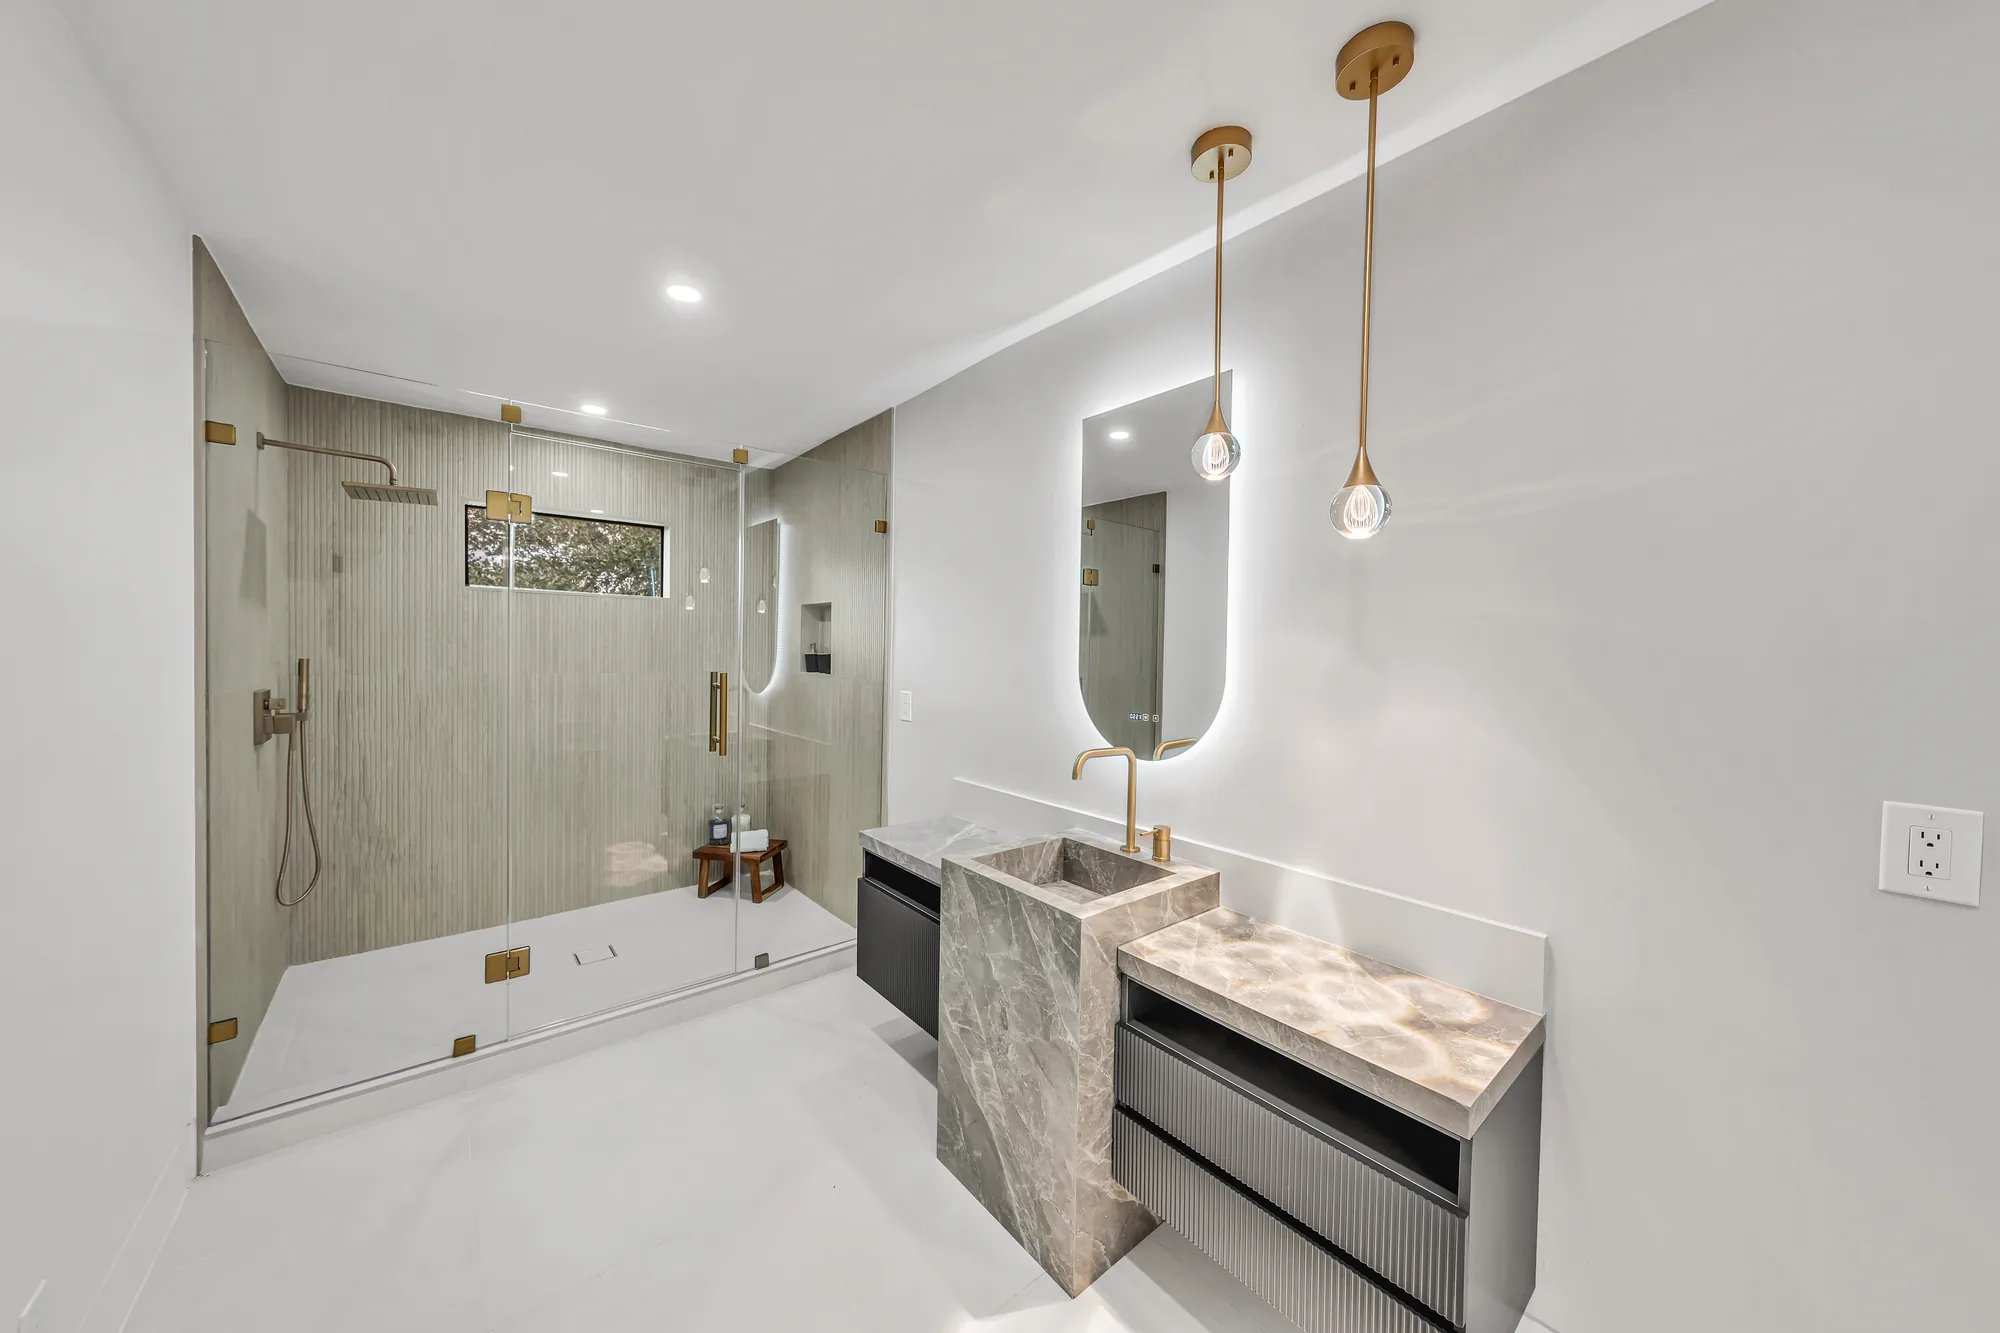
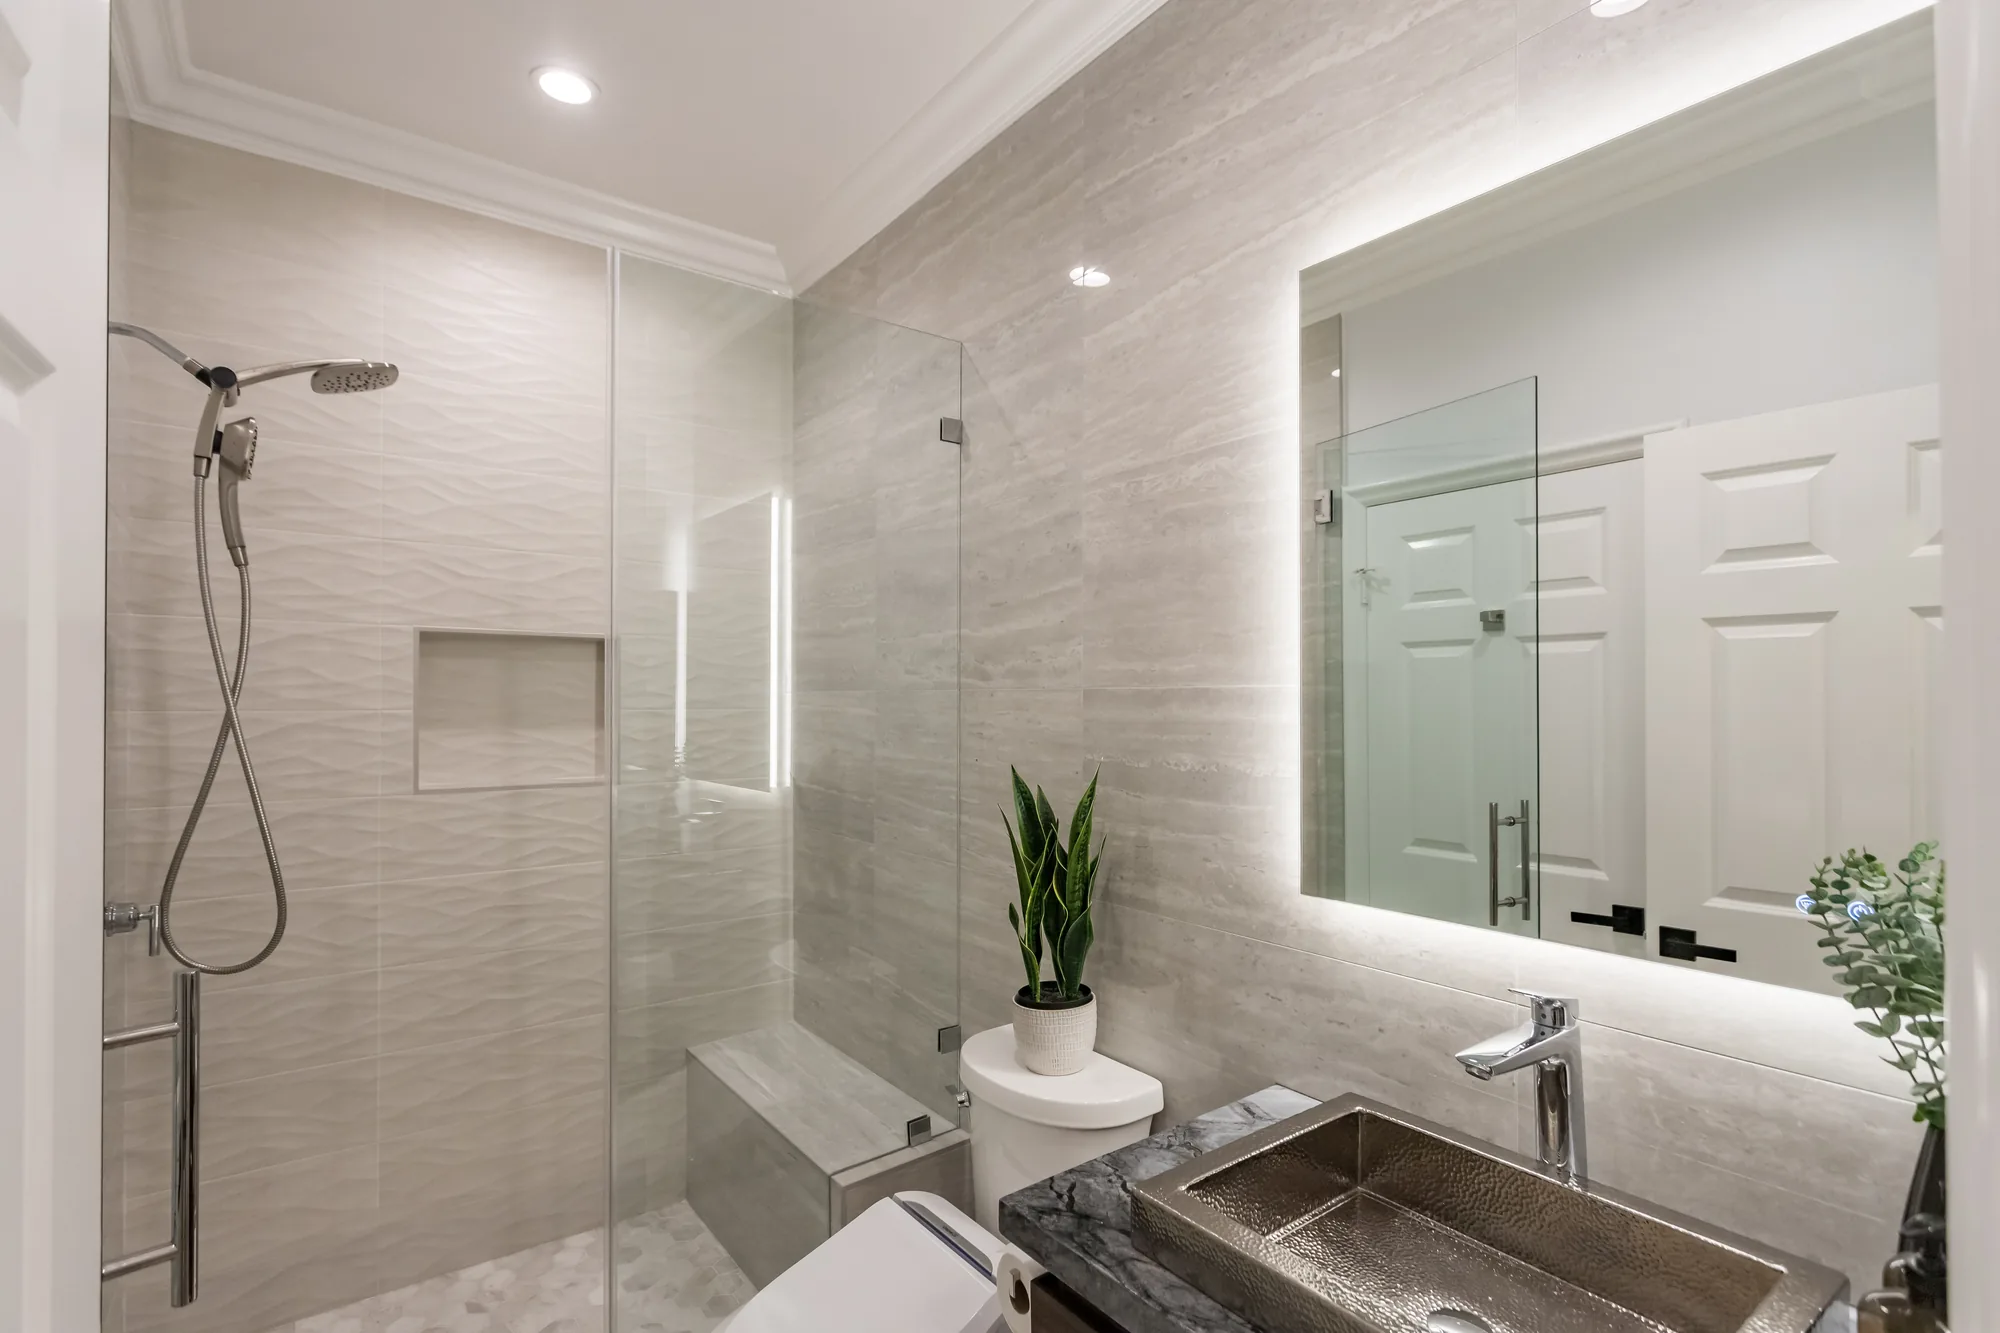
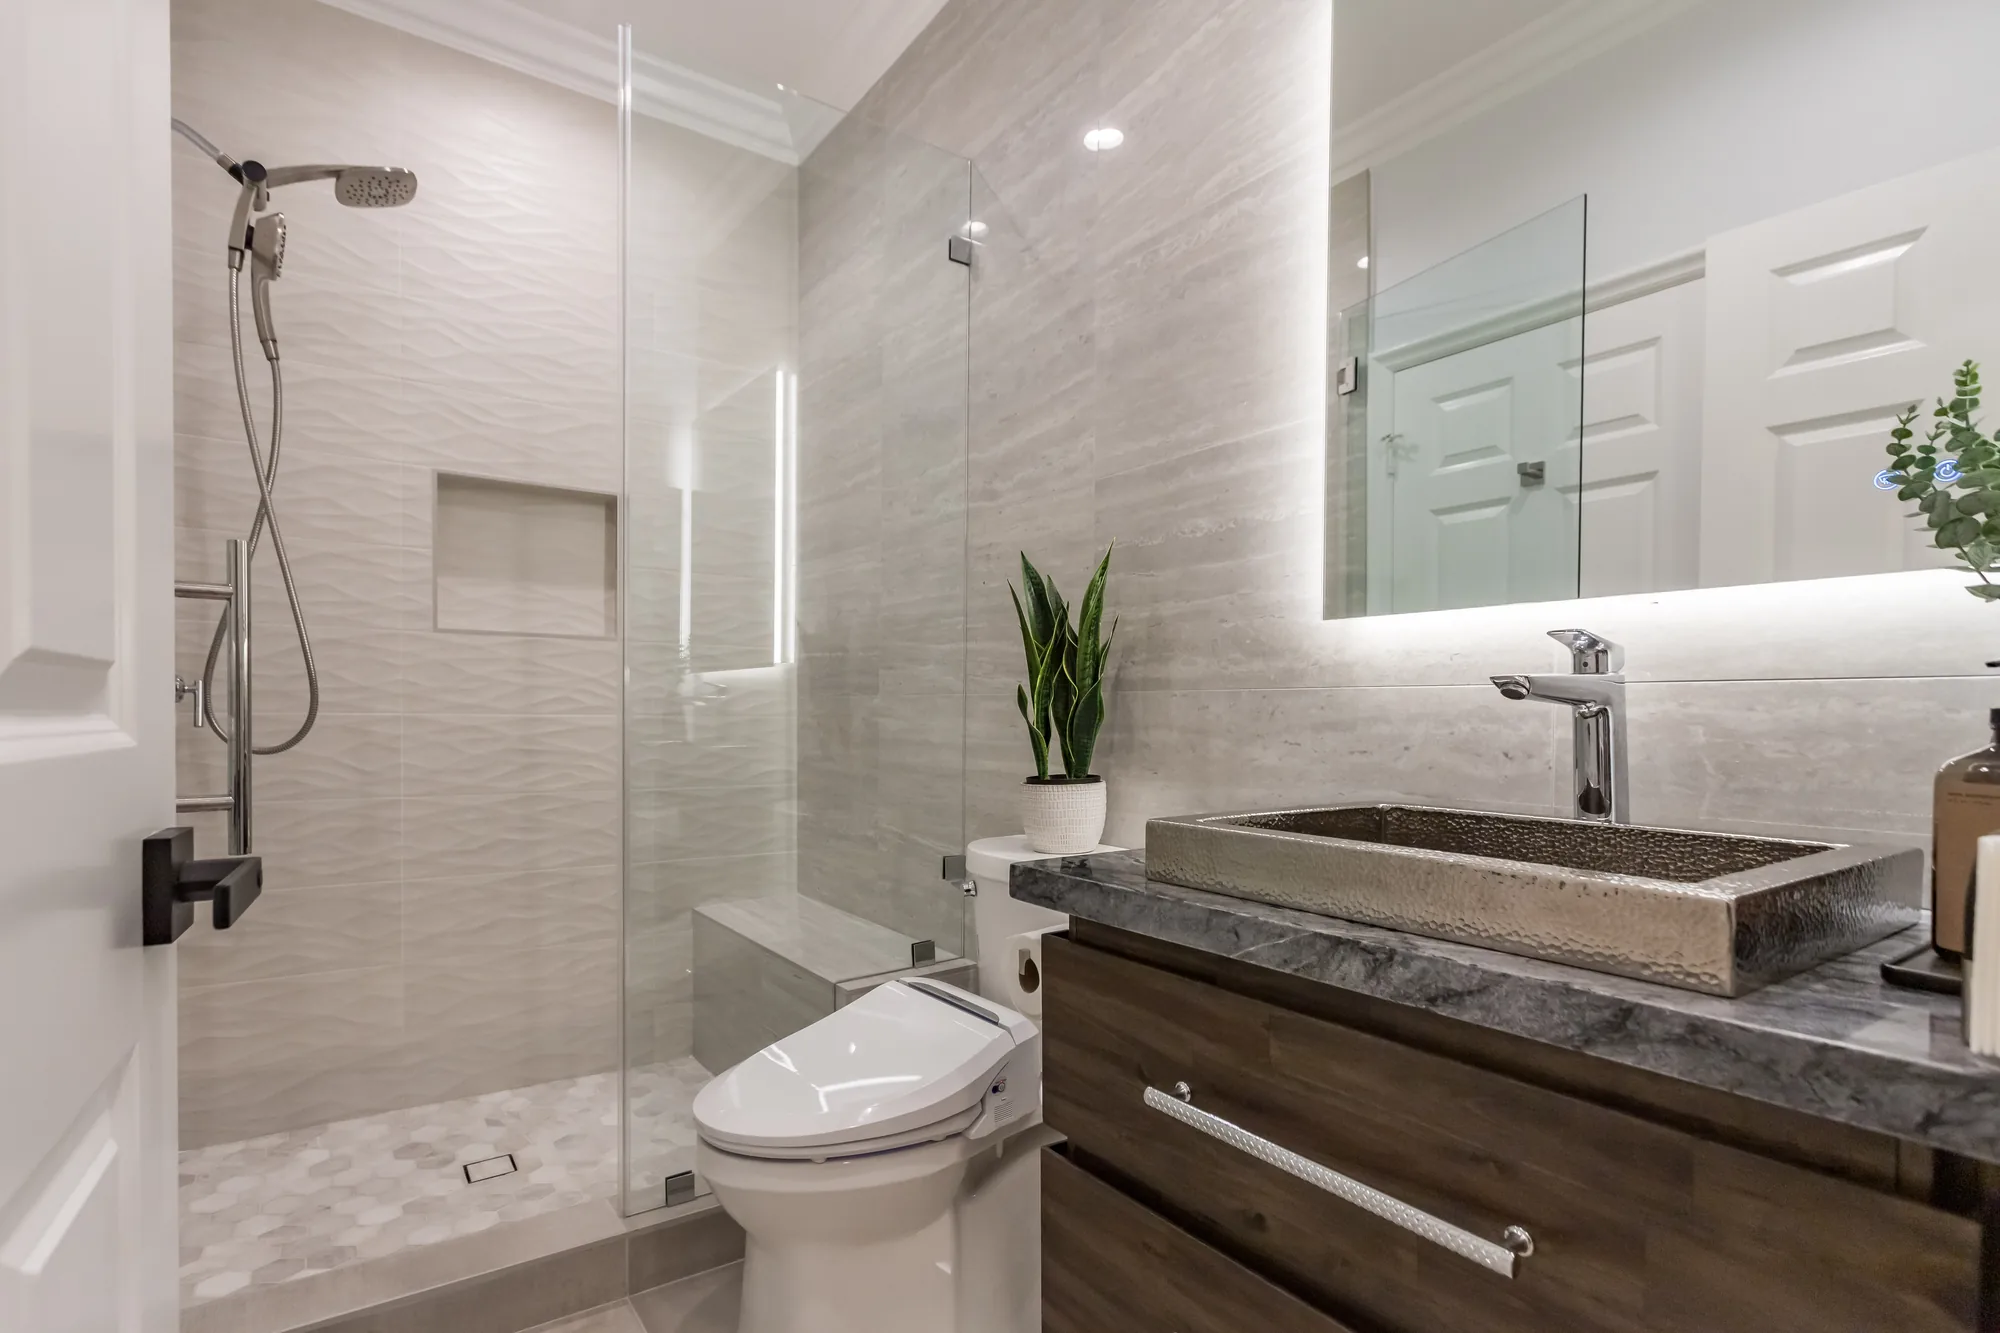
Marble-look tiled shower with sliding glass doors, matte black grab bars, rain head and recessed niche.Vanity wall with wood and black open shelves, a lighted mirrored cabinet and a white integrated sink.Champagne bronze tub spout and shower valve trim on marble-look tile above a white bathtub.Brushed gold widespread faucet on a white vanity top, with a gold-framed mirror behind it.Glass-enclosed shower with marble-look tile, built-in bench, herringbone floor and brushed gold fixtures.Wide primary bathroom with freestanding tub, floating stone double vanity and gray concrete-look tile walls.Floating white double vanity with dark stone counter, round backlit mirror and gold glass pendant lights.Bathroom with fluted floating vanity, freestanding stone pedestal sink and walk-in glass shower.Remodeled bathroom with glass walk-in shower, backlit mirror and hammered metal sink on a stone vanity top.Wide view of a remodeled bathroom with a walk-in glass shower, dark wood vanity and stone-look tile walls.Marble-look tiled shower with sliding glass doors, matte black grab bars, rain head and recessed niche.Vanity wall with wood and black open shelves, a lighted mirrored cabinet and a white integrated sink.Champagne bronze tub spout and shower valve trim on marble-look tile above a white bathtub.Brushed gold widespread faucet on a white vanity top, with a gold-framed mirror behind it.Glass-enclosed shower with marble-look tile, built-in bench, herringbone floor and brushed gold fixtures.Wide primary bathroom with freestanding tub, floating stone double vanity and gray concrete-look tile walls.Floating white double vanity with dark stone counter, round backlit mirror and gold glass pendant lights.Bathroom with fluted floating vanity, freestanding stone pedestal sink and walk-in glass shower.Remodeled bathroom with glass walk-in shower, backlit mirror and hammered metal sink on a stone vanity top.Wide view of a remodeled bathroom with a walk-in glass shower, dark wood vanity and stone-look tile walls.
Overview

A Bathroom Floor Is an Assembly, Not a Surface


Homeowners shop for bathroom flooring the way they shop for a rug, comparing colors and patterns. The tile or plank you choose matters, but it is the last inch of a stack that also includes floor joists, subfloor panels, patching or mortar bed, sometimes a membrane, and the setting material that bonds it all together. Get that stack right and almost any quality finish performs. Get it wrong and even expensive porcelain will telegraph cracks along the joist lines within a couple of winters.

The bathroom is also the only room in the house where water is deliberately introduced every single day, then left to sit in the grout lines, along the tub apron, and around the toilet flange. Add the Puget Sound climate, where a bathroom can stay damp for hours in January because the outside air is already saturated, and a floor that is merely water resistant is not the same as a floor that is detailed to shed and drain. That distinction is where most of the real work in a bathroom floor lives.

Much of the Eastside housing stock makes this more interesting. Homes built through the 1950s and 60s often have plank subfloors, joists on wider spacing than current tile standards expect, and two or three layers of previous flooring stacked on top. Newer construction in Bellevue, Redmond and Sammamish has flatter engineered subfloors but frequently uses long-span I-joists that deflect more than homeowners expect. Both conditions are workable. Neither is something you want to find out about after the tile is already down.

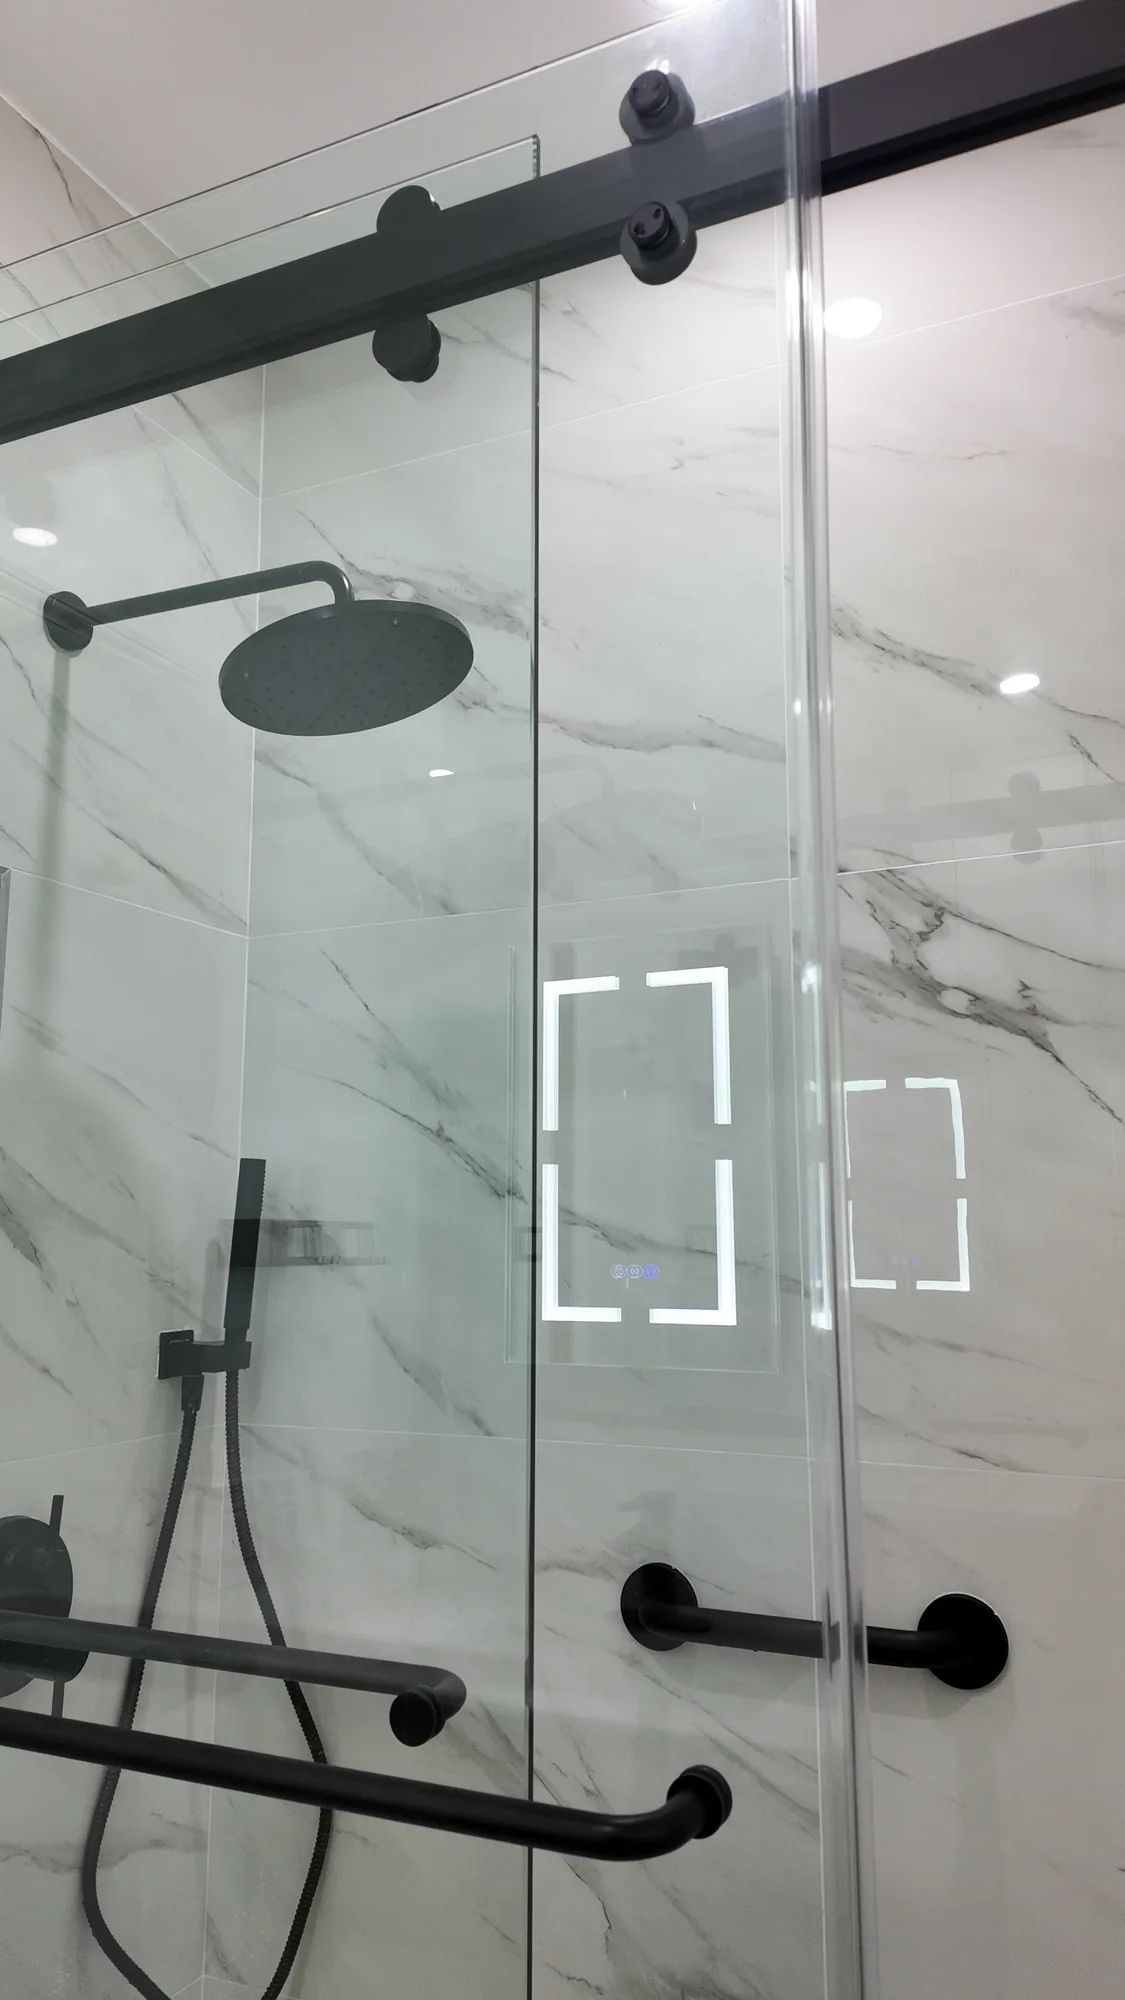
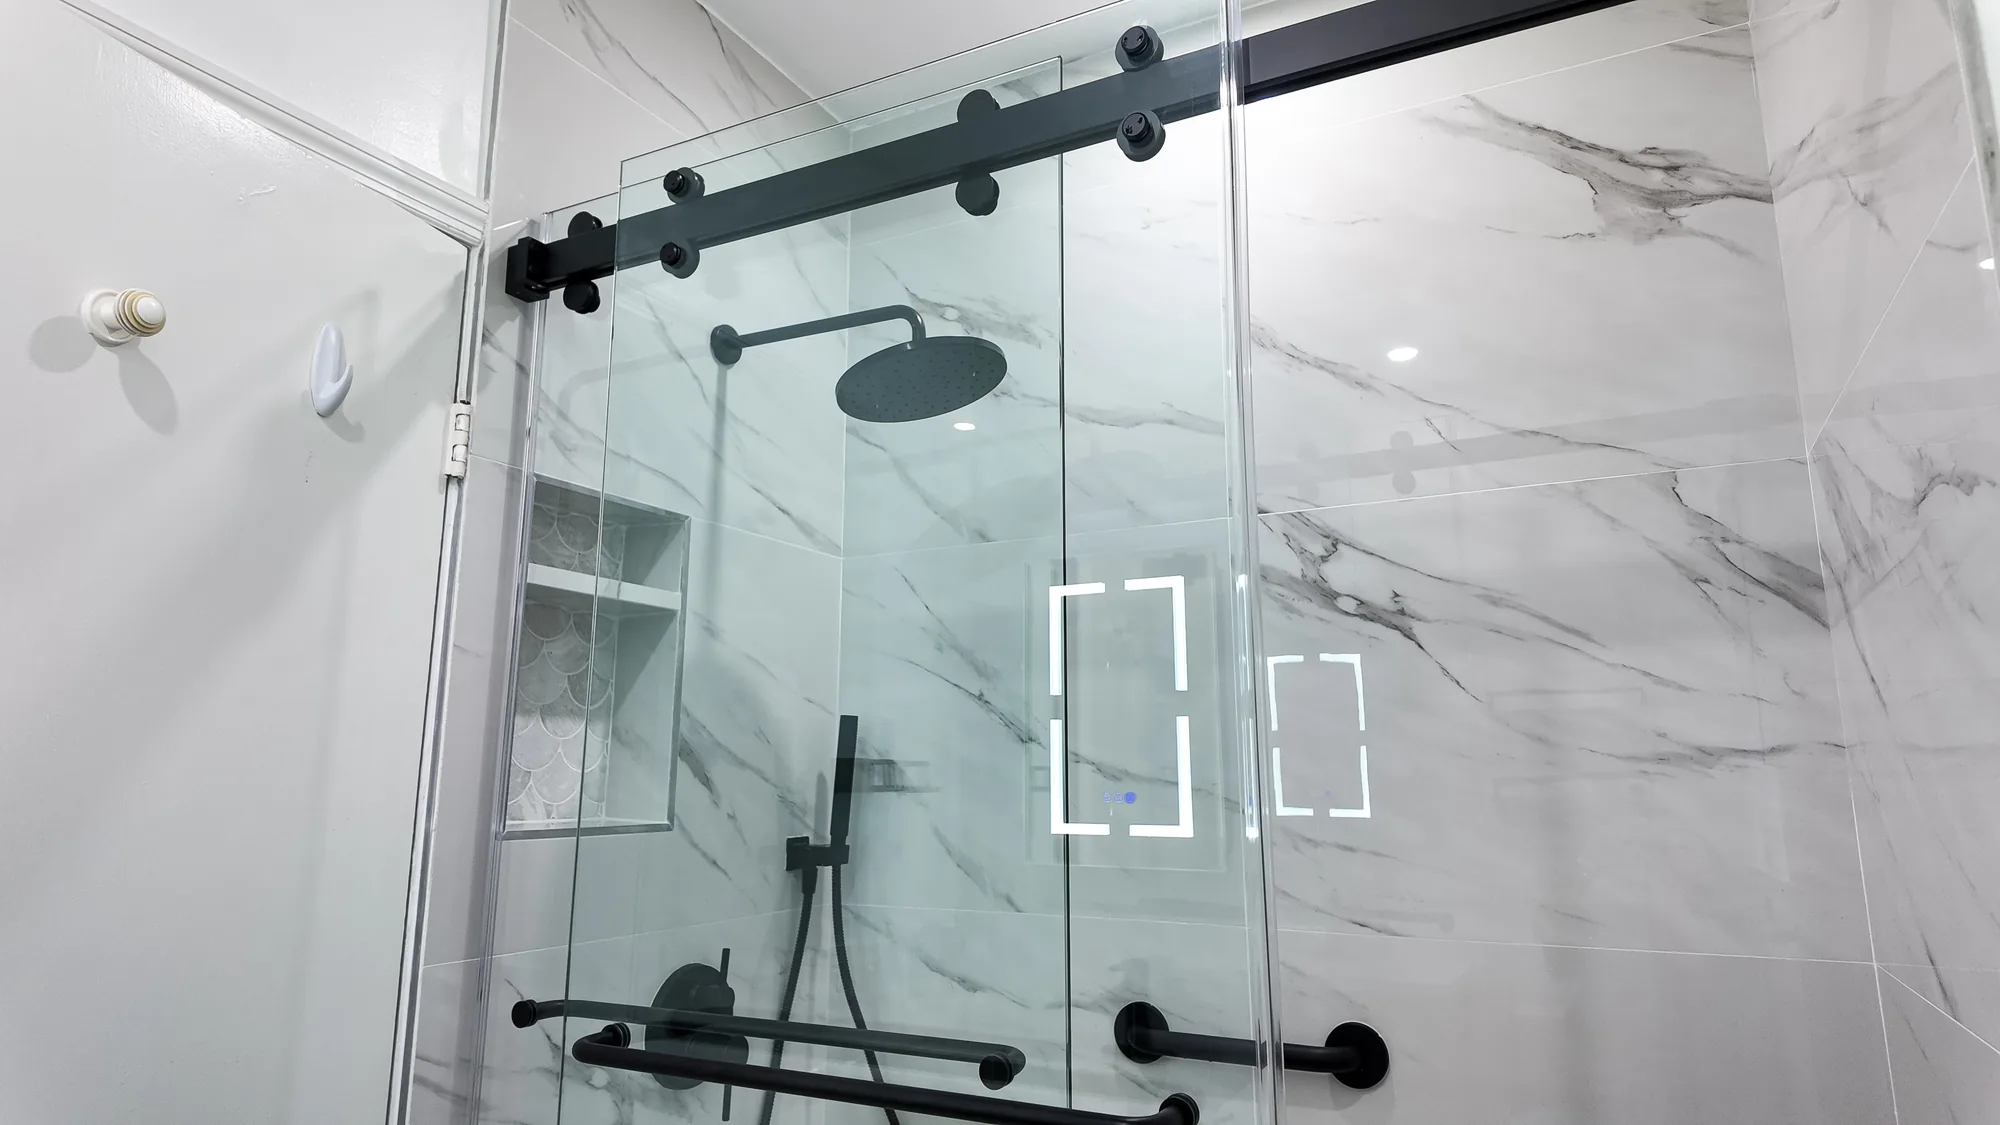
Marble-look tiled shower with sliding glass doors, matte black grab bars, rain head and recessed niche.
Design Direction

Layouts and Patterns Worth Considering


The same material reads very differently depending on format, direction and grout treatment.

Large-format straight lay

Rectangular or square tiles in bigger formats set in a simple grid, with minimal grout lines and a calm, continuous look. This is the strongest choice for making a small Eastside bathroom feel larger, and it works well with grey natural light because there is less visual noise. The trade-off is that large tile is unforgiving of an out-of-flat substrate, so plan for the leveling work it requires.

Hexagon and penny mosaic

Small-format sheets in hex, penny round or basketweave that read as texture rather than pattern, and a natural fit for period homes and guest baths. The high grout-line density gives excellent underfoot traction, which is why it has stayed popular in wet areas for a century. Expect more grout to clean, and choose a grout color you are willing to live with rather than a bright white that will show every scuff.

Wood-look plank porcelain

Long porcelain planks with printed grain that give the warmth of wood in a room where real wood does not belong. It is the usual answer when a bathroom opens directly onto hardwood and you want visual continuity without a jarring material change. Plank tile should be laid with a modest offset rather than a half-lap, because long planks are rarely flat enough end to end for a full brick pattern to sit cleanly.

Marble-look porcelain with an inset

A veined field tile paired with a border, rug-style inset, or contrasting threshold at the vanity or shower entry. This gives a master bathroom a designed, deliberate look without the maintenance load of real stone. The inset has to be planned against the room dimensions before any tile is cut, or it ends up off-center relative to the vanity and the eye catches it immediately.

Patterned and encaustic-look tile

Graphic cement-look porcelain used as a full floor or a defined area, most effective in a small powder room where a bold floor is the entire design move. Because the pattern carries the room, the walls and vanity can stay quiet. Confirm the pattern repeat and how it terminates at the walls, since a busy tile cut awkwardly at the perimeter undoes the effect.

Continuous curbless wet-room floor

One material runs from the door through the shower with no curb, and a linear or point drain handles the slope. It is the most accessible layout available and it makes a compact bathroom read as a single volume. It also demands the most from the framing, because the floor has to be recessed or the whole bathroom built up, and the waterproofing becomes the entire floor rather than just the shower.

Completed Project

Marble-Look Porcelain and Matte Black Bathroom Remodel


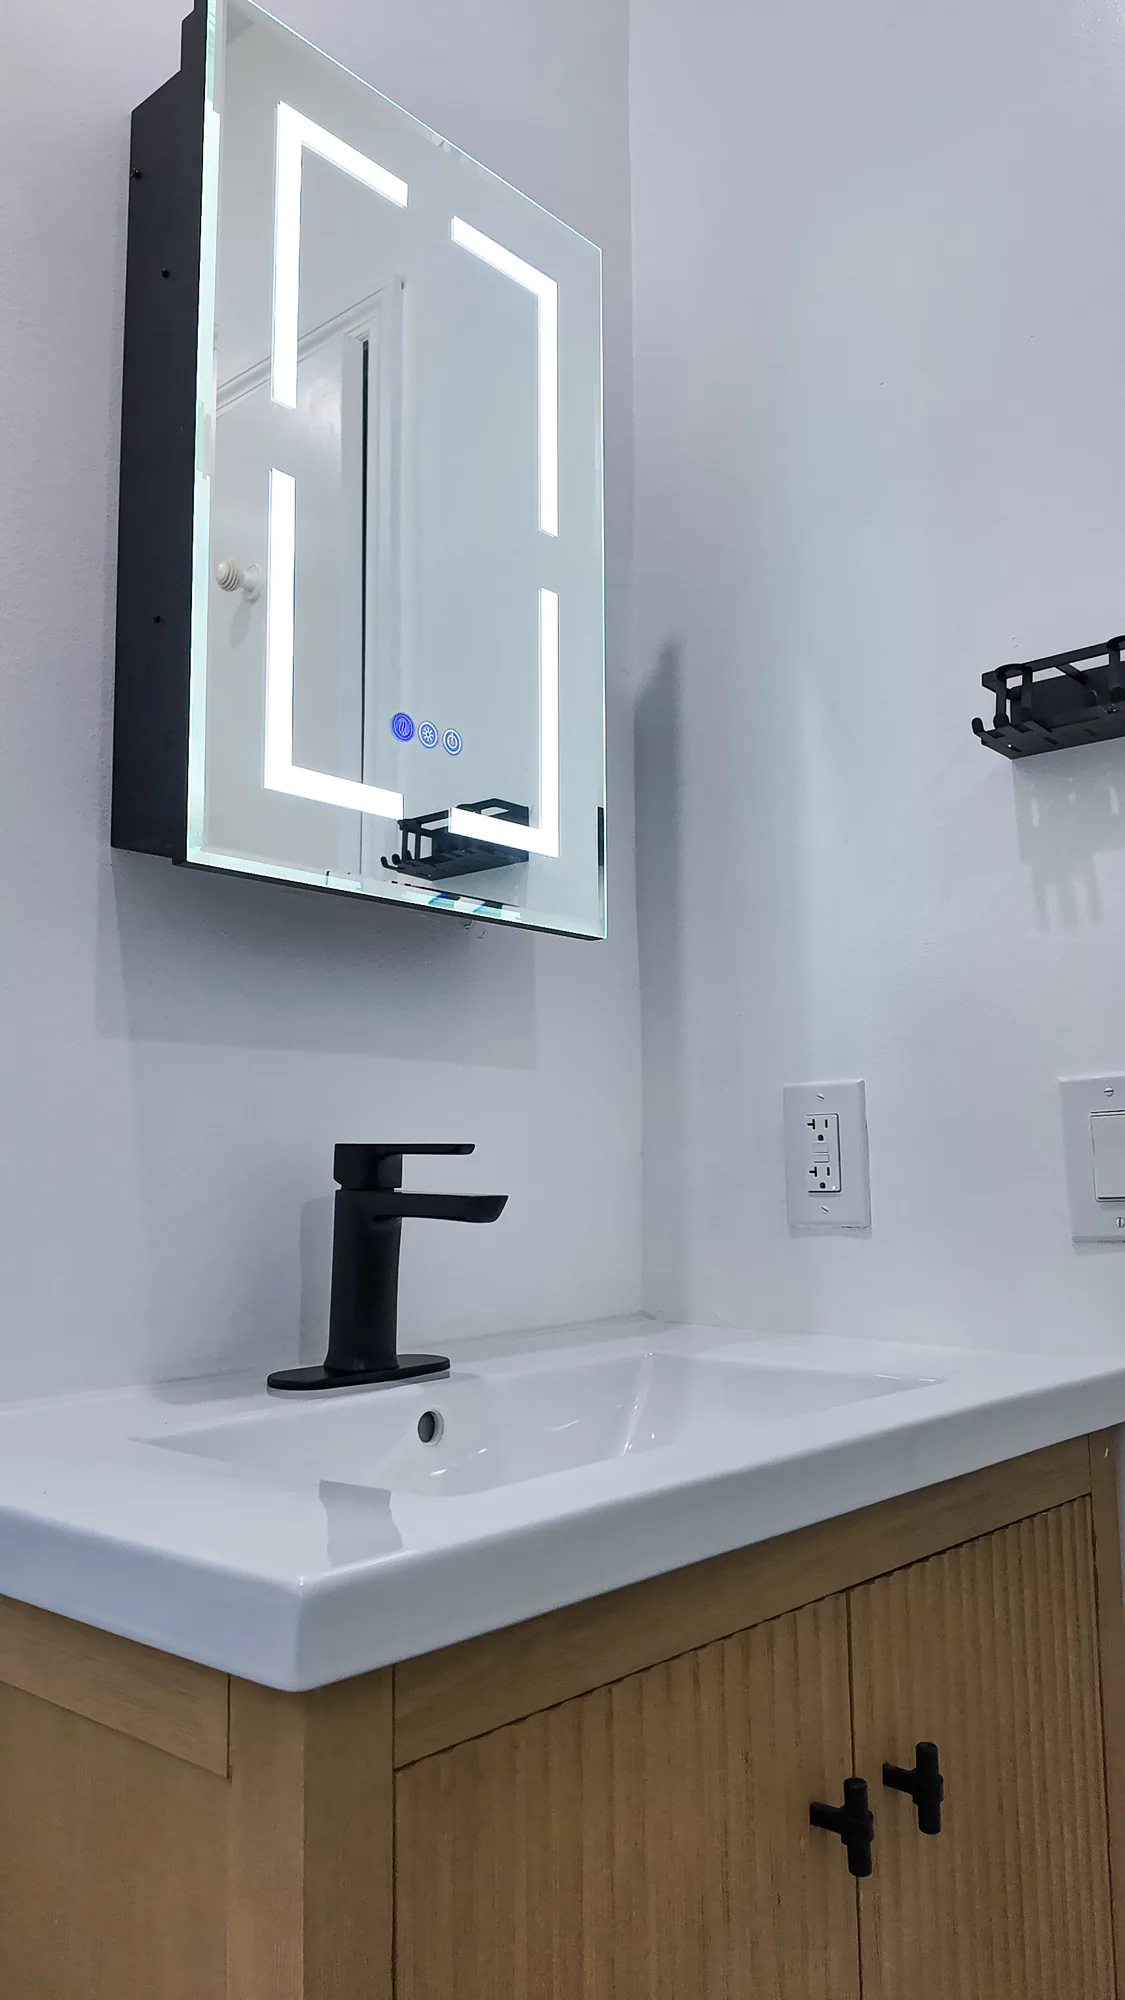
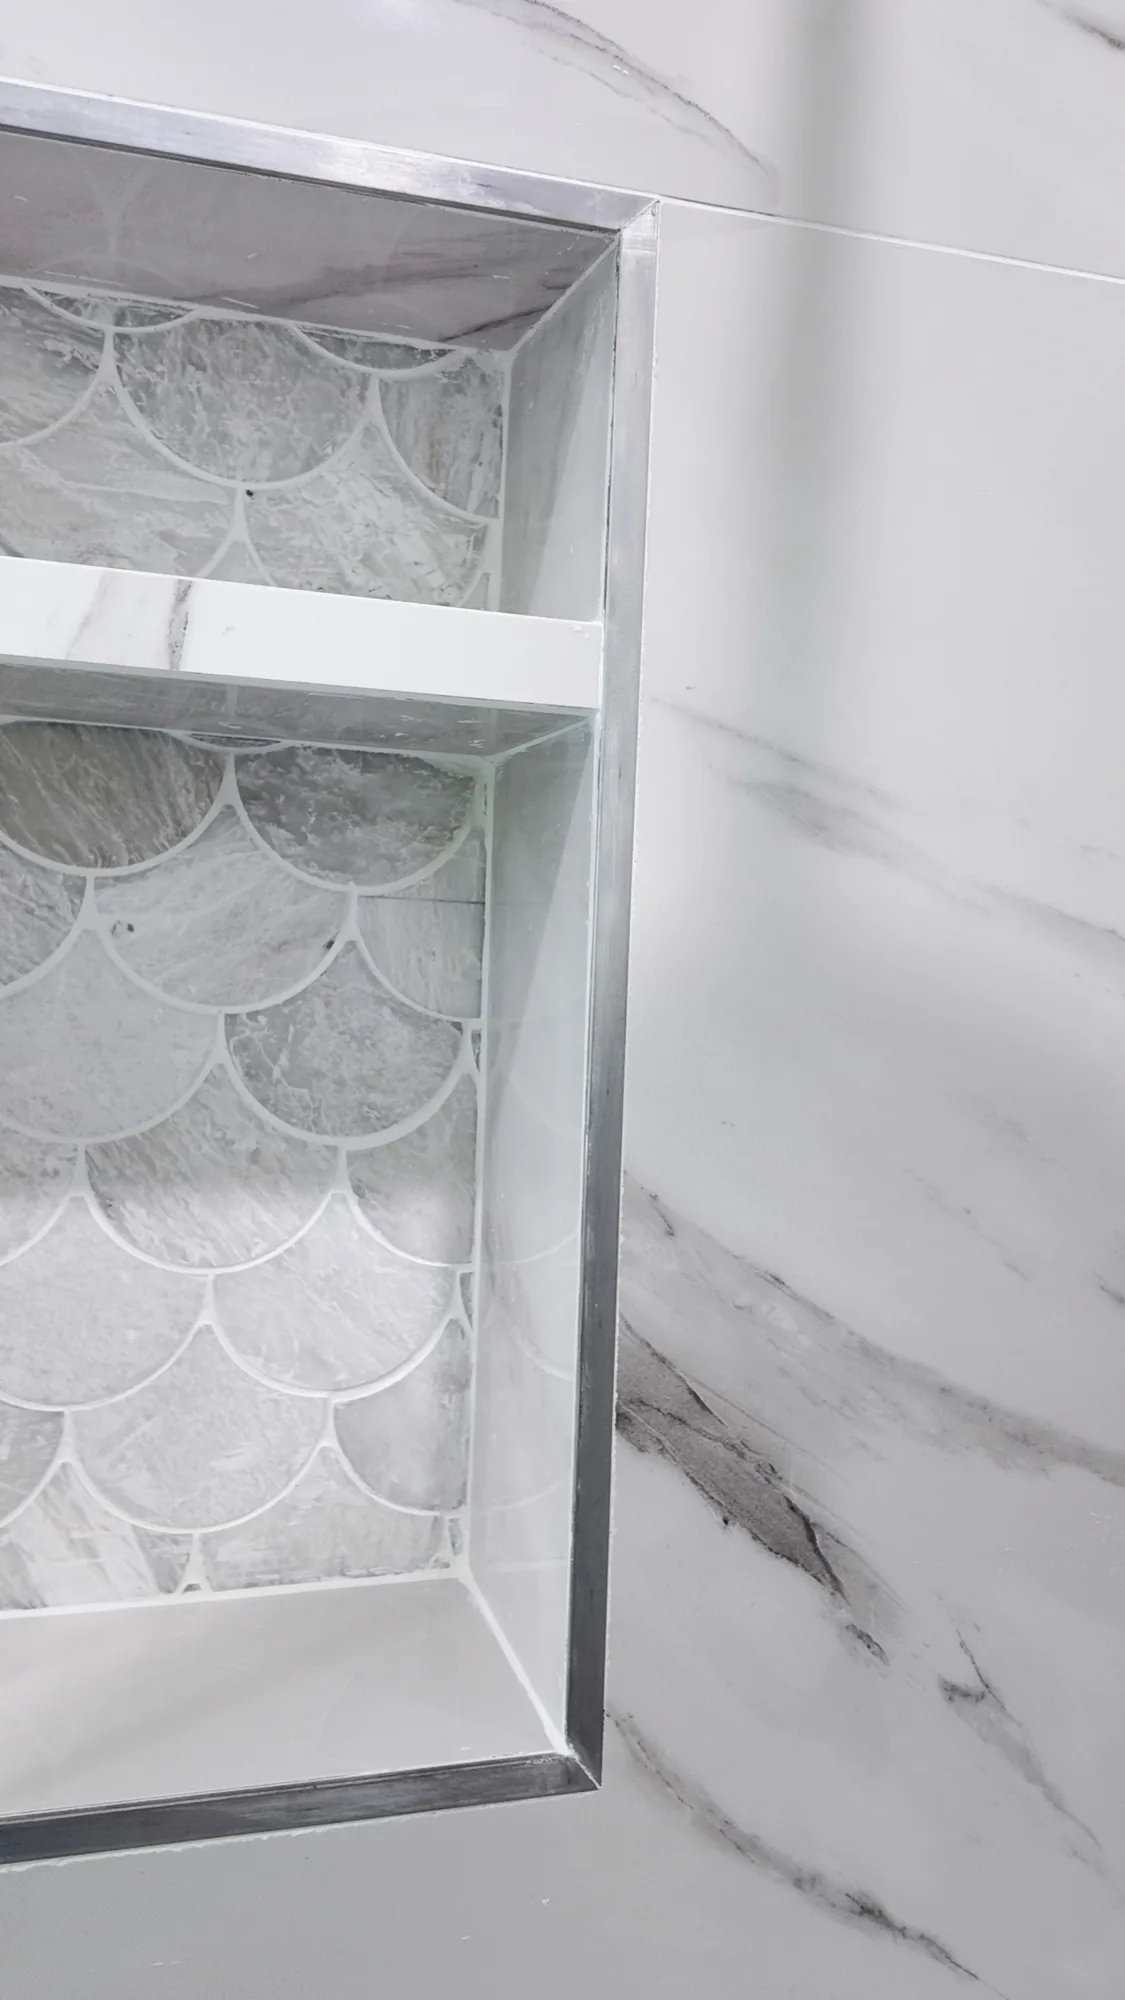
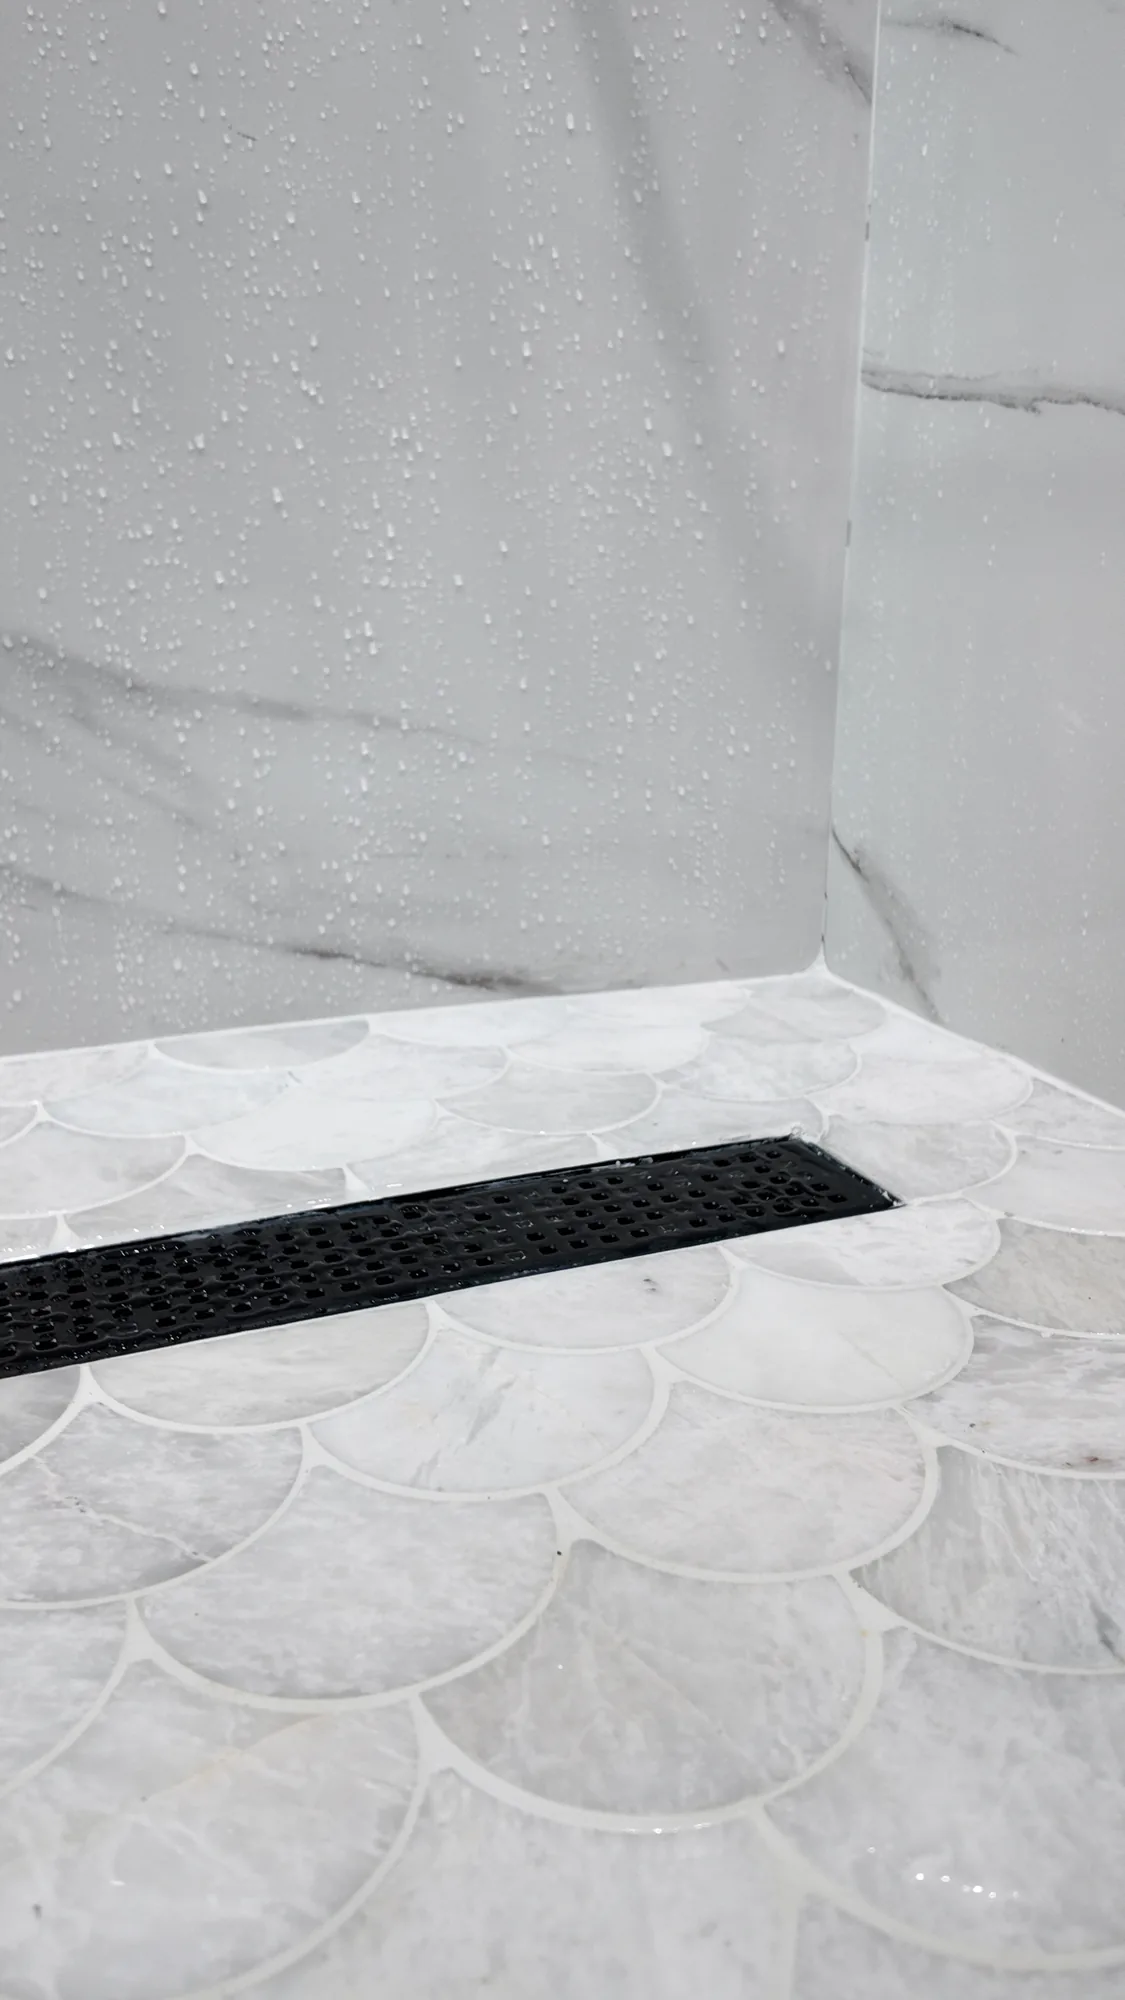
This full bathroom remodel pairs large-format marble-look porcelain wall tile with a fan-shaped stone mosaic shower floor and a consistent matte black fixture package. The shower was rebuilt with a frameless sliding glass enclosure on exposed black barn-style hardware, a wall-mounted rain head plus handheld on a slide bracket, two grab bars, and a linear drain set into the mosaic pan. A recessed shower niche was built with a metal-trimmed perimeter, a solid shelf, and the same scalloped mosaic carried across the back for a deliberate accent. The vanity wall received a fluted light-wood vanity with an integrated white basin top, a single-hole matte black faucet, and a backlit LED mirrored medicine cabinet, with black-and-wood open shelving and a matched accessory set. Tile layout, grout lines, corner miters, and niche trim are clean and square throughout, and recessed ceiling lighting was installed to wash the tile evenly.
Style: Modern

Work Completed

  • Full shower rebuild with large-format marble-look porcelain wall tile
  • Fan-shaped scalloped stone mosaic shower pan with black linear drain
  • Frameless sliding glass shower enclosure on matte black roller hardware
  • Wall-mounted rain shower head plus handheld shower on matte black trim
  • Recessed niche with metal edge trim, shelf, and mosaic tile back
  • Two matte black grab bars set into the tiled shower walls
  • Fluted light-wood vanity with integrated white basin and black faucet
  • Backlit LED mirrored medicine cabinet and recessed ceiling lighting

Materials & Finishes

  • Large-format marble-look porcelain wall tile
  • Fan-shaped scalloped grey and white stone mosaic floor tile
  • Matte black plumbing fixtures and shower trim
  • Clear tempered frameless sliding glass shower panels
  • Matte black linear shower drain grate
  • Metal niche edge trim
  • Fluted light-wood vanity cabinetry
  • Integrated white ceramic vanity top and basin
  • Backlit LED mirrored medicine cabinet
  • Black metal and wood open wall shelving
  • Matte black cabinet hardware, towel bar and paper holder
Marble-look tiled shower with sliding glass doors, matte black grab bars, rain head and recessed niche.
The shower elevation shows the sliding glass doors, twin grab bars, rain head and recessed niche.
Vanity wall with wood and black open shelves, a lighted mirrored cabinet and a white integrated sink.
The vanity wall balances open shelving, a backlit mirrored cabinet and the wood vanity below.
Close view of a recessed shower niche with a shelf, metal edge trim and scalloped stone mosaic back.
The built-in niche is trimmed in metal edging with a solid shelf and a scalloped stone mosaic back panel.
Black linear shower drain set into a scalloped stone mosaic floor beside marble-look wall tile.
A matte black linear drain runs along the base of the shower where the mosaic pan meets the wall tile.
Sliding glass shower door on black roller hardware with a rain head and grab bars on marble-look tile.
The frameless sliding glass enclosure runs on exposed matte black roller hardware.
Fluted wood vanity with a white integrated sink, black faucet and a lighted mirrored medicine cabinet.
A fluted light-wood vanity with an integrated white basin sits beneath a backlit mirrored medicine cabinet.
Completed Project

Copper Mosaic and Concrete-Look Tile Bath Remodel


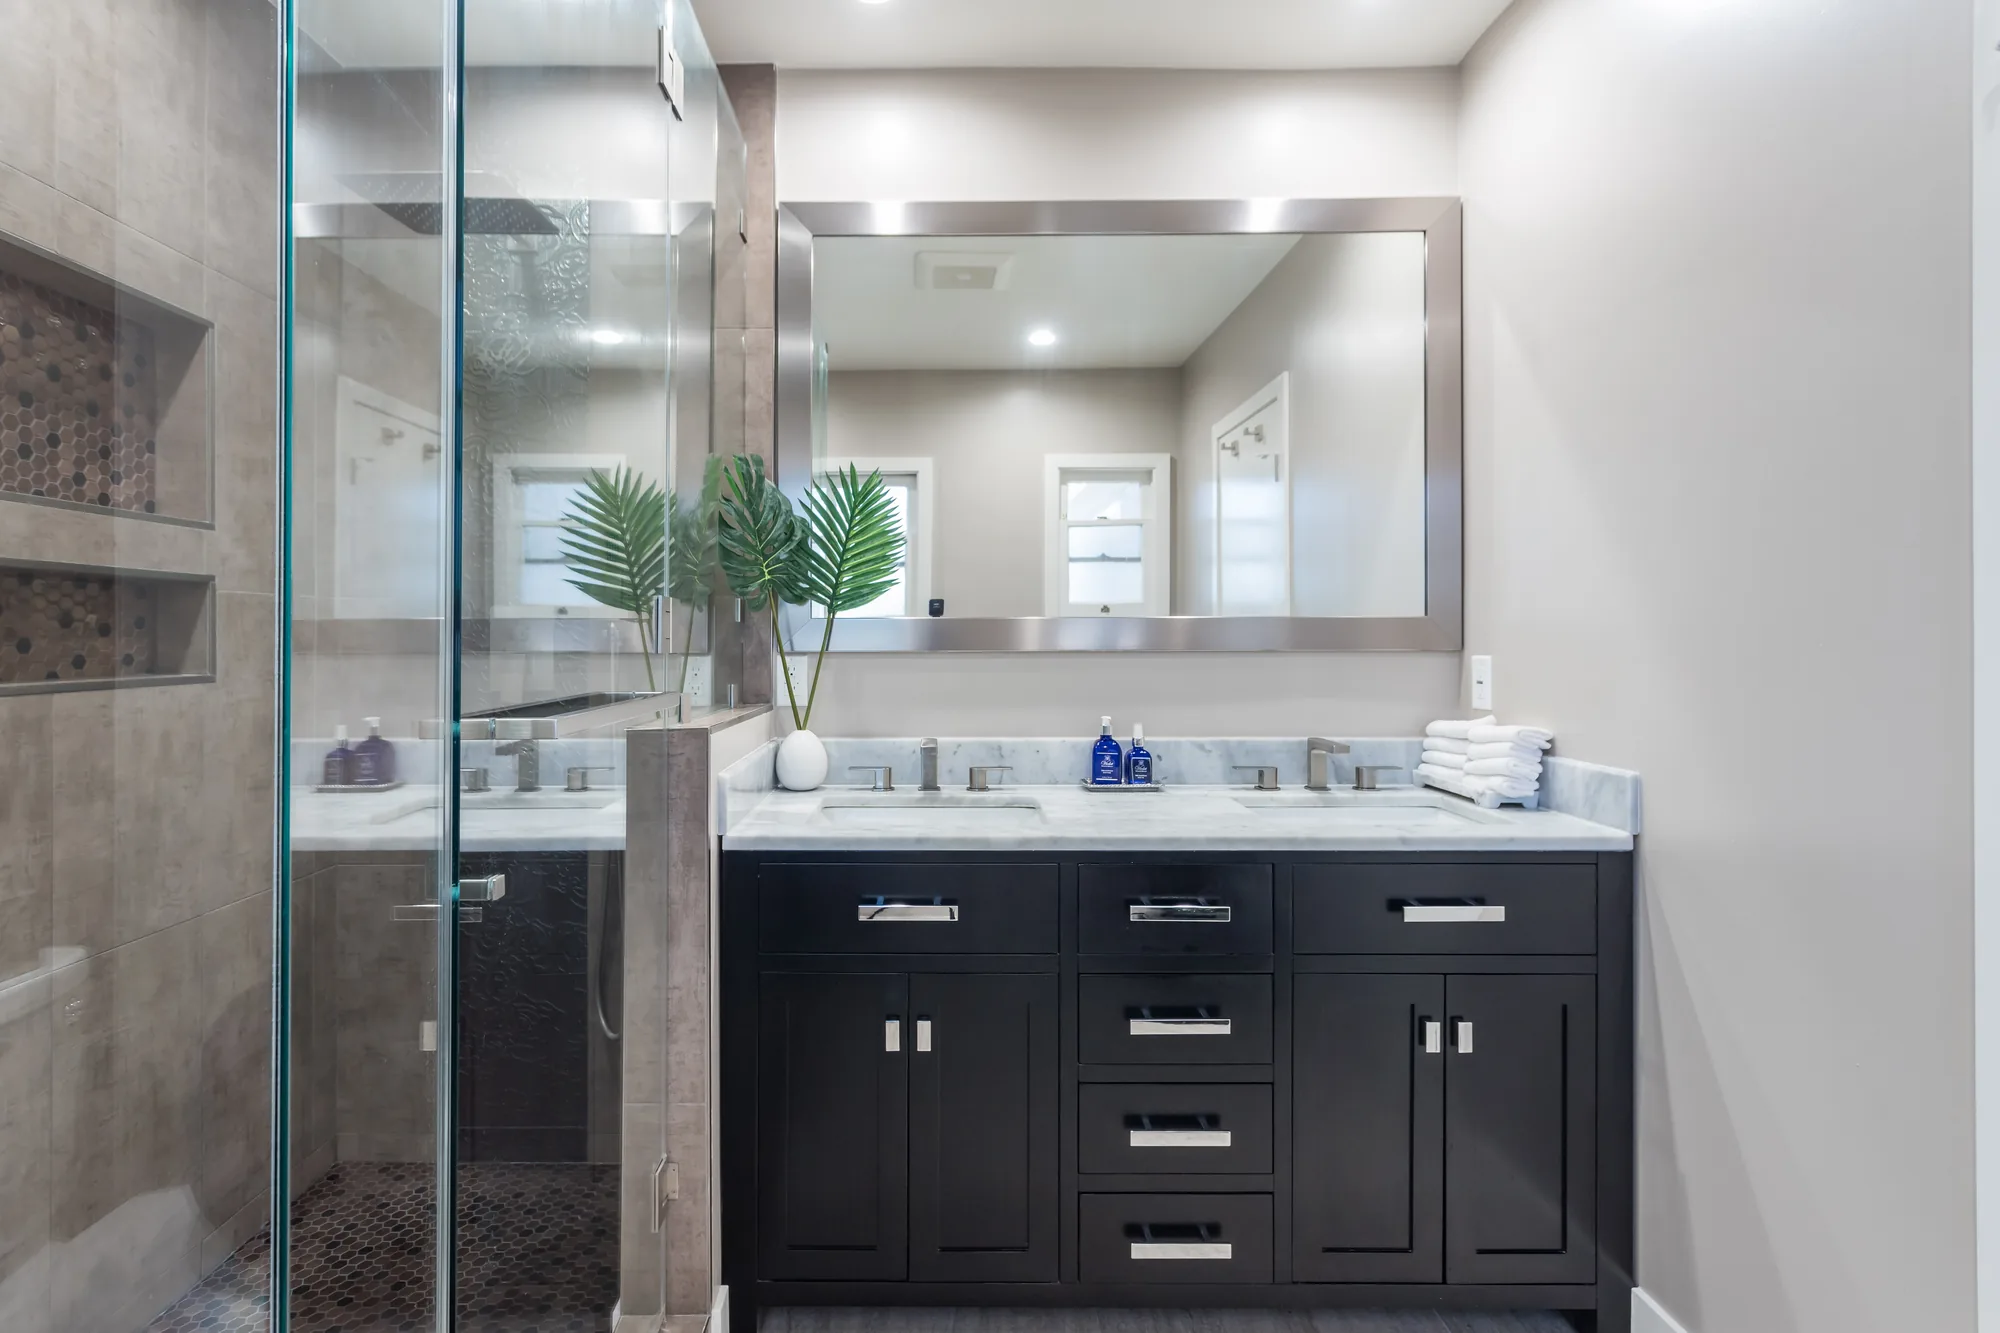
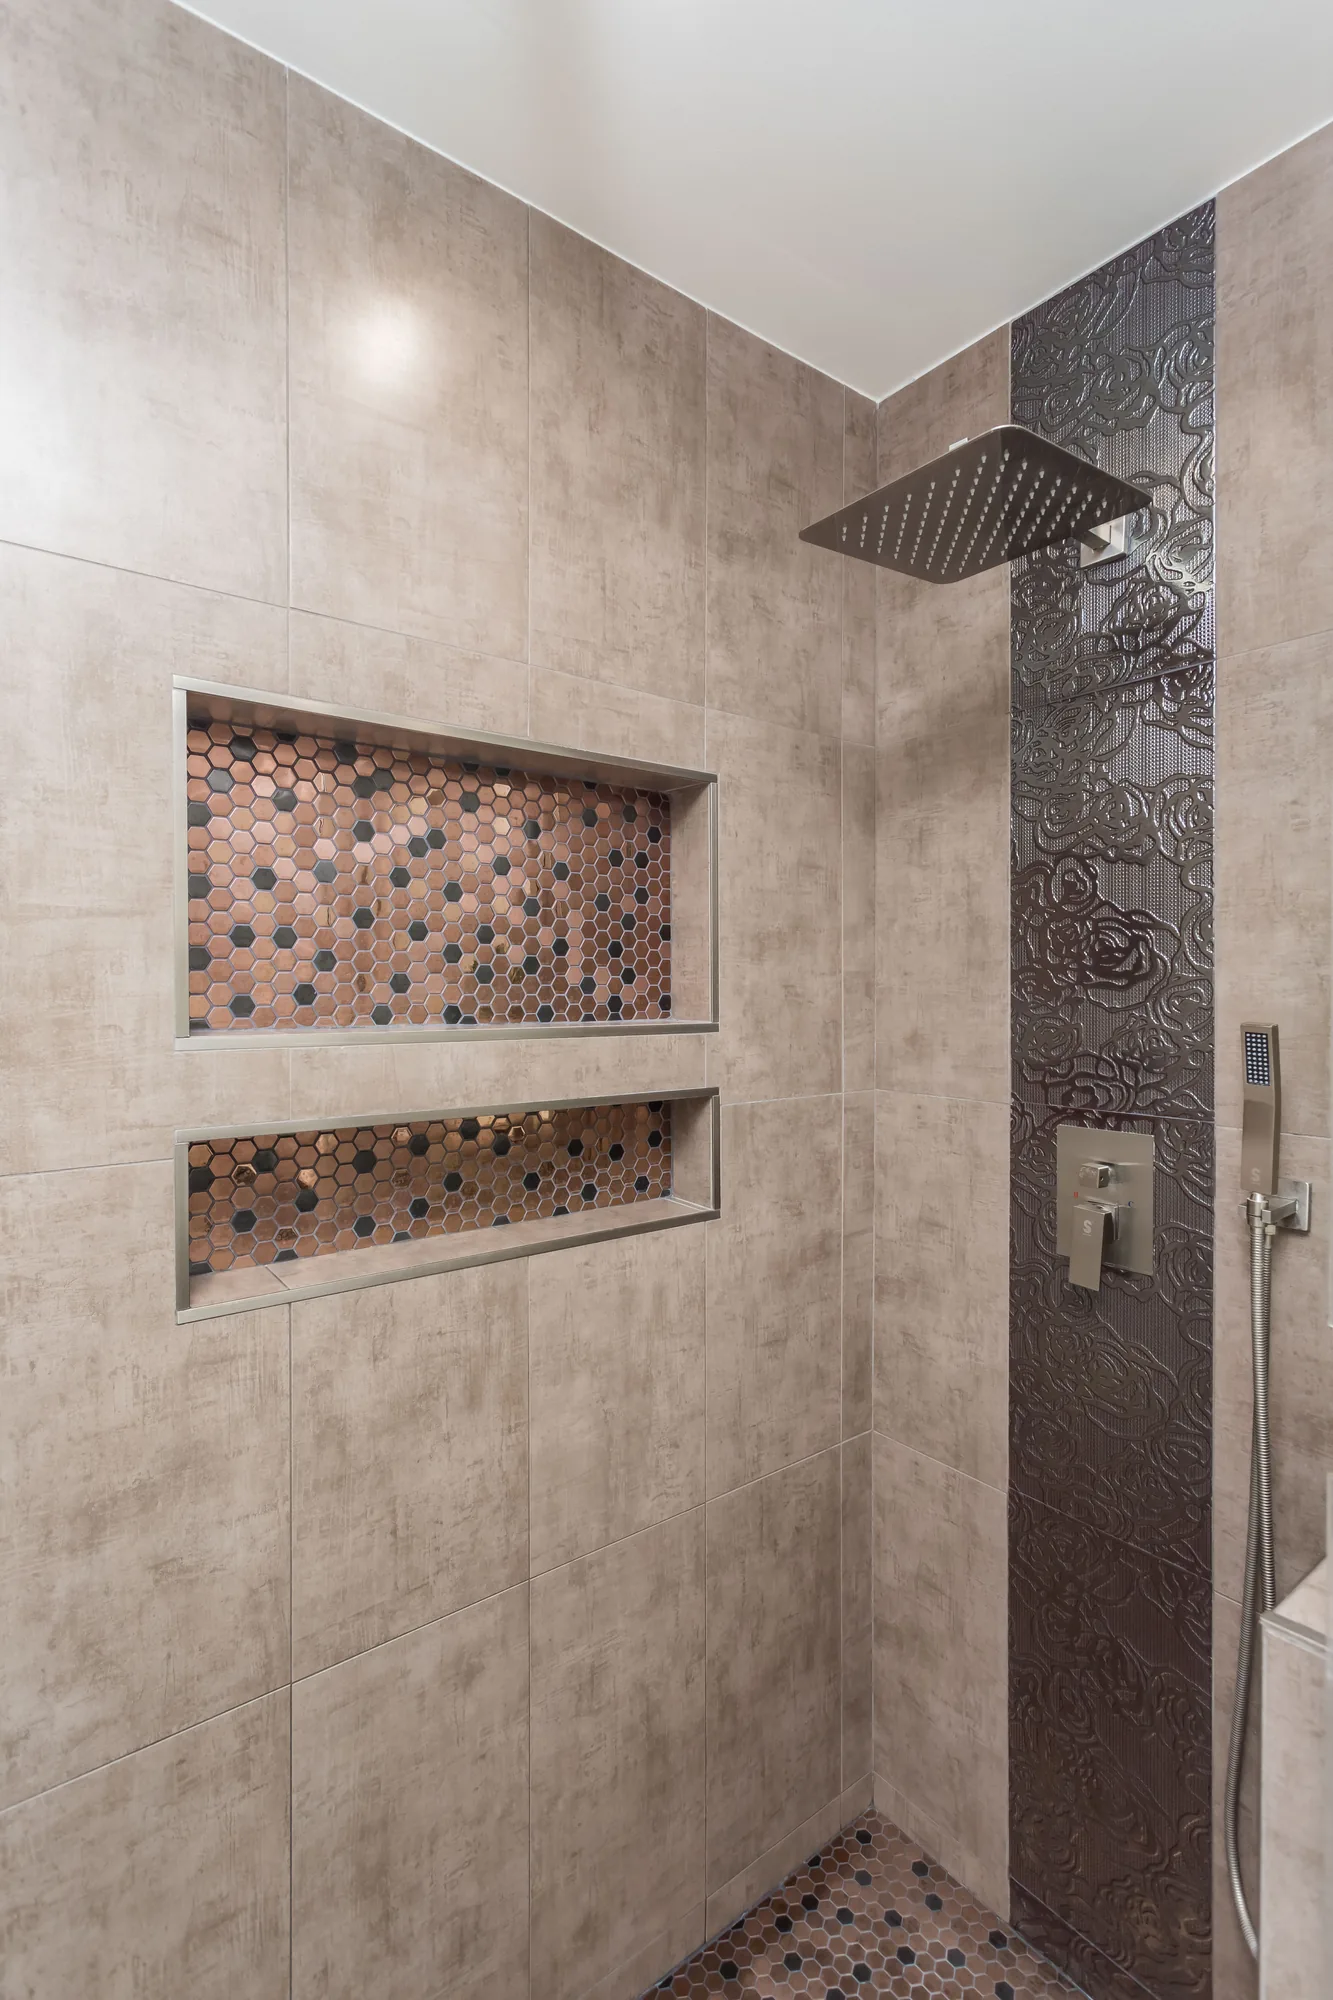
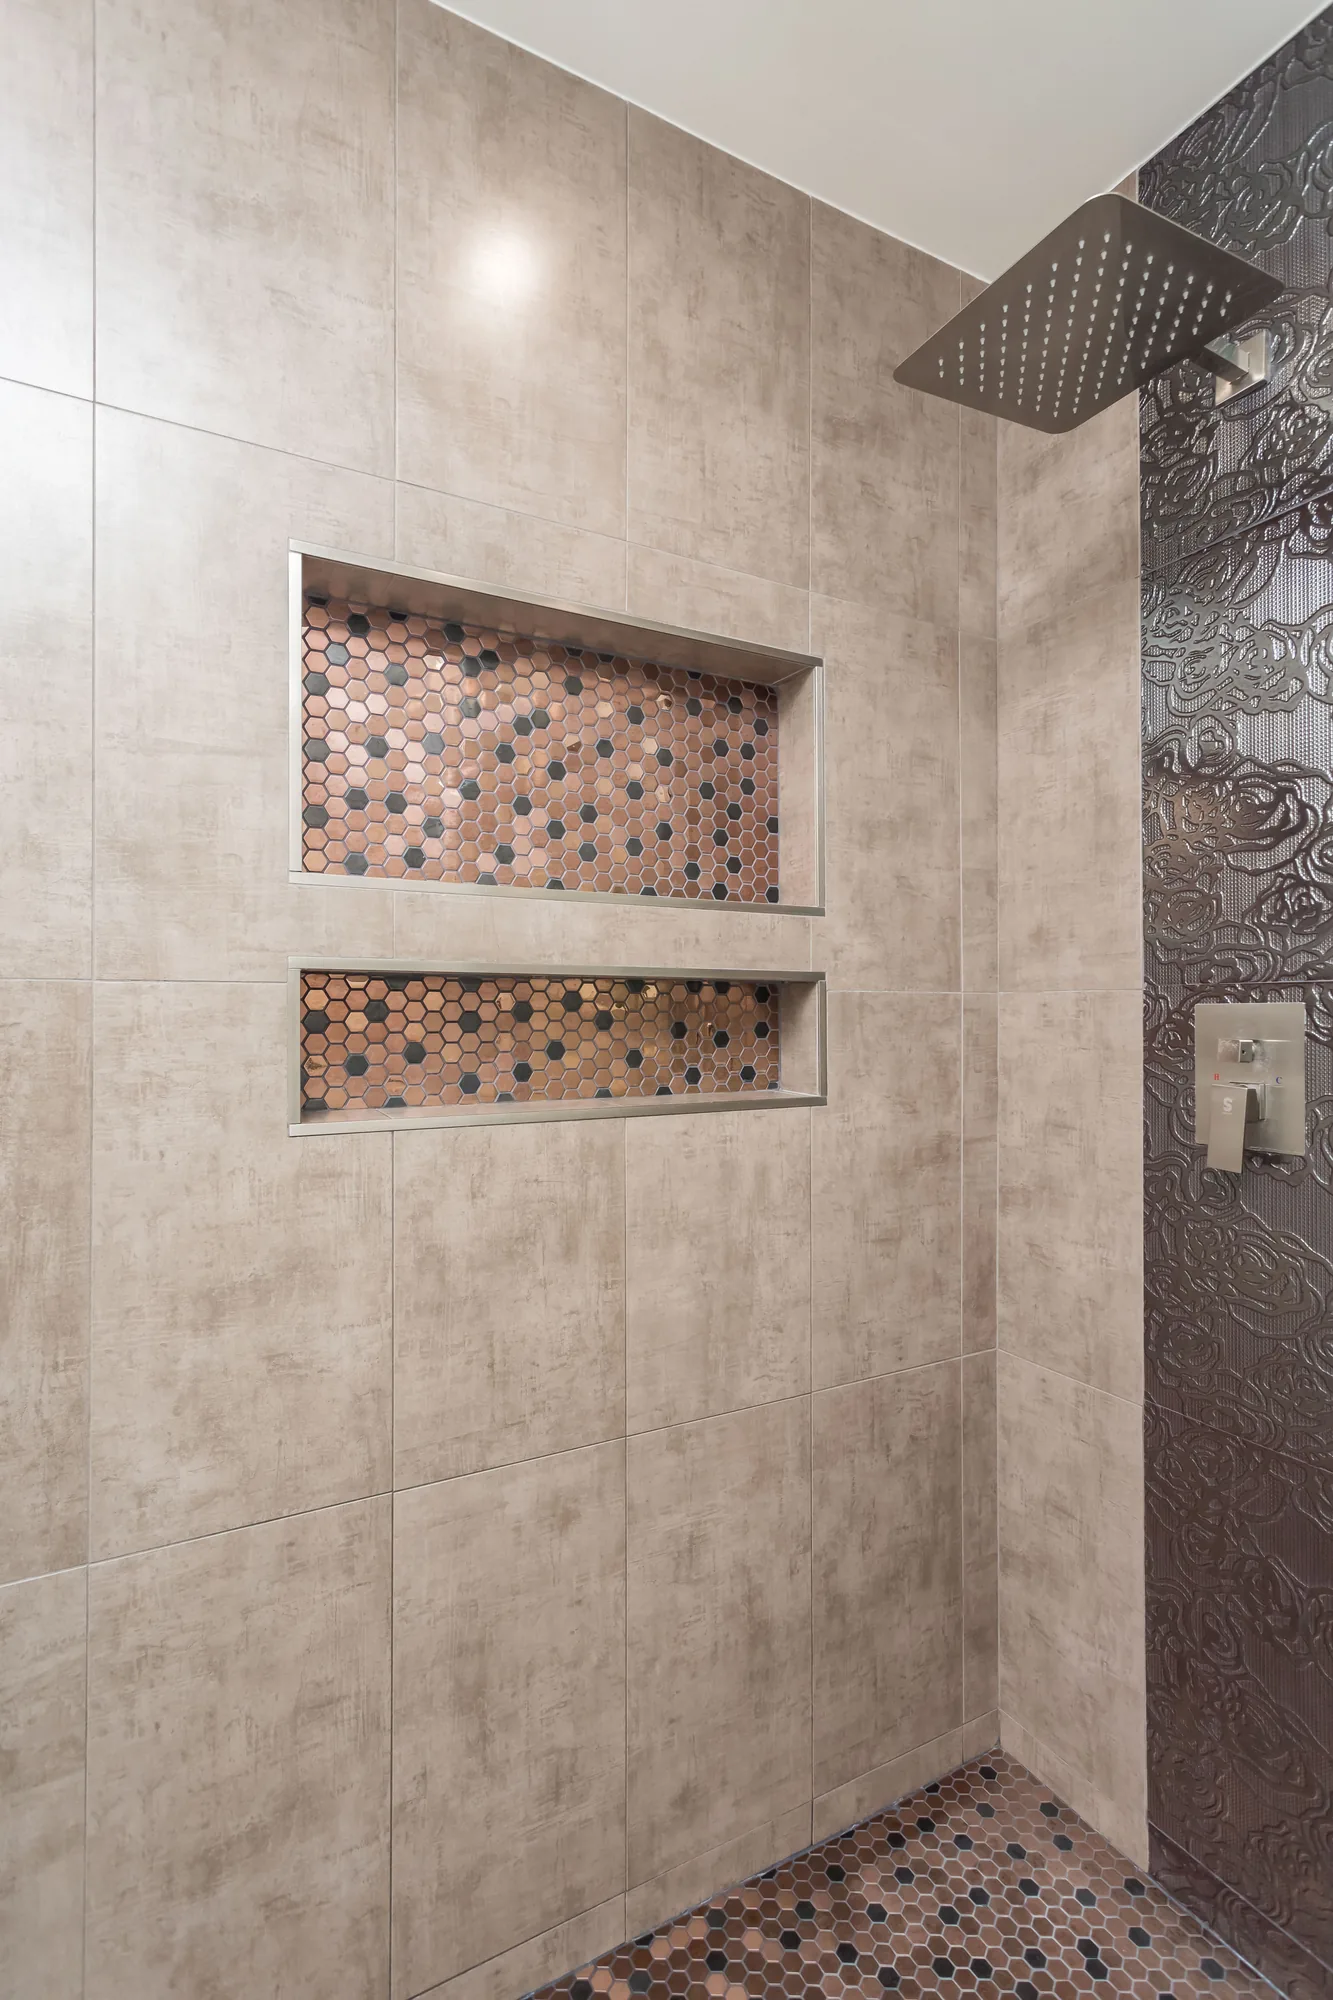
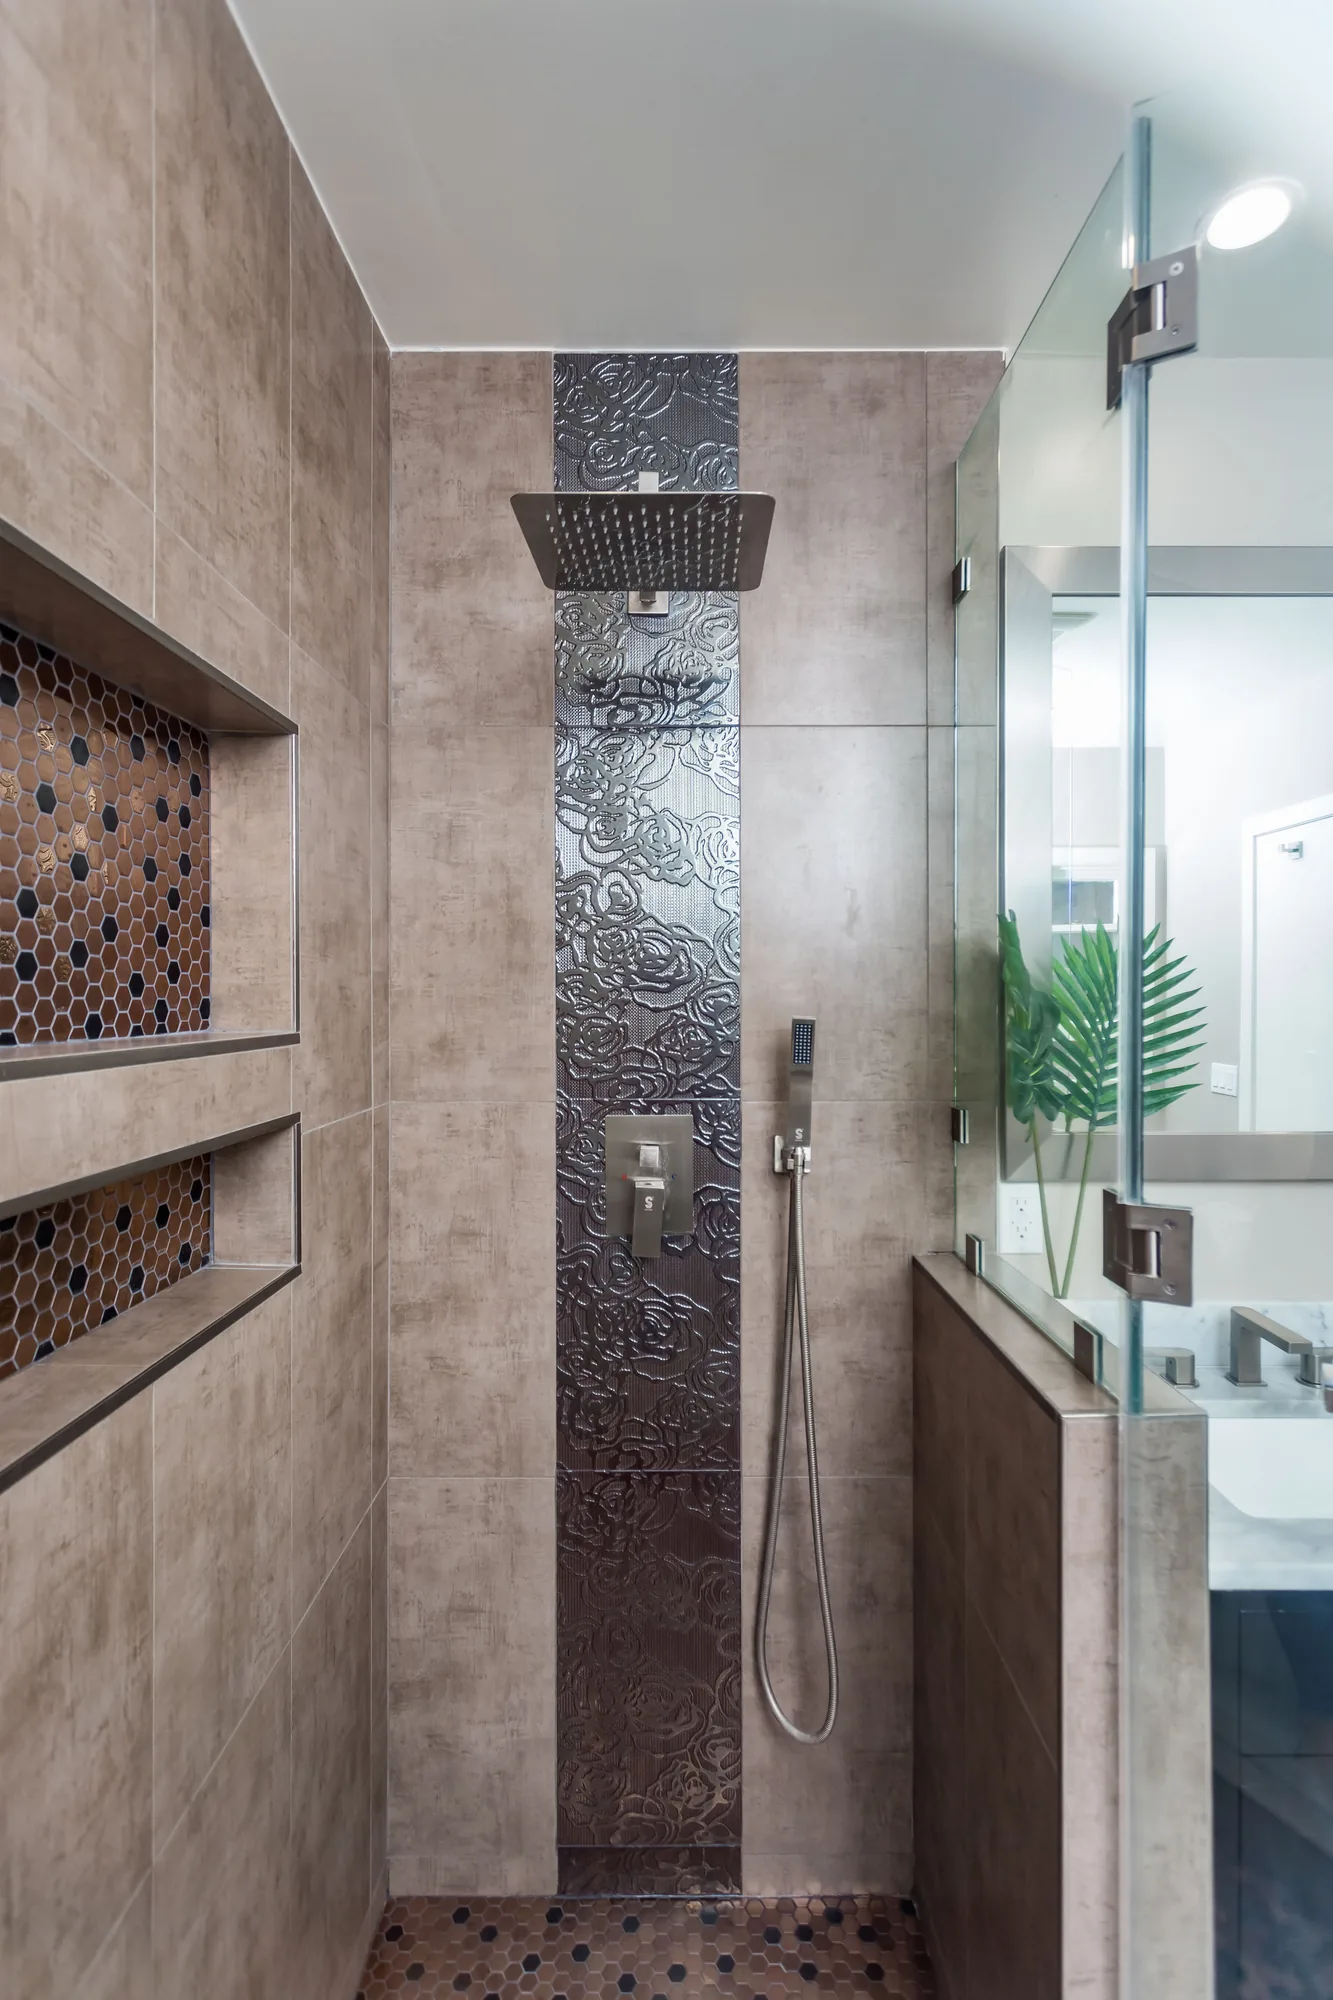
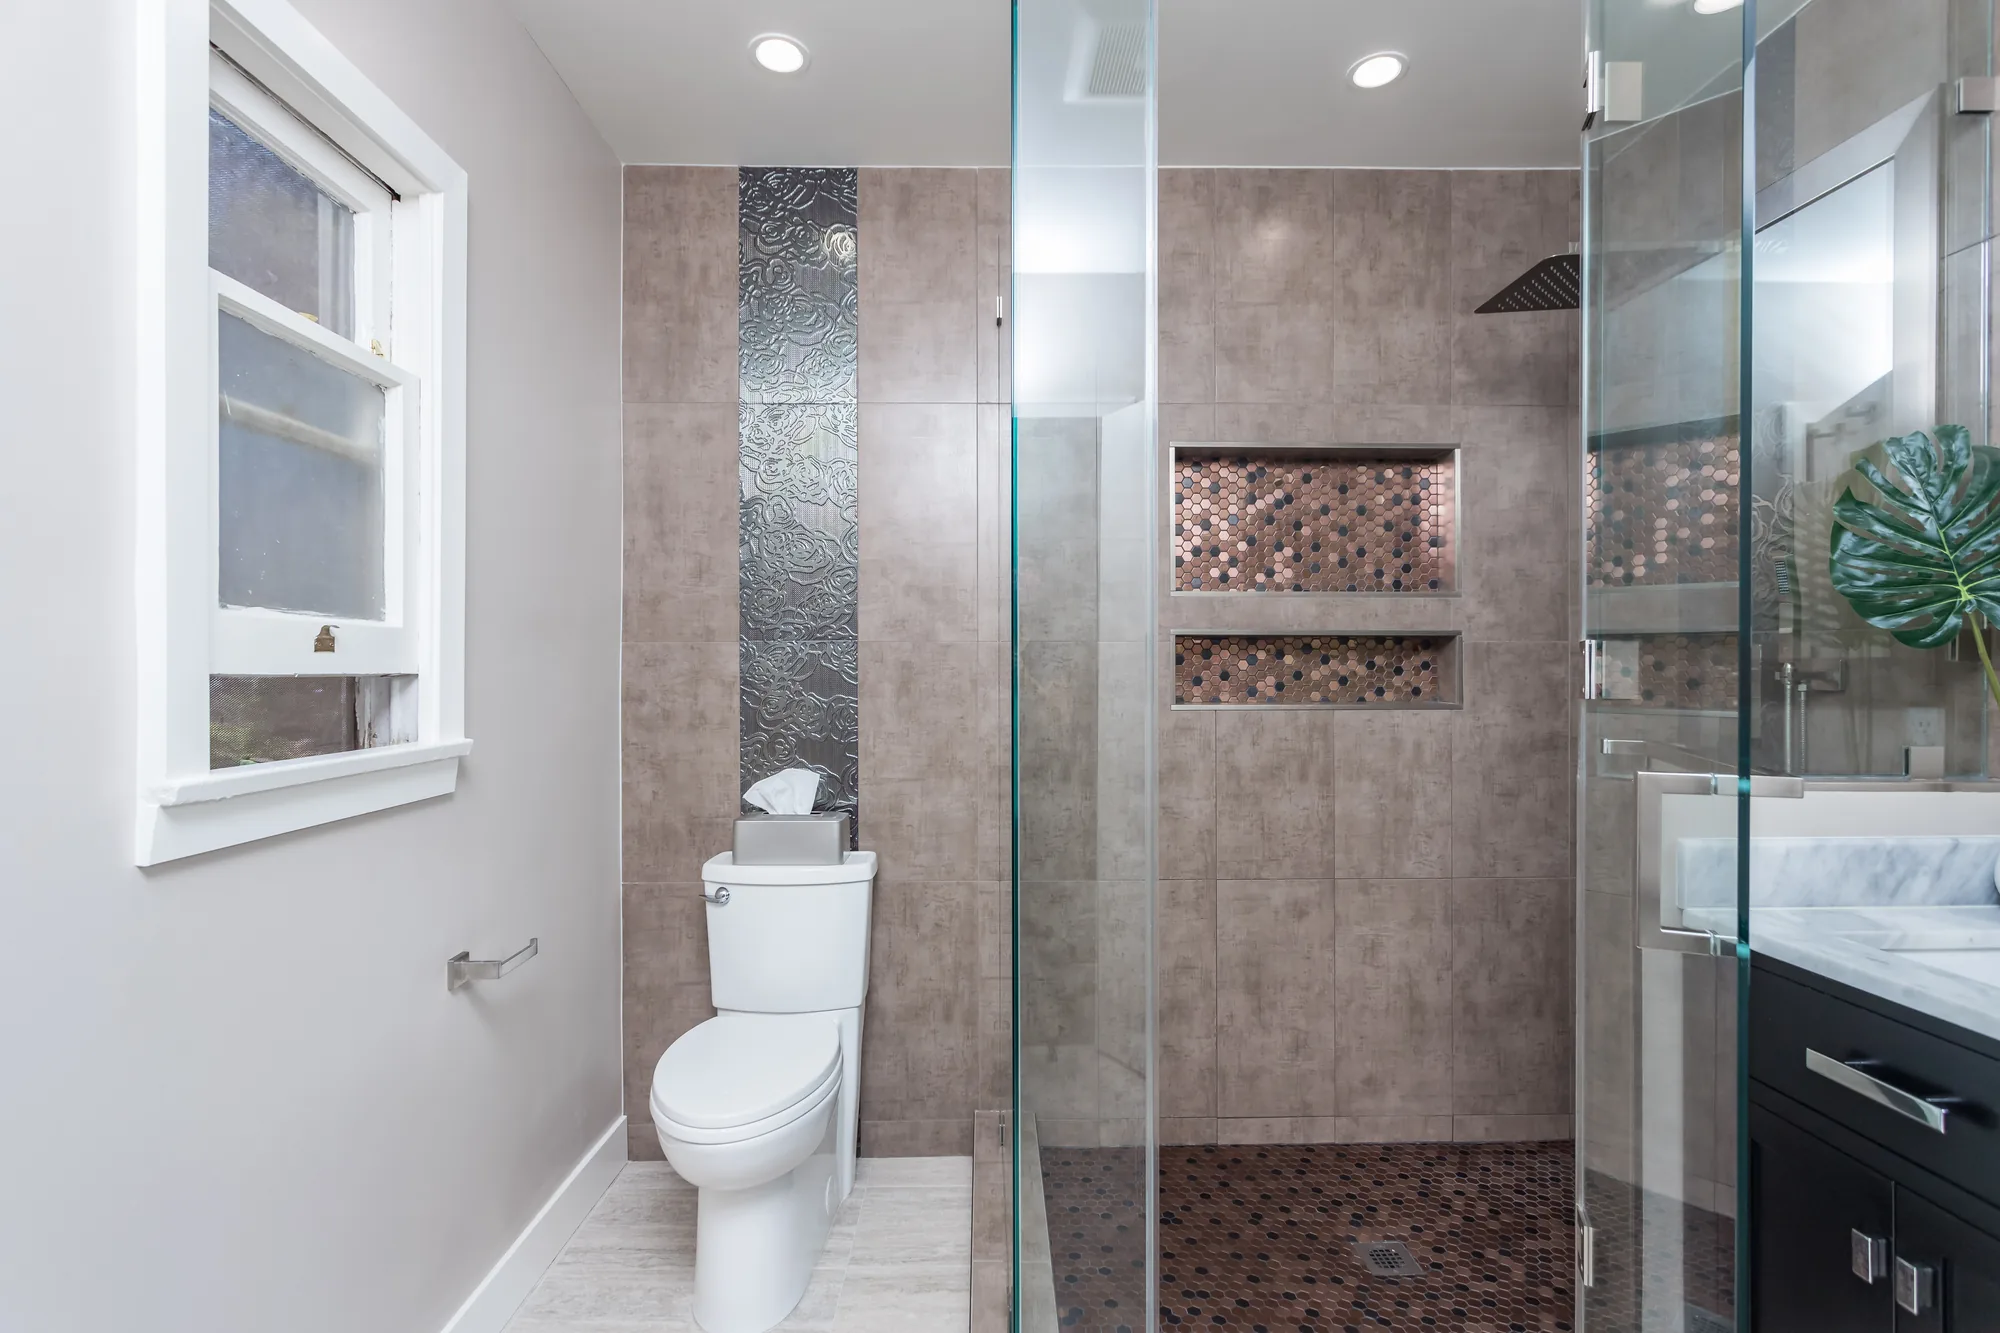
This full bathroom was rebuilt around a walk-in shower finished floor to ceiling in large-format concrete-look porcelain tile. The shower is enclosed with frameless clear glass and fitted with a square rain head, a wall-mount pressure-balance valve and a handheld sprayer on a hose, all in a brushed metal finish. Two stacked recessed niches were framed into the wet wall and lined with copper-tone hexagon mosaic, each edged in metal trim, and the same mosaic carries across the sloped shower pan to a square center drain. A vertical strip of dark embossed relief tile runs from ceiling to floor behind the shower fittings and repeats on the toilet wall to tie the two zones together. Opposite the shower sits a dark shaker-style double vanity with a light veined stone countertop, undermount sinks, brushed nickel widespread faucets and bar pulls, under a wide metal-framed mirror, with recessed can lighting overhead and light stone-look plank tile on the floor.
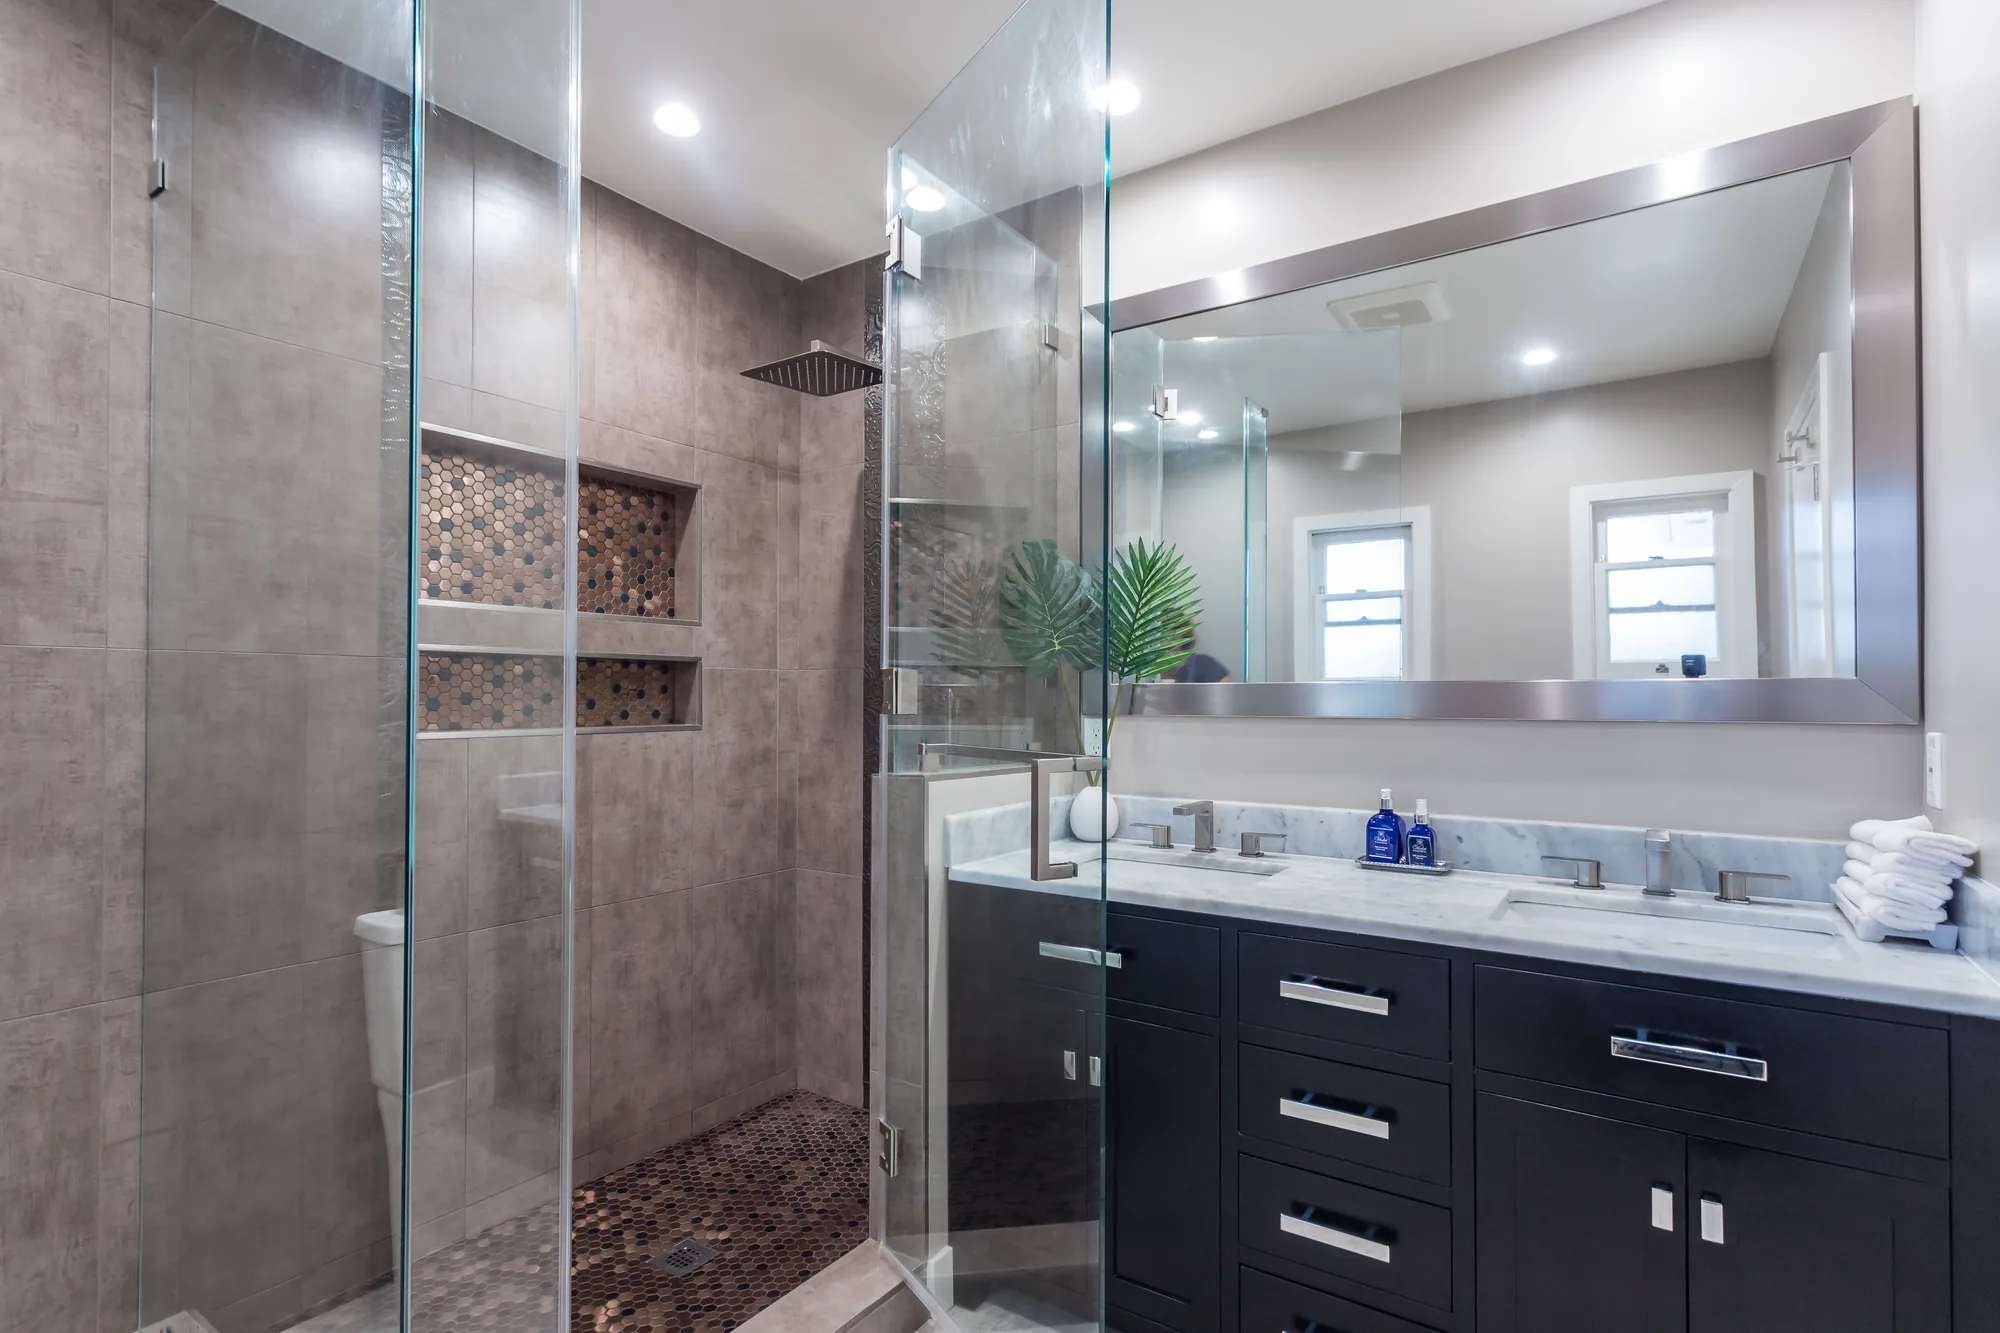
Style: Contemporary

Work Completed

  • Walk-in shower tiled floor to ceiling in large-format concrete-look porcelain
  • Two recessed shower niches built into the wet wall with metal edge trim
  • Copper-tone hexagon mosaic in both niches and across the shower pan
  • Frameless clear glass shower enclosure and fixed partition panel
  • Square rain shower head, wall-mount valve and handheld sprayer in brushed metal
  • Dark shaker double vanity with light veined stone countertop and undermount sinks
  • Wide metal-framed mirror with recessed can lighting above the vanity
  • Stone-look plank tile flooring carried through the room

Materials & Finishes

  • Large-format concrete-look porcelain wall tile
  • Copper-tone and charcoal hexagon mosaic tile
  • Dark embossed relief accent tile
  • Light veined stone-look countertop
  • Dark stained shaker cabinetry
  • Brushed nickel plumbing fixtures and cabinet hardware
  • Frameless clear glass shower panels
  • Metal-framed mirror
  • Light stone-look plank floor tile
  • Metal tile edge trim
Full bathroom with glass shower, tiled toilet alcove and dark vanity beside a frosted window.
The finished bathroom with the walk-in shower, toilet alcove and vanity all in one view.
Wide view of a remodeled bathroom with a walk-in glass shower and dark double vanity under a mirror.
The walk-in shower and the double vanity read as one continuous space from the doorway.
Dark shaker double vanity with a marble-look counter and framed mirror next to a glass shower.
A dark shaker double vanity anchors the wall opposite the shower.
Shower interior with two tiled niches, a square rain head and a dark textured tile accent stripe.
Two built-in niches sit opposite the fixture wall inside the shower.
Two recessed shower niches lined with copper-tone hex mosaic beside a rain shower head.
Both niches are framed square and lined with the same hexagon mosaic used on the floor.
Narrow walk-in shower with a rain head, handheld sprayer and mosaic tile floor.
The fixture wall combines a rain head, wall valve and handheld sprayer on one accent stripe.
What You Get

What the Work Actually Includes


Every bathroom floor installation we run covers the substrate work first and the finish material last.

Demolition and full substrate exposure

We remove the existing flooring down to the structural subfloor rather than burying it under another layer. That is the only point in the project where you can see rot at the toilet flange, a soft spot at the tub, or a previous leak that was patched over instead of repaired.

Subfloor repair and stiffening

Damaged panels are cut back to solid framing and replaced, and blocking or an added layer of plywood is used where deflection is outside the range a rigid finish can tolerate. Tile has almost no ability to bend, so the floor has to be made stiff before anything gets set on it.

Flattening and self-leveling

We check the floor plane with a straightedge and correct it with patching compound or a poured self-leveling underlayment. Large-format tile in particular demands a flat substrate, because any hump or dip shows up as lippage at the tile edges where you feel it with a bare foot.

Waterproofing and crack isolation

Depending on the layout we install a sheet or liquid membrane, an uncoupling mat, or a bonded shower pan tied into the surrounding floor. These layers manage the two things that break tile floors: water migrating into the substrate and the substrate moving independently of the tile.

Electric radiant heat

If you want a heated floor, the mat or cable is laid out, tested, and embedded before the finish goes down, with the thermostat and floor sensor coordinated with an electrician. Retrofitting heat later means tearing the floor out again, so this is a decision made at the planning table.

Setting, grouting and finish detailing

Layout is dry-laid and adjusted so cuts fall in balanced, unobtrusive places, then tile is set with full mortar coverage and back-buttered where the format calls for it. Grout, movement joints at the perimeter, transitions to adjoining rooms, and the toilet reset on a correctly sized flange all happen as part of the same scope.

Get Started

Find Out What Is Under Your Bathroom Floor

An on-site assessment tells you whether your project is a straightforward replacement or a subfloor repair. Call (206) 825-2773 to schedule a look at the room.

How We Work

How the Project Runs, Start to Finish


A bathroom floor is a short project with several unmovable waiting periods built into it.

1

On-site assessment

We walk the bathroom, check an access point below where one exists, and test the floor for flex and flatness. We are looking for soft spots at the toilet and tub, prior water damage, joist direction and spacing, and how the finished floor height will relate to adjoining rooms.

2

Material selection and layout planning

You choose the finish, grout color and any accent, and we set where the tile grid starts so cuts land in balanced positions. This is also when heated floor and curbless questions get settled, because both change what happens to the substrate.

3

Protection and demolition

Floors along the path of travel are covered, containment goes up to keep dust out of the rest of the house, and the fixtures that need to come out are disconnected. The old flooring comes up in full, and we document anything the assessment could not see.

4

Substrate correction

Rotted or damaged panels are replaced, fasteners are added where the subfloor was under-nailed, and the plane is corrected with patch or self-leveler. This is the step homeowners never see and the one that determines how the floor performs.

5

Membrane and heat installation

The waterproofing or uncoupling layer goes down and, if specified, the radiant mat is embedded and tested for continuity before and after it is covered. A heating element damaged during installation is nearly impossible to locate afterward, so it gets checked at each stage.

6

Setting the finish

Tile is dry-laid to confirm the layout, then set with the correct trowel and mortar for the format, with coverage verified by periodically pulling a tile back up. Cuts around the toilet flange, vanity and door casing are made to fit tightly rather than relying on caulk to cover a gap.

7

Grout, seal and cure

Grout goes in after the mortar has set, joints at the walls and at any change of plane get flexible sealant instead of rigid grout, and natural stone is sealed. The floor then needs undisturbed cure time before fixtures return and before it can take water.

8

Fixture reset and walkthrough

The toilet is reset on a flange at the correct height relative to the new floor, transitions and base are finished, and we walk the room with you in daylight. You get the material information and the maintenance approach for the specific grout and finish that were installed.

Watch the Work

A Closer Look at the Work


A short walkthrough of how a bathroom floor comes together, from substrate preparation through the finished surface.

Bathroom Project Highlights

Highlights from a completed bathroom remodel.

Bathroom Remodel — On-Site Clip 1

On-site footage from a completed bathroom remodel showing tile, fixtures and finished detail.

Materials & Finishes

Comparing the Realistic Material Options


Each of these is a legitimate bathroom floor; the right one depends on the room, the substrate and how you want to maintain it.

OptionBest ForConsiderationsRelative Cost
Porcelain tileNearly any bathroom, including wet rooms and heated floorsDense and effectively waterproof through the body; hard on dropped glassware and cold underfoot without radiant heatModerate
Ceramic tileGuest baths and powder rooms on a controlled budgetSofter and more absorbent than porcelain, so it is less suited to curbless showers or heavy-traffic family bathroomsLow to moderate
Marble and limestoneMaster bathrooms where a natural material is the design pointPorous and reactive to acids, needs resealing on a schedule, and polished finishes get slick when wet; honed is the safer bathroom choiceHigh
Slate and quartziteBathrooms that need real slip resistance and a rustic textureNatural cleft surface grips well but is harder to keep clean, and some slate flakes over time depending on the quarryModerate to high
Rigid-core luxury vinylBasement baths, rentals, and rooms where warmth and quiet matterWaterproof at the plank but not at the seams under standing water; needs a flat substrate and should not sit under a curbless showerLow to moderate
Sheet vinylUtility bathrooms, laundry-adjacent baths and fast turnaroundsSeamless across the field so it handles spills well, but it dents under fixture legs and cannot be spot-repairedLow
Poured concrete-look toppingModern designs wanting an uninterrupted monolithic floorNo grout lines to maintain, but it is a specialty install with a longer cure and demands careful crack-control detailingHigh

final material choice depends on site conditions and a written estimate

Why Sky Pro

Reasons Homeowners Hand Us This Work


Flooring is one of the easiest trades to make look acceptable on day one and one of the hardest to make last.

We open the floor before we price the finish

Estimating a bathroom floor without knowing what sits under the old vinyl is guesswork. We identify the substrate work during the assessment so the number you approve reflects the actual condition of your floor rather than a best case.

Preparation is not the line item we cut

When a budget is tight, the tempting move is to skip leveling or the membrane because nobody sees them. We would rather adjust the finish material than the assembly underneath it, because the assembly is what determines whether the floor survives.

Layout is planned, not improvised

We set the grid so cuts fall in balanced places, sightlines from the door read straight, and you do not end up with a sliver tile against the most visible wall. It costs planning time and no extra material.

Familiarity with older Eastside floors

Mid-century homes around Bellevue and Kirkland and the older Seattle neighborhoods share a predictable set of conditions: plank subfloors, layered flooring, undersized framing, and past leaks around cast-iron waste lines. Knowing what to expect shortens the surprise list.

Coordination with the rest of the bathroom

Flooring rarely happens in isolation. We sequence it against the vanity, shower and wall tile so the floor is not installed too early to survive the rest of the work or too late to fit under the fixtures already set.

Straight answers about maintenance

Different grouts, sealers and stone types have genuinely different care requirements, and the wrong routine will ruin good material. You finish the project knowing what was installed and what it needs, not holding a generic care sheet.

Investment

What Drives the Cost of a Bathroom Floor


Two bathrooms of identical size can land far apart, and the reasons are usually below the tile.

Cut count versus square footage

Bathrooms are small rooms full of obstacles: toilet, vanity, tub apron, door casing, sometimes a linen closet. A bathroom has a far higher ratio of cut tiles to field tiles than any other room, and cutting is labor, so area alone is a poor predictor of effort.

Condition of the subfloor

A sound, flat plywood subfloor needs little more than cleaning and a membrane. A floor with rot at the flange, three layers of old vinyl, or a plank subfloor that has to be sheathed over turns into structural work before any flooring starts.

Material format and tolerance

Large-format tile and long plank tile require a flatter substrate than mosaic does, which means more leveling compound and more time on the preparation. The same material in a smaller format can meaningfully reduce what the floor demands underneath.

Extent of waterproofing

A conventional floor with a tub or curbed shower needs waterproofing in defined areas. A curbless wet room extends the membrane across the whole bathroom and adds recessing or building up the floor, which is a different scope entirely.

Radiant heat and electrical work

A heated floor adds the mat or cable, the embedding layer, a dedicated circuit and a thermostat with a floor sensor. The heating material is only part of it; whether your panel has capacity and how far the circuit has to run affects the electrical side.

Fixture and plumbing coordination

Raising the floor height changes the relationship between the toilet flange and the finished surface, and an extender or a flange reset is often required. Removing and resetting a vanity, moving a floor register, or planing a door that no longer clears all add scope.

We do not quote bathroom flooring over the phone or from photographs. Substrate condition, floor height relationships and layout obstacles are only knowable in the room, so accurate pricing requires an on-site inspection followed by a written estimate that itemizes preparation separately from finish material.

Start Your Project

Ready to Talk Materials and Layout?

Bring us your ideas and we will walk through what your bathroom’s substrate, height relationships and daily traffic realistically support. Reach us at (206) 825-2773.

Common Questions

Frequently Asked Questions


Can I install real hardwood or laminate in a bathroom?

Solid hardwood and traditional laminate are poor choices for a full bathroom, though hardwood can work in a powder room with no tub or shower. Wood moves with humidity and laminate’s fiberboard core swells irreversibly once water reaches a seam, and bathrooms in this climate stay damp long after the exhaust fan shuts off. If you want the look of wood, wood-look porcelain plank or a rigid-core vinyl gives you the appearance without the failure mode. Engineered wood is more stable than solid but still not something we would put directly adjacent to a shower.

Is a heated floor worth it in the Seattle area?

It is one of the few upgrades homeowners here consistently say they would do again. Our winters are not extreme, but they are long, damp and grey, and a heated tile floor removes the single thing most people dislike about tile. It also helps the room dry faster after a shower, which matters in bathrooms with marginal ventilation. The practical catch is that it has to be installed with the floor, so the decision belongs at the planning stage rather than after demolition.

How long before I can use the bathroom again?

Plan on the bathroom being out of service for the better part of a week for a straightforward floor, and longer if the subfloor needs real repair. The install itself moves quickly, but mortar and grout have cure times that cannot be shortened, and stone sealers need their own window. Setting a toilet back down too early or running water over green grout is how a good installation gets compromised on the final day. We give you a specific date at the start rather than a vague range.

Do you have to remove the toilet and vanity?

The toilet always comes out. Tiling up to a toilet base instead of under it leaves a visible cut line, traps moisture at the edge, and means the floor has to be cut apart the next time the toilet is replaced. The vanity depends on the design: a freestanding or furniture-style vanity generally gets removed so the floor runs continuously underneath, while a built-in cabinet with the new flooring scribed to it can sometimes stay. We confirm this during the assessment because it affects both the schedule and the plumbing.

How do I keep a tile floor from being slippery when wet?

Choose the finish and the format for traction instead of relying on a bath mat. Tile carries a wet slip-resistance rating, and honed, matte and textured surfaces perform substantially better than polished ones; polished marble is the worst common offender. Smaller tile formats also help, because the grout lines themselves add grip, which is why mosaic has been standard in wet areas for generations. Tell us during selection if anyone in the household has mobility concerns and we will steer the options accordingly.

Can you install new flooring over the existing floor?

Sometimes it is physically possible, but it is rarely the right call in a bathroom. Every layer you add raises the finished height relative to the toilet flange, the door, the tub apron and the adjoining room, and it hides whatever damage exists underneath. The floors we get called to replace prematurely are very often the ones that were installed over something else. We take it down to the structural subfloor so we can see and correct what is actually there.

Why does grout crack, and can it be prevented?

Cracked grout almost always means movement, not bad grout. If the subfloor deflects under load, or the substrate expands and contracts at a different rate than the tile, that stress has to go somewhere and the grout is the weakest link. The fixes are structural and preventive: stiffen the floor before setting, install an uncoupling membrane so the tile and substrate can move independently, and use flexible sealant instead of grout at the perimeter and at every change of plane. Regrouting a floor that still moves only resets the clock.

Do I need a permit to replace bathroom flooring in Bellevue?

A straight like-for-like floor replacement generally does not require a permit, since it is a finish material rather than structural or system work. Permits come into play when the project touches something else: relocating plumbing, altering framing, adding an electrical circuit for radiant heat, or recessing a floor for a curbless shower. Requirements differ between the City of Bellevue, neighboring Eastside cities and unincorporated King County. We identify what your specific scope requires before work starts rather than discovering it mid-project.

Client Reviews

What Our Clients Say


Service Areas

Bathroom Floor Installation Across the Eastside


We install bathroom flooring throughout Bellevue and the surrounding Eastside communities, including Kirkland, Redmond, Sammamish, Issaquah, Bothell and Mercer Island, along with Seattle and the north end. Working across that range of housing stock means we move regularly between mid-century homes with plank subfloors and newer construction built on long-span engineered framing.

Do not see your neighborhood? Call (206) 825-2773 — we regularly work throughout King County.

Where We Work

Serving Bellevue and the Greater Seattle Area


Our service area covers Bellevue and the Eastside, extending into Seattle and the surrounding King and Snohomish County communities.

Contact Us Today

Request a Bathroom Flooring Consultation


Tell us about your bathroom and what you are hoping to change. We will follow up to arrange a visit and provide a written estimate that separates preparation work from finish materials.

Appointment Request Form

Let us know how we can help you!

Click To Call