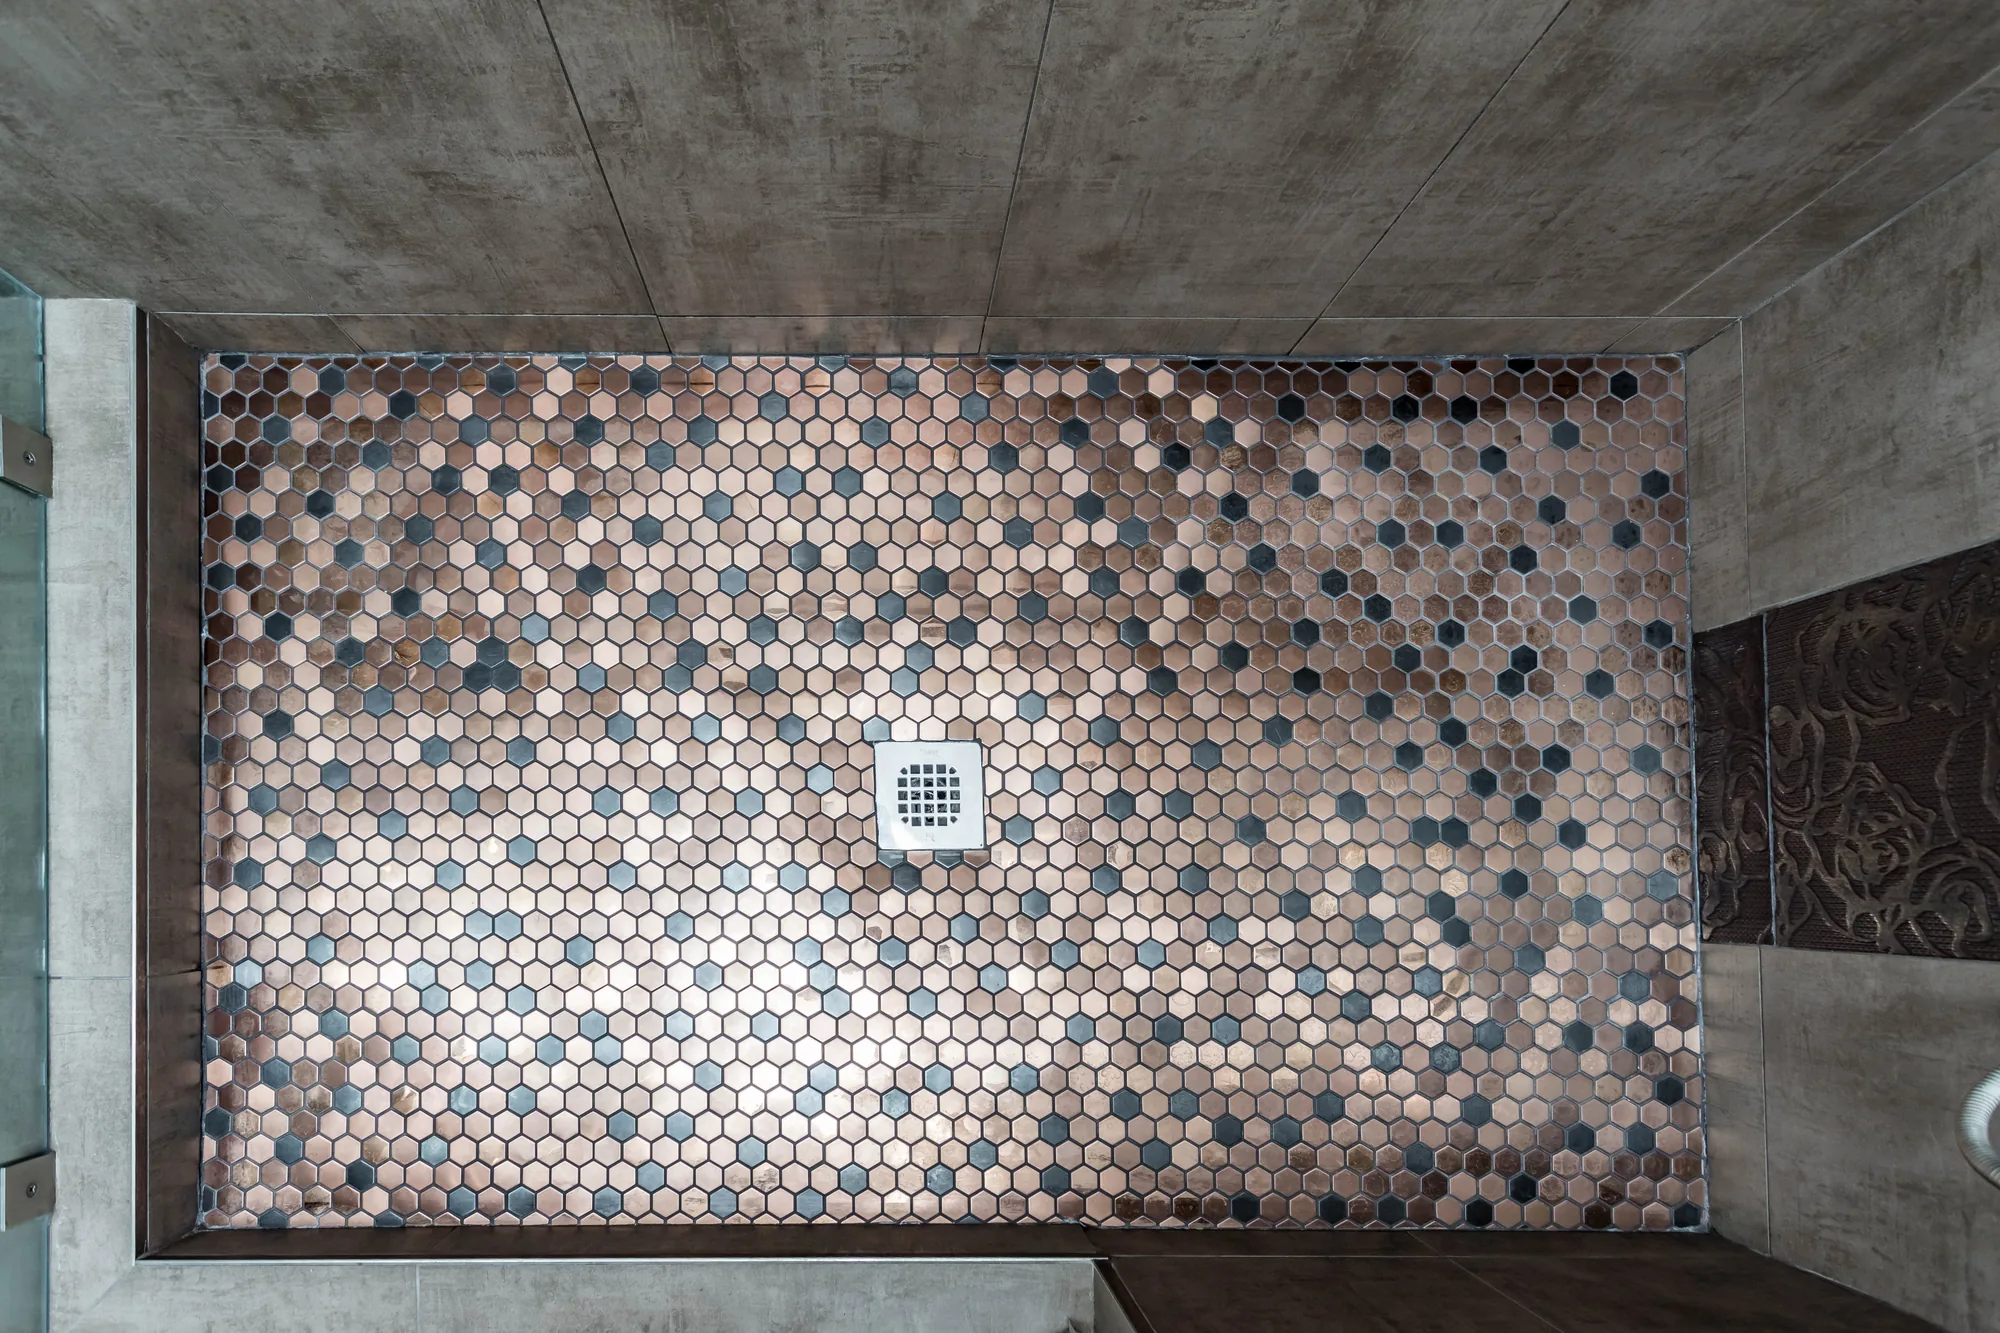
Bathroom walls are the part of the room that gets wet, gets scrubbed, and gets looked at every single day. We build them as a complete assembly, from framing and blocking through waterproofing membrane to the last piece of trim, so the surface you see is backed by something that will not fail in ten years.


Nearly every failed shower wall we open up on the Eastside failed behind the tile, not at the tile. The most common cause is a wet area built on paper-faced drywall, including the green moisture-resistant board that a lot of homeowners still believe is waterproof. It is not. Green board is a water-resistant gypsum panel, and once water gets past the grout joints it turns the paper facing into food for mold and the core into mush. Homes built across Bellevue, Kirkland and Redmond from the 1950s through the 1980s are full of this detail, often with tile set in organic mastic directly over it.
The Pacific Northwest makes the problem worse in a quiet way. Our heating season runs long and damp, so warm humid air inside the bathroom is constantly pushed toward cooler exterior wall cavities. If the exhaust fan is undersized, ducted into an attic instead of outside, or missing entirely, as it is in a lot of original mid-century baths, that moisture never leaves the room. It condenses inside the wall. You see the result as dark grout, a soft spot near the tub deck, or paint that will not stop peeling on the other side of the wall.
So we start every wall project at the substrate. We decide what backer material and what waterproofing system the assembly needs, confirm ventilation is adequate, correct the framing so the surface is actually flat, and only then talk about tile size, pattern and grout color. Done in that order, the finish work goes faster and the wall behaves for decades. Done in the other order, you get a beautiful shower with a hidden expiration date.

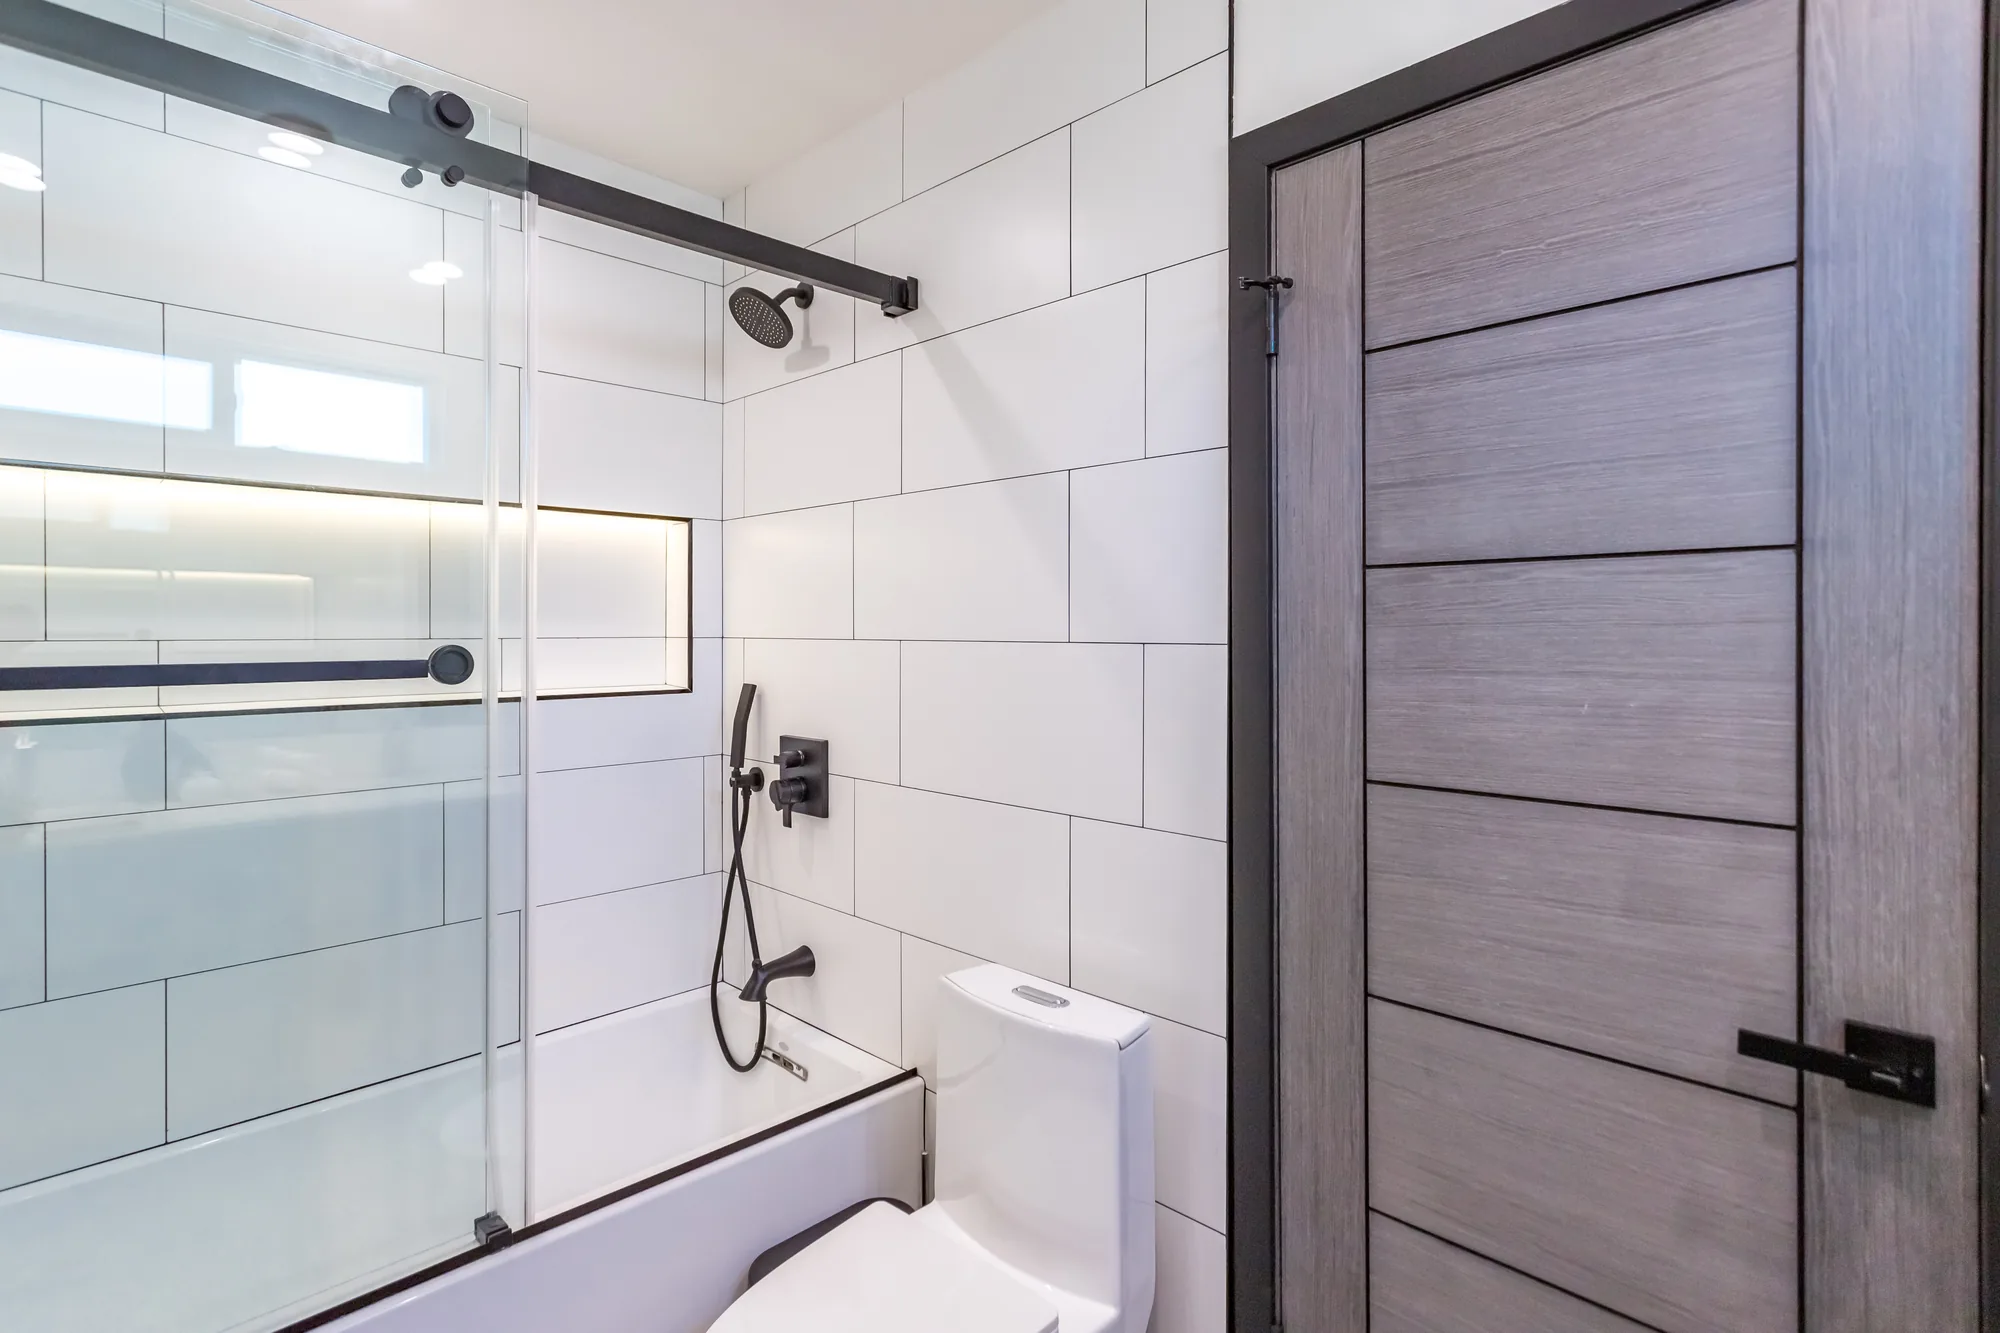
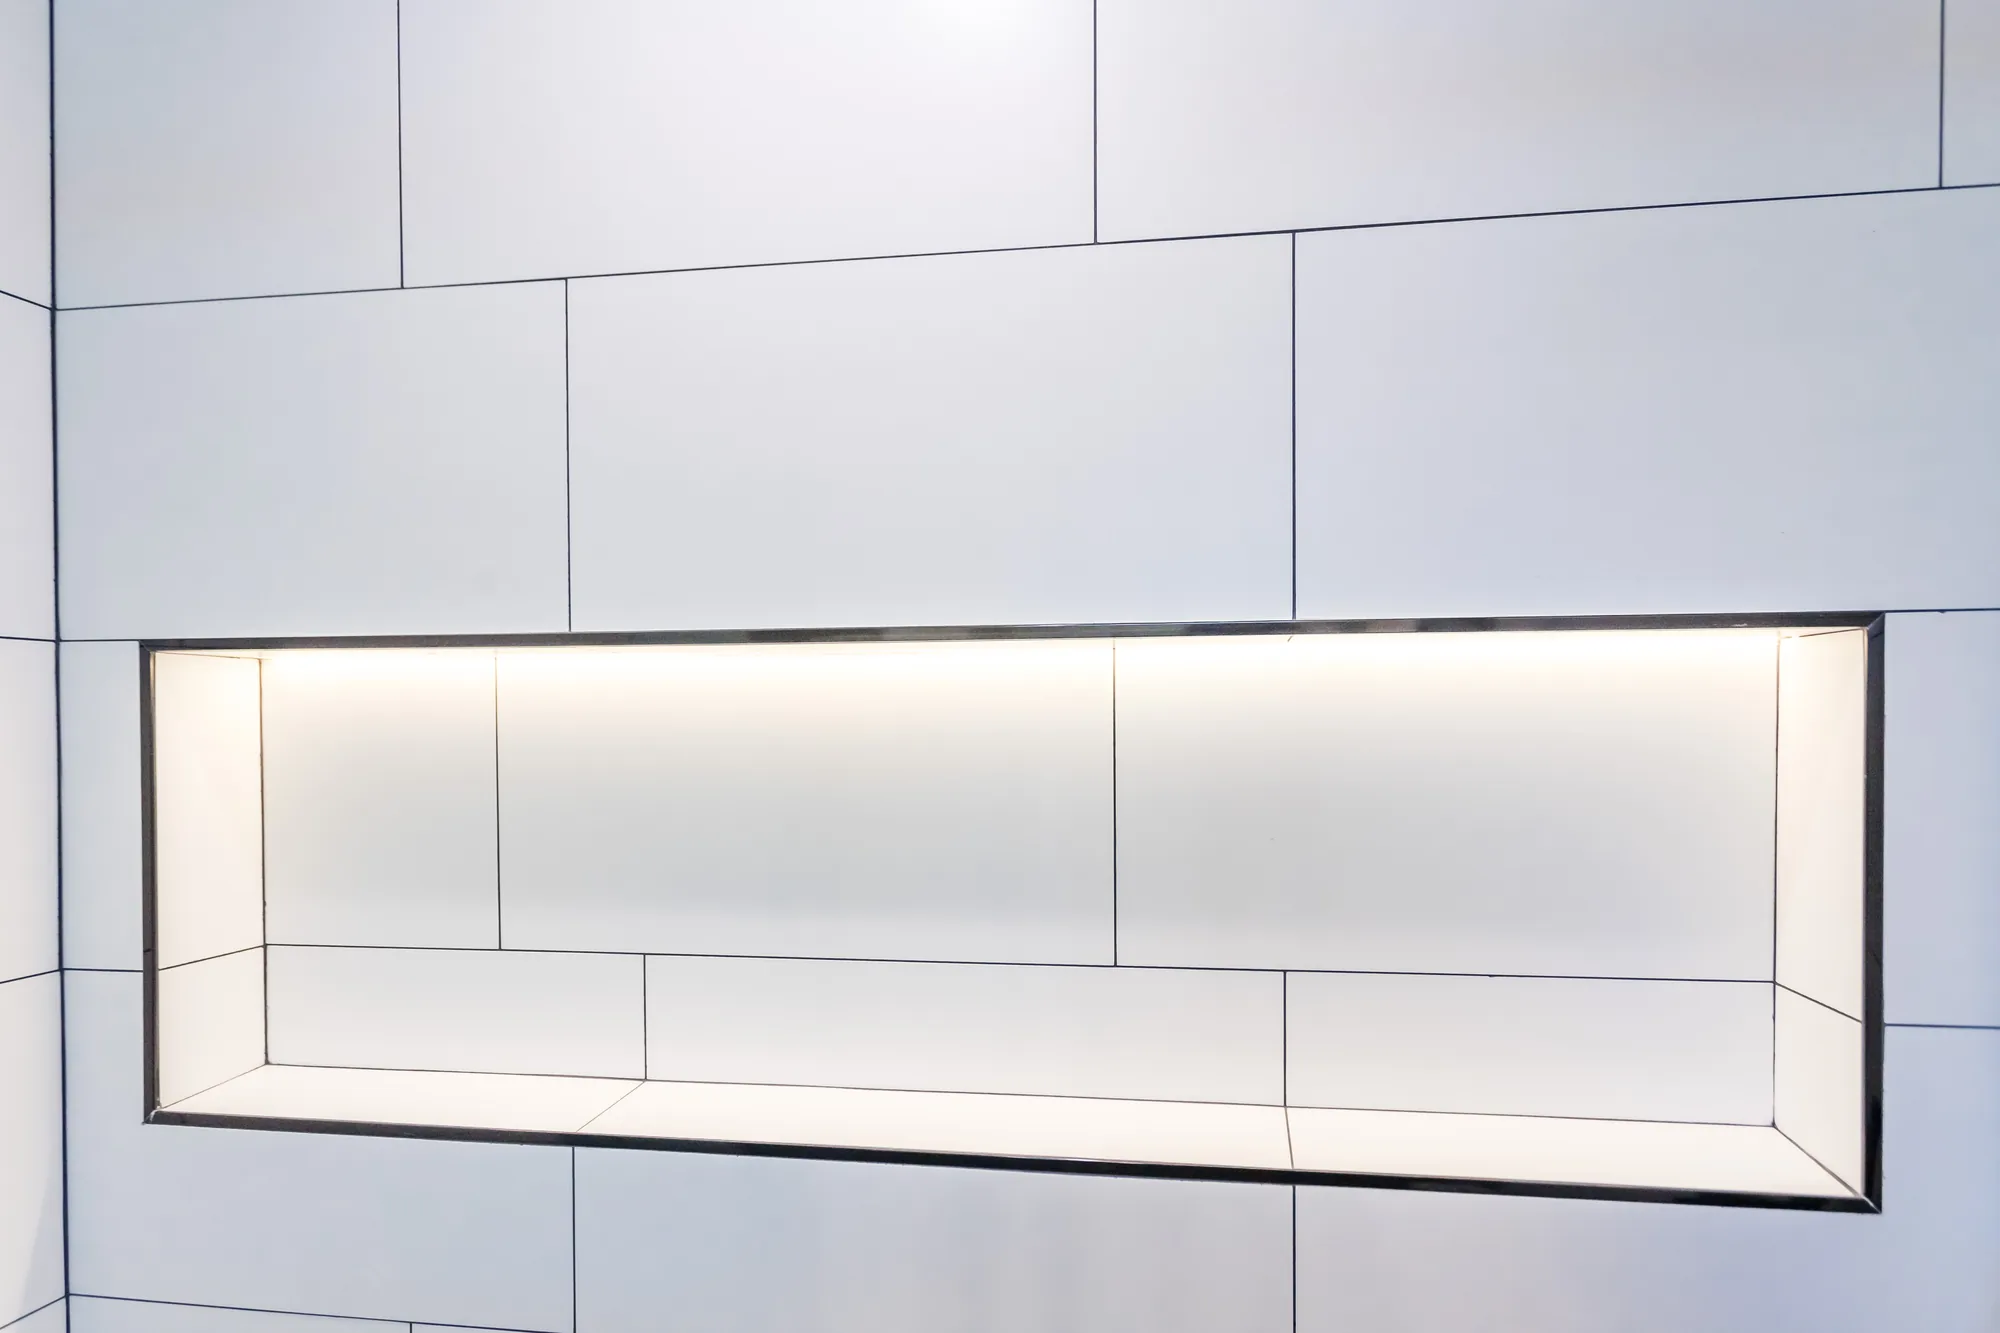
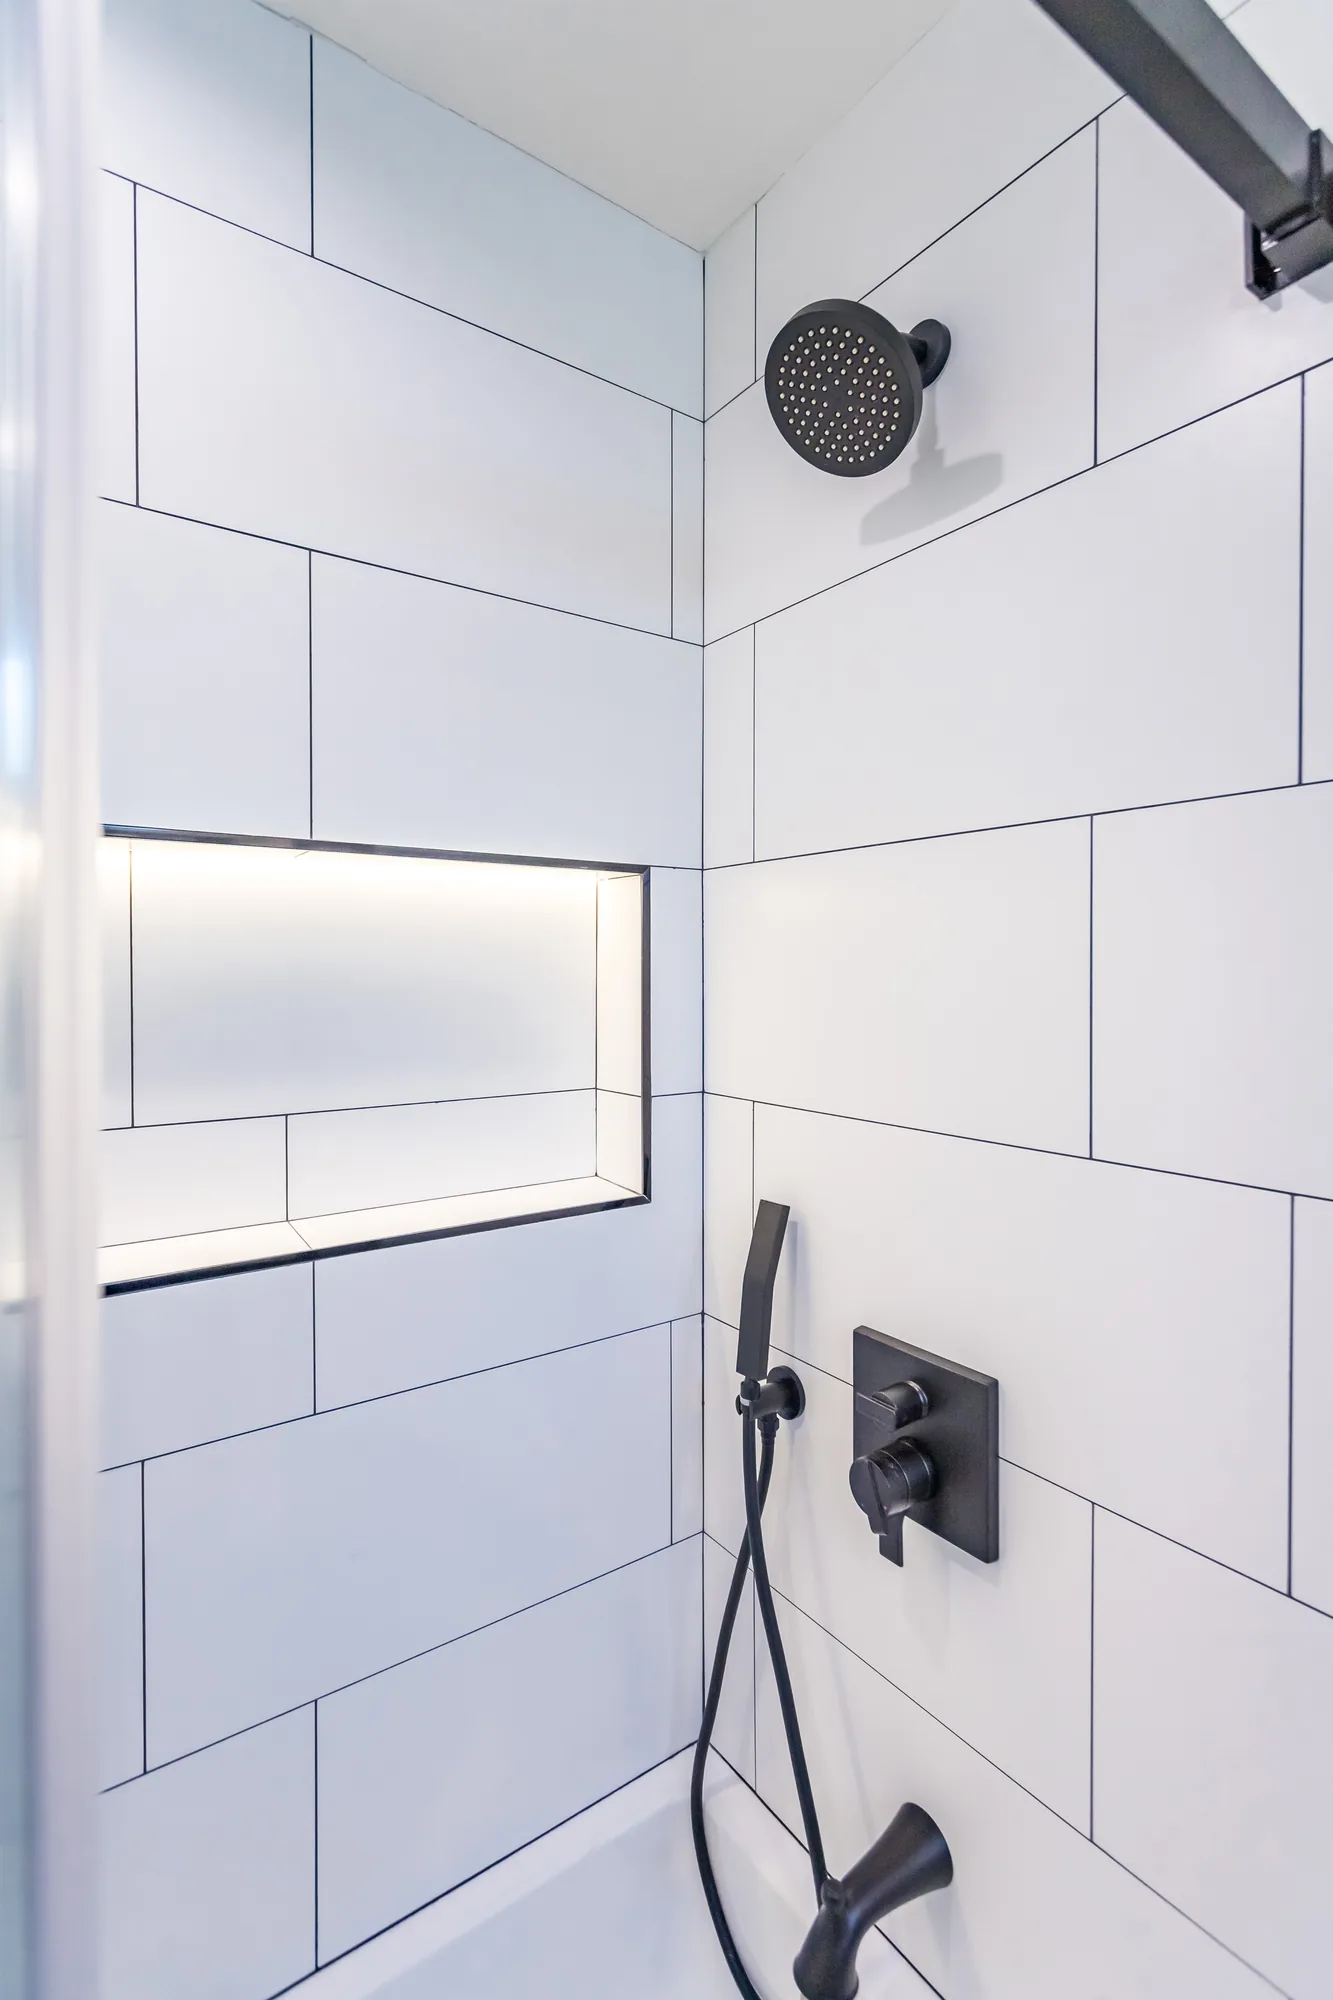
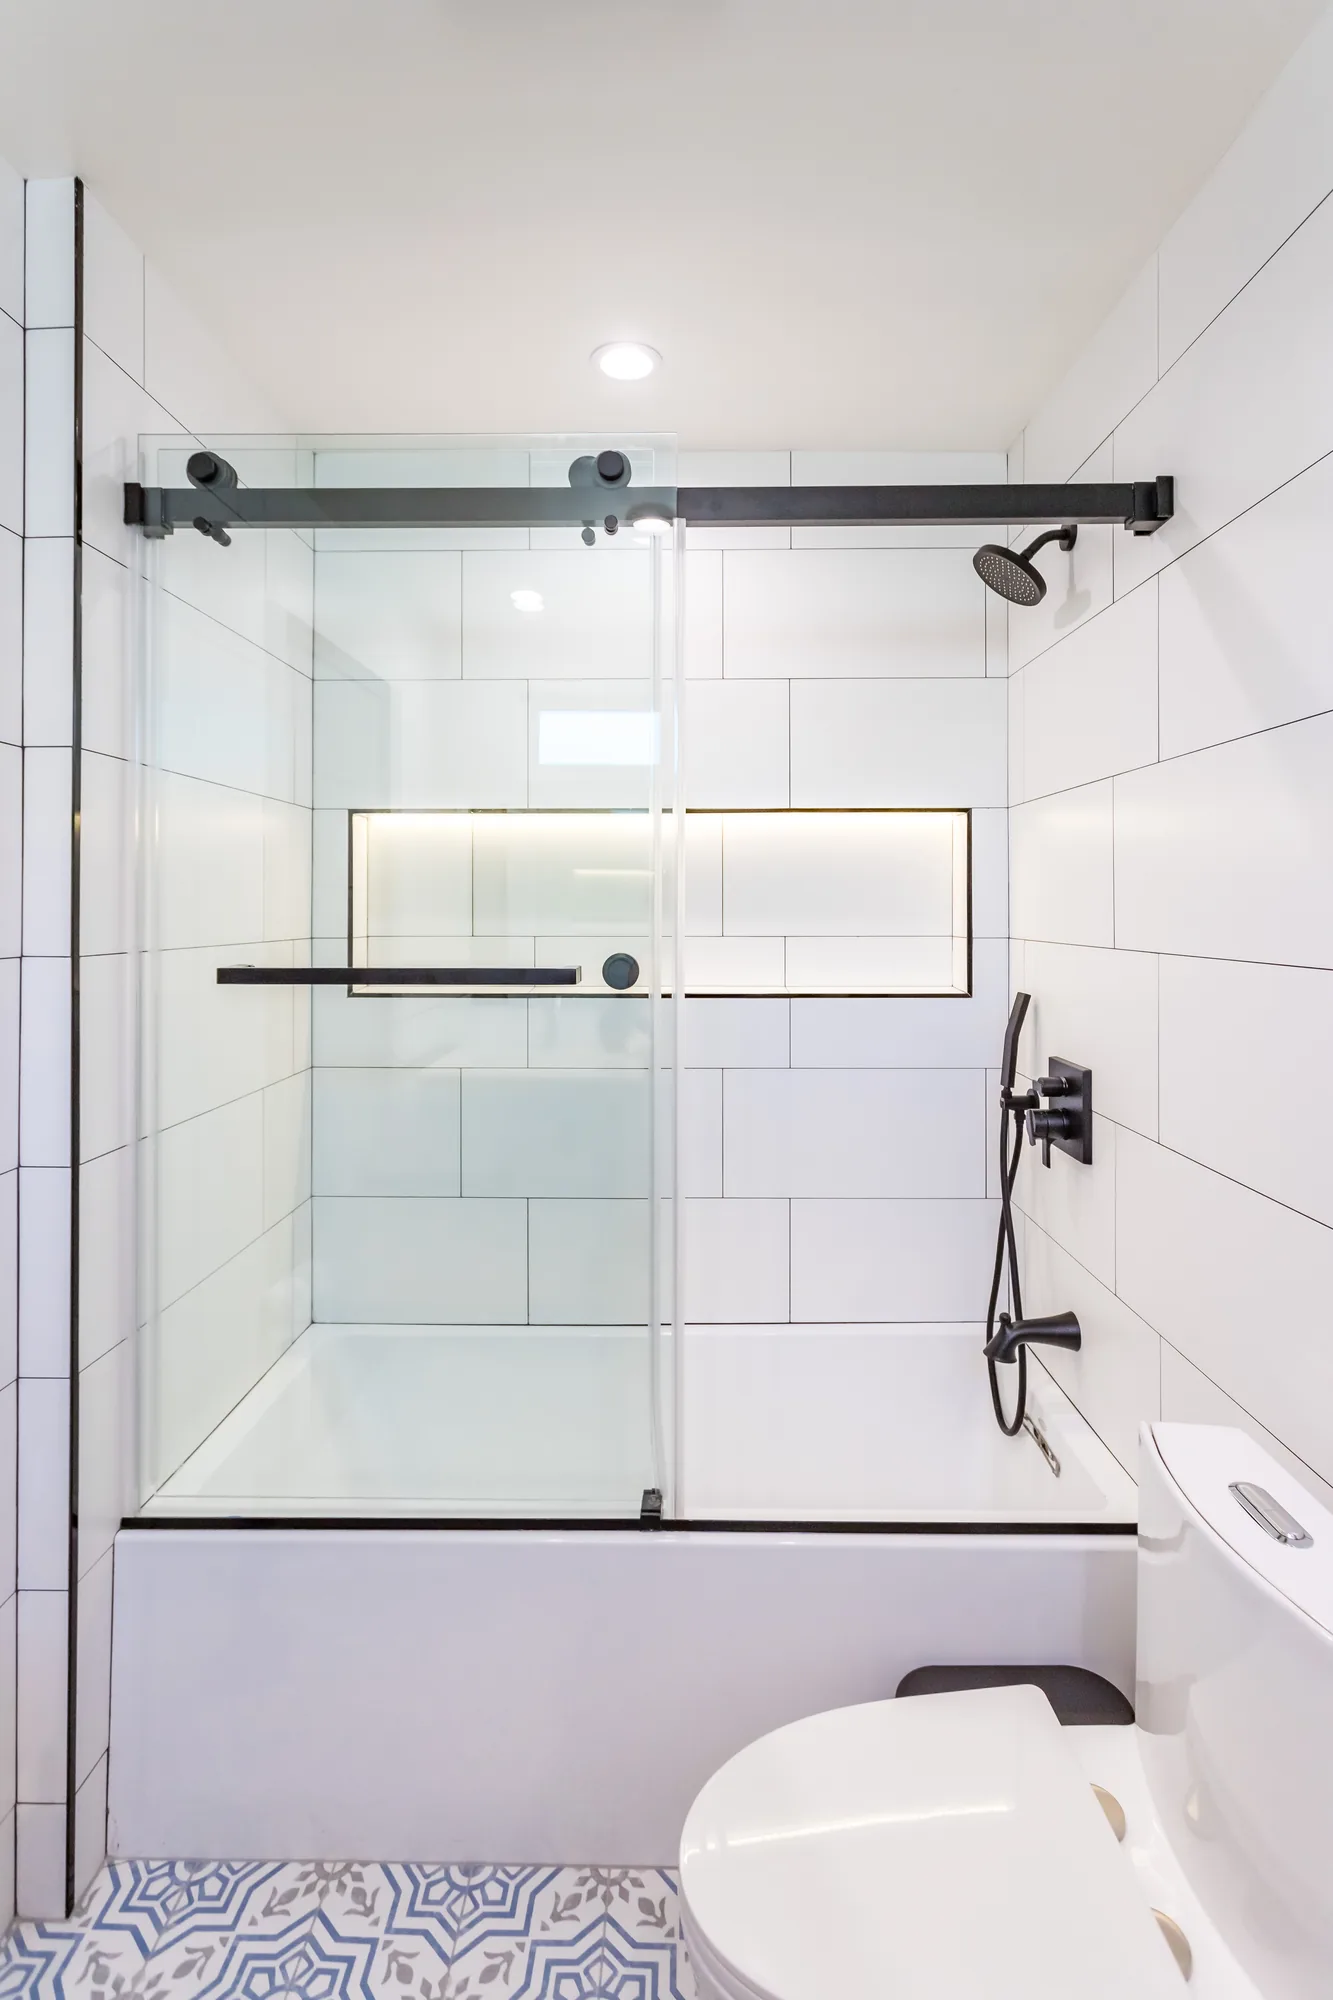
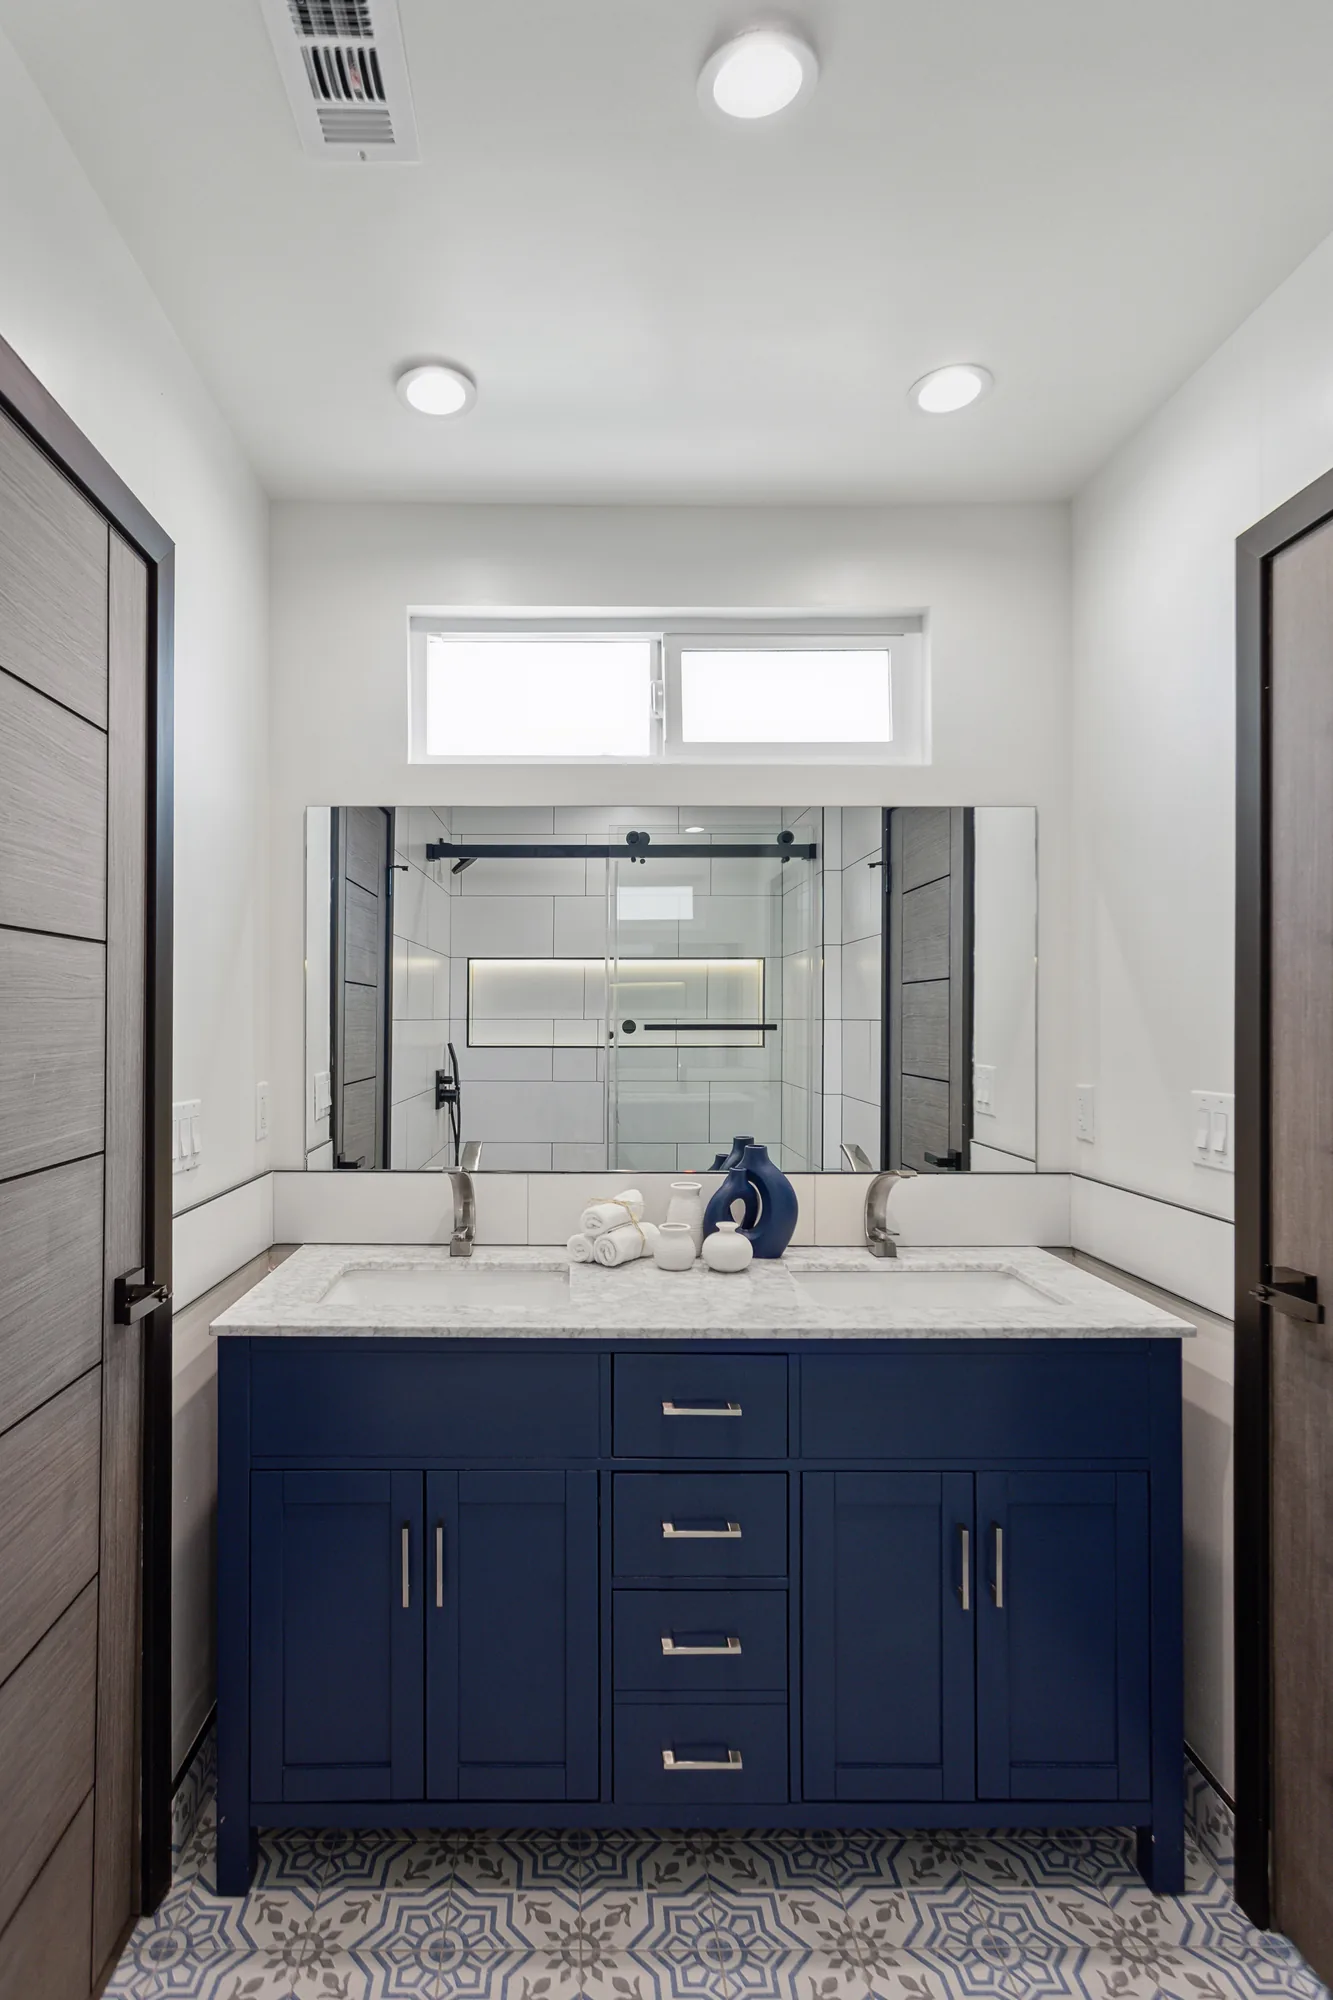
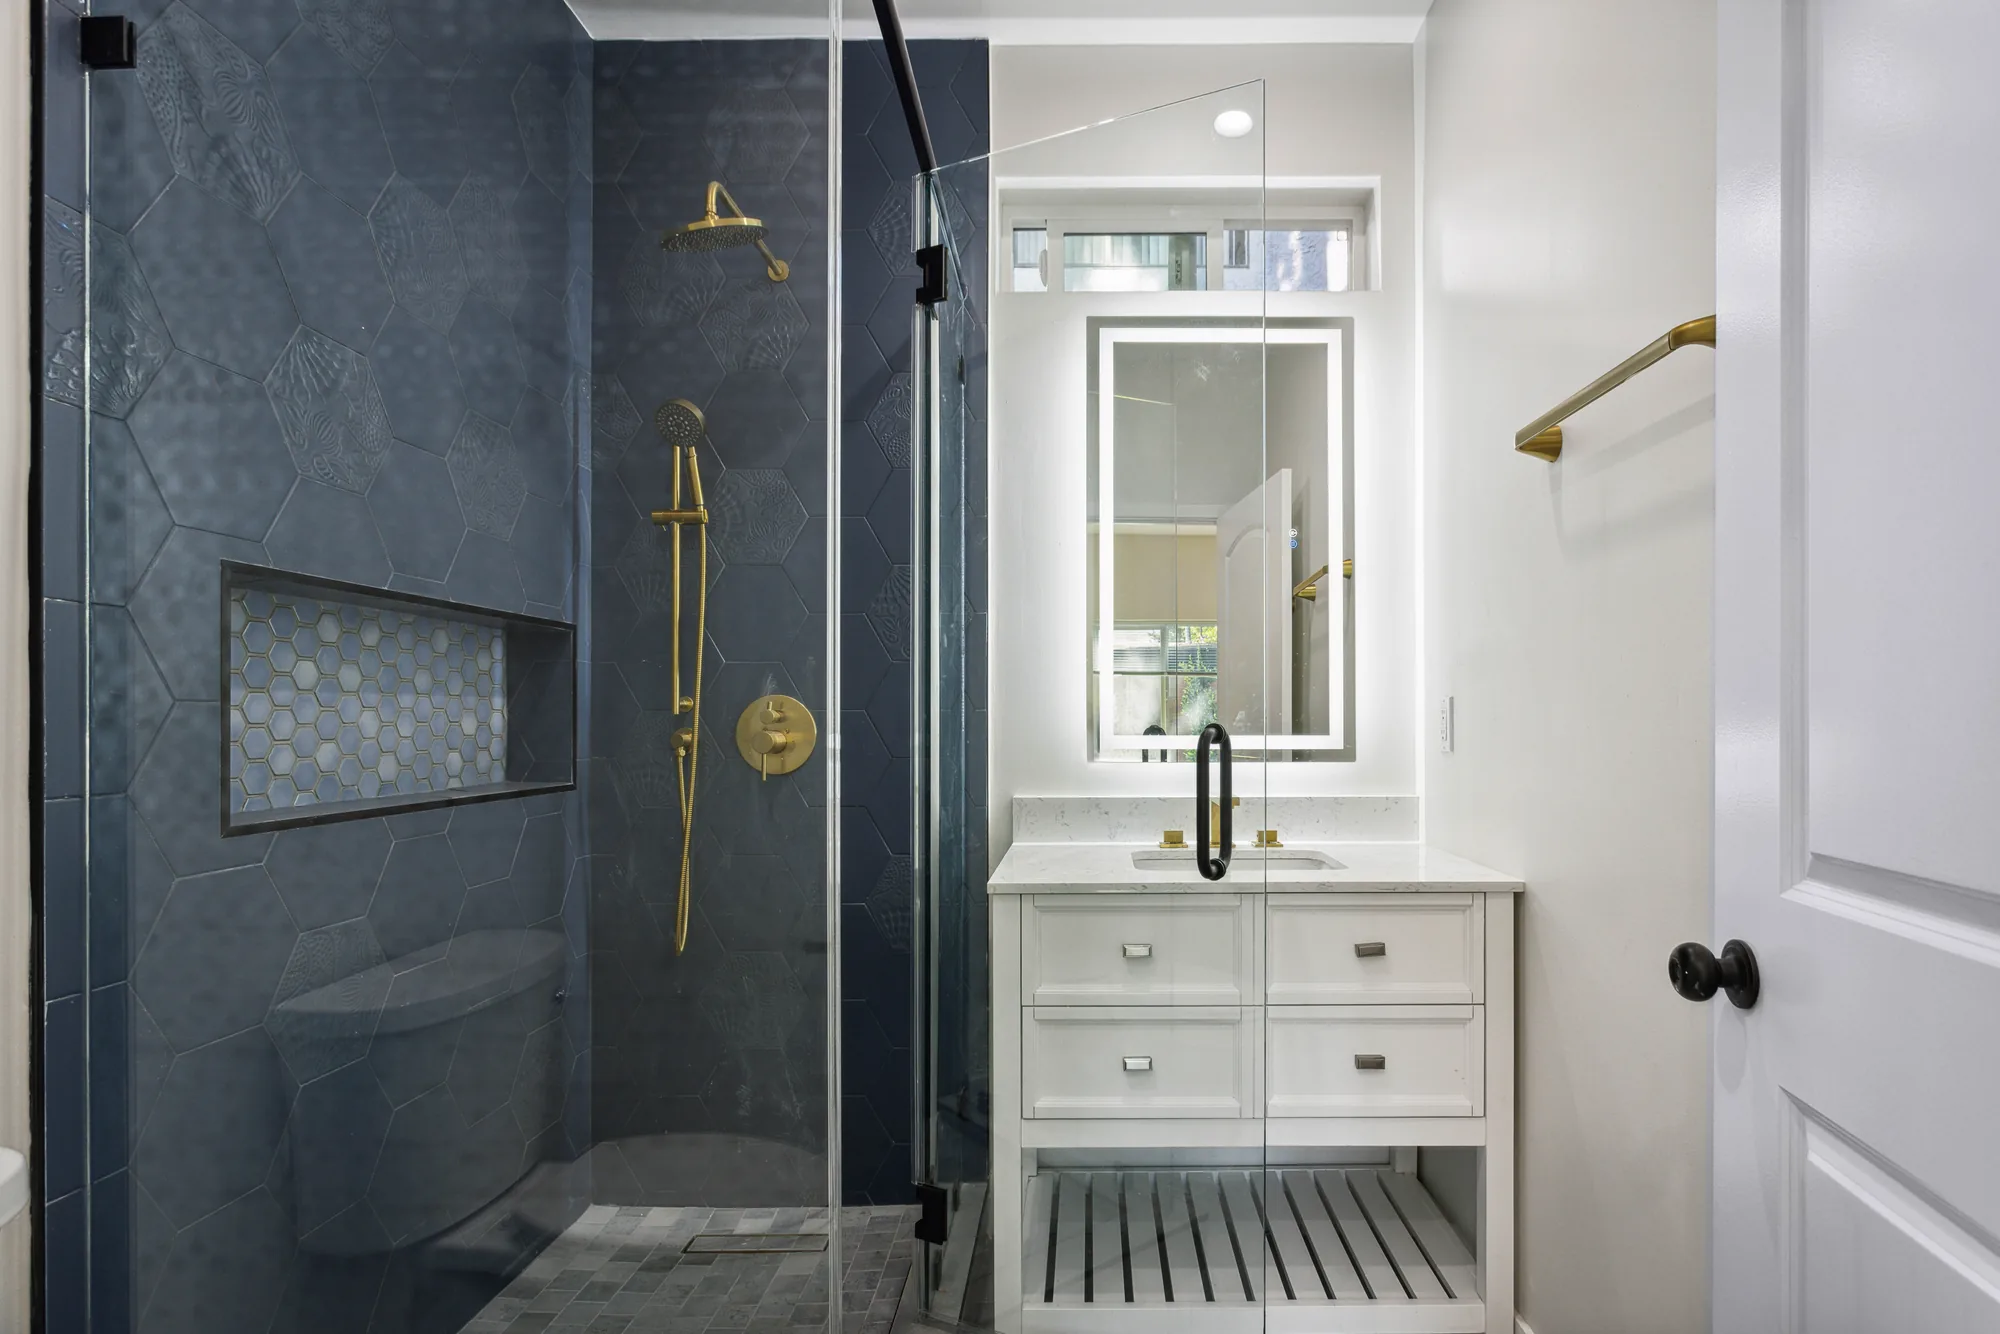
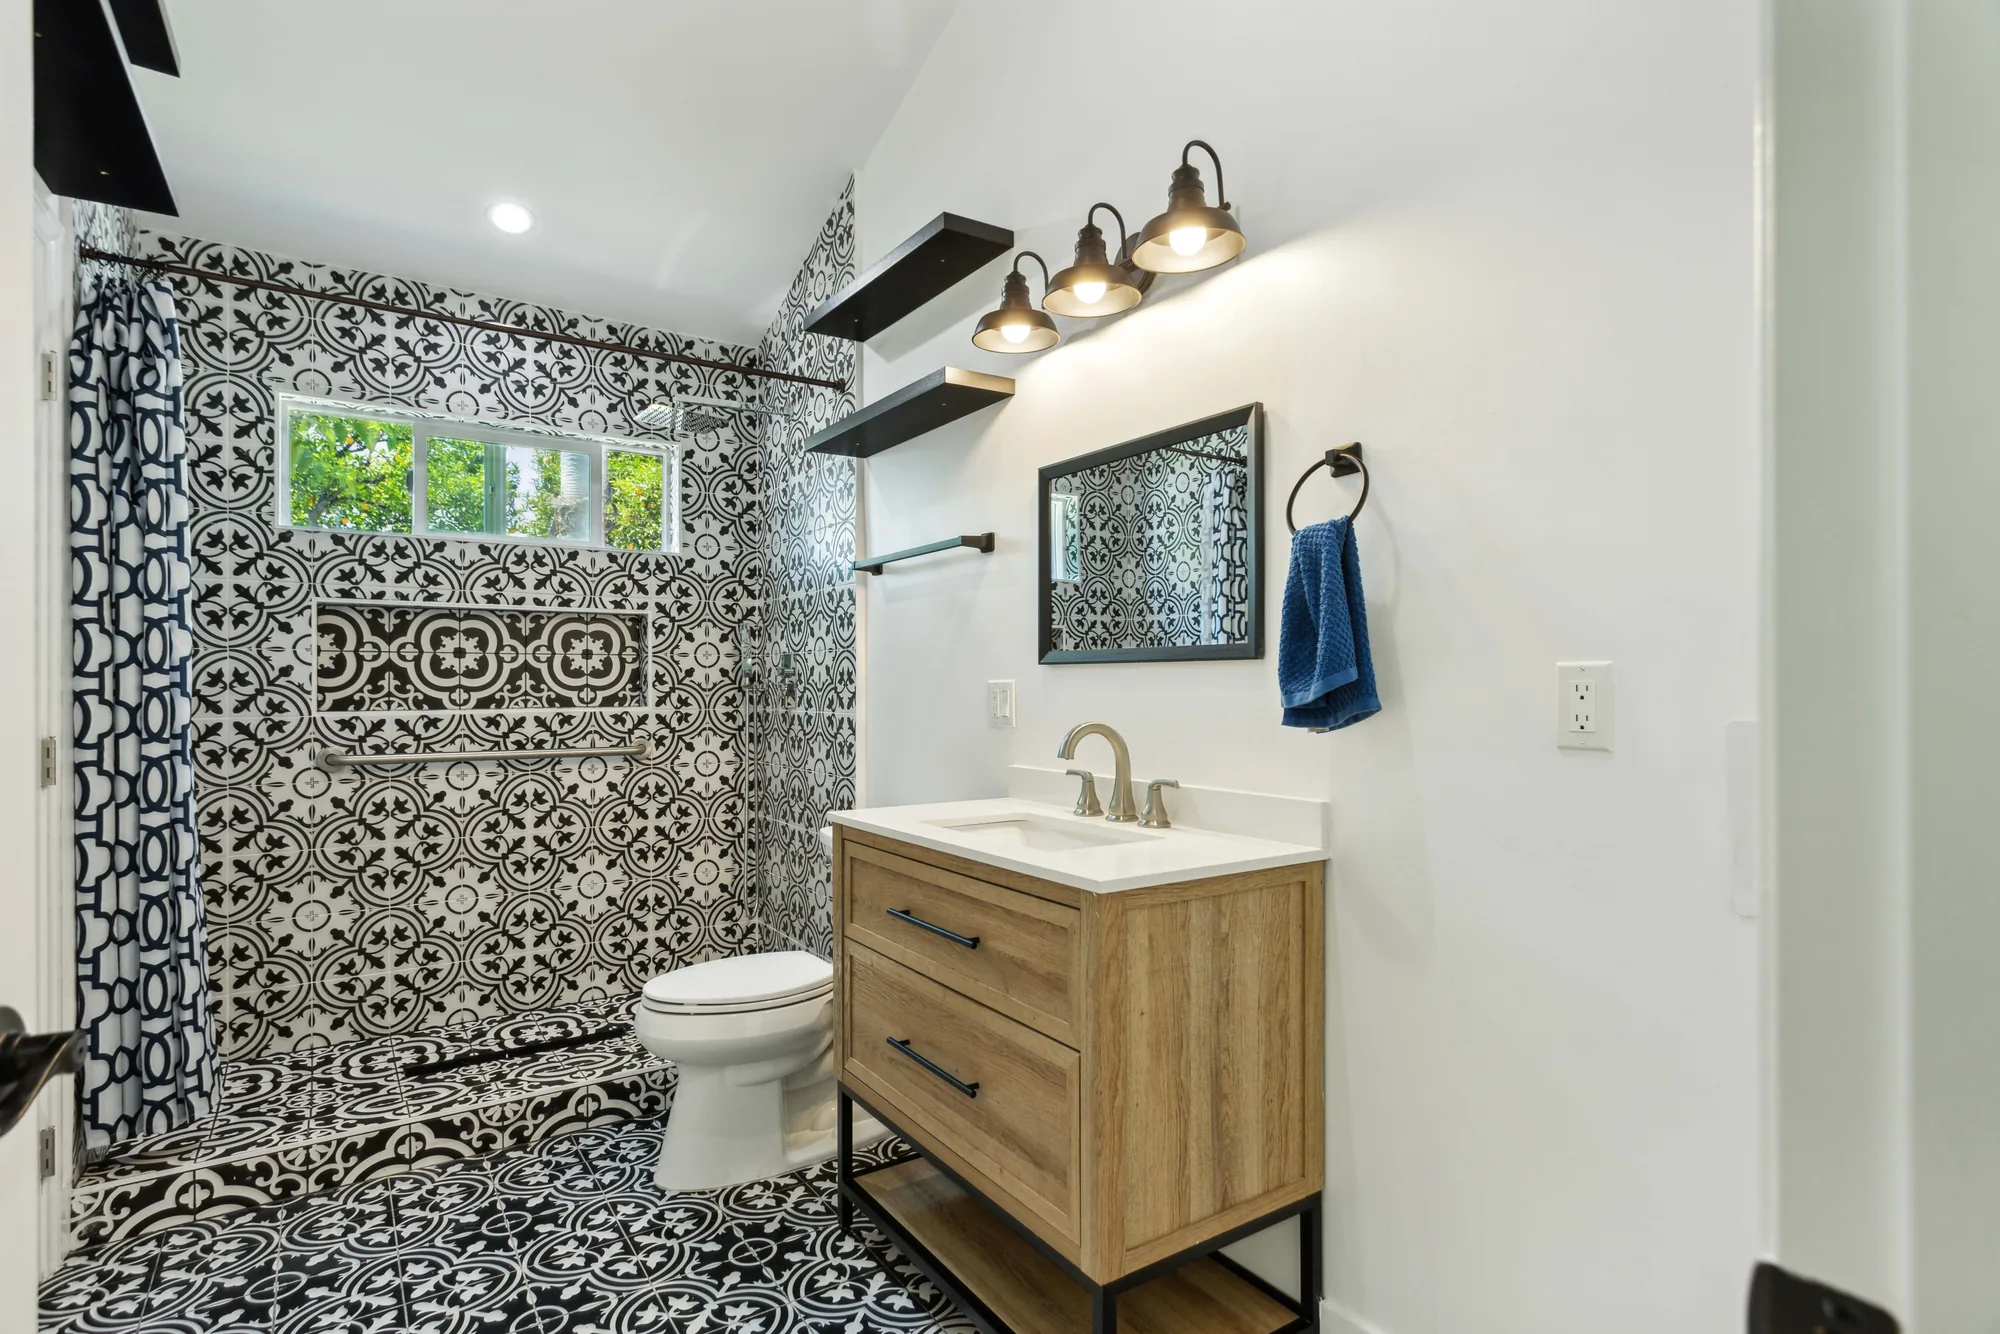
This full bathroom remodel pairs a navy blue shaker double vanity with a light veined marble-look stone countertop and undermount porcelain sinks. The wet area was rebuilt as an alcove tub and shower wrapped in white large-format wall tile set with contrasting dark grout, closed off with a clear sliding glass enclosure riding on a matte black barn-style track. A long horizontal recessed niche was framed into the shower wall with a slim black metal edge and integrated LED lighting, tiled tight inside so the joints line up with the surrounding field tile. The floor is a blue and gray patterned cement-look tile carried wall to wall, and the room is finished with matte black shower valves, showerhead and handheld, brushed nickel faucets and cabinet pulls, a large frameless mirror, recessed can lighting and gray woodgrain doors hung in black-painted jambs.
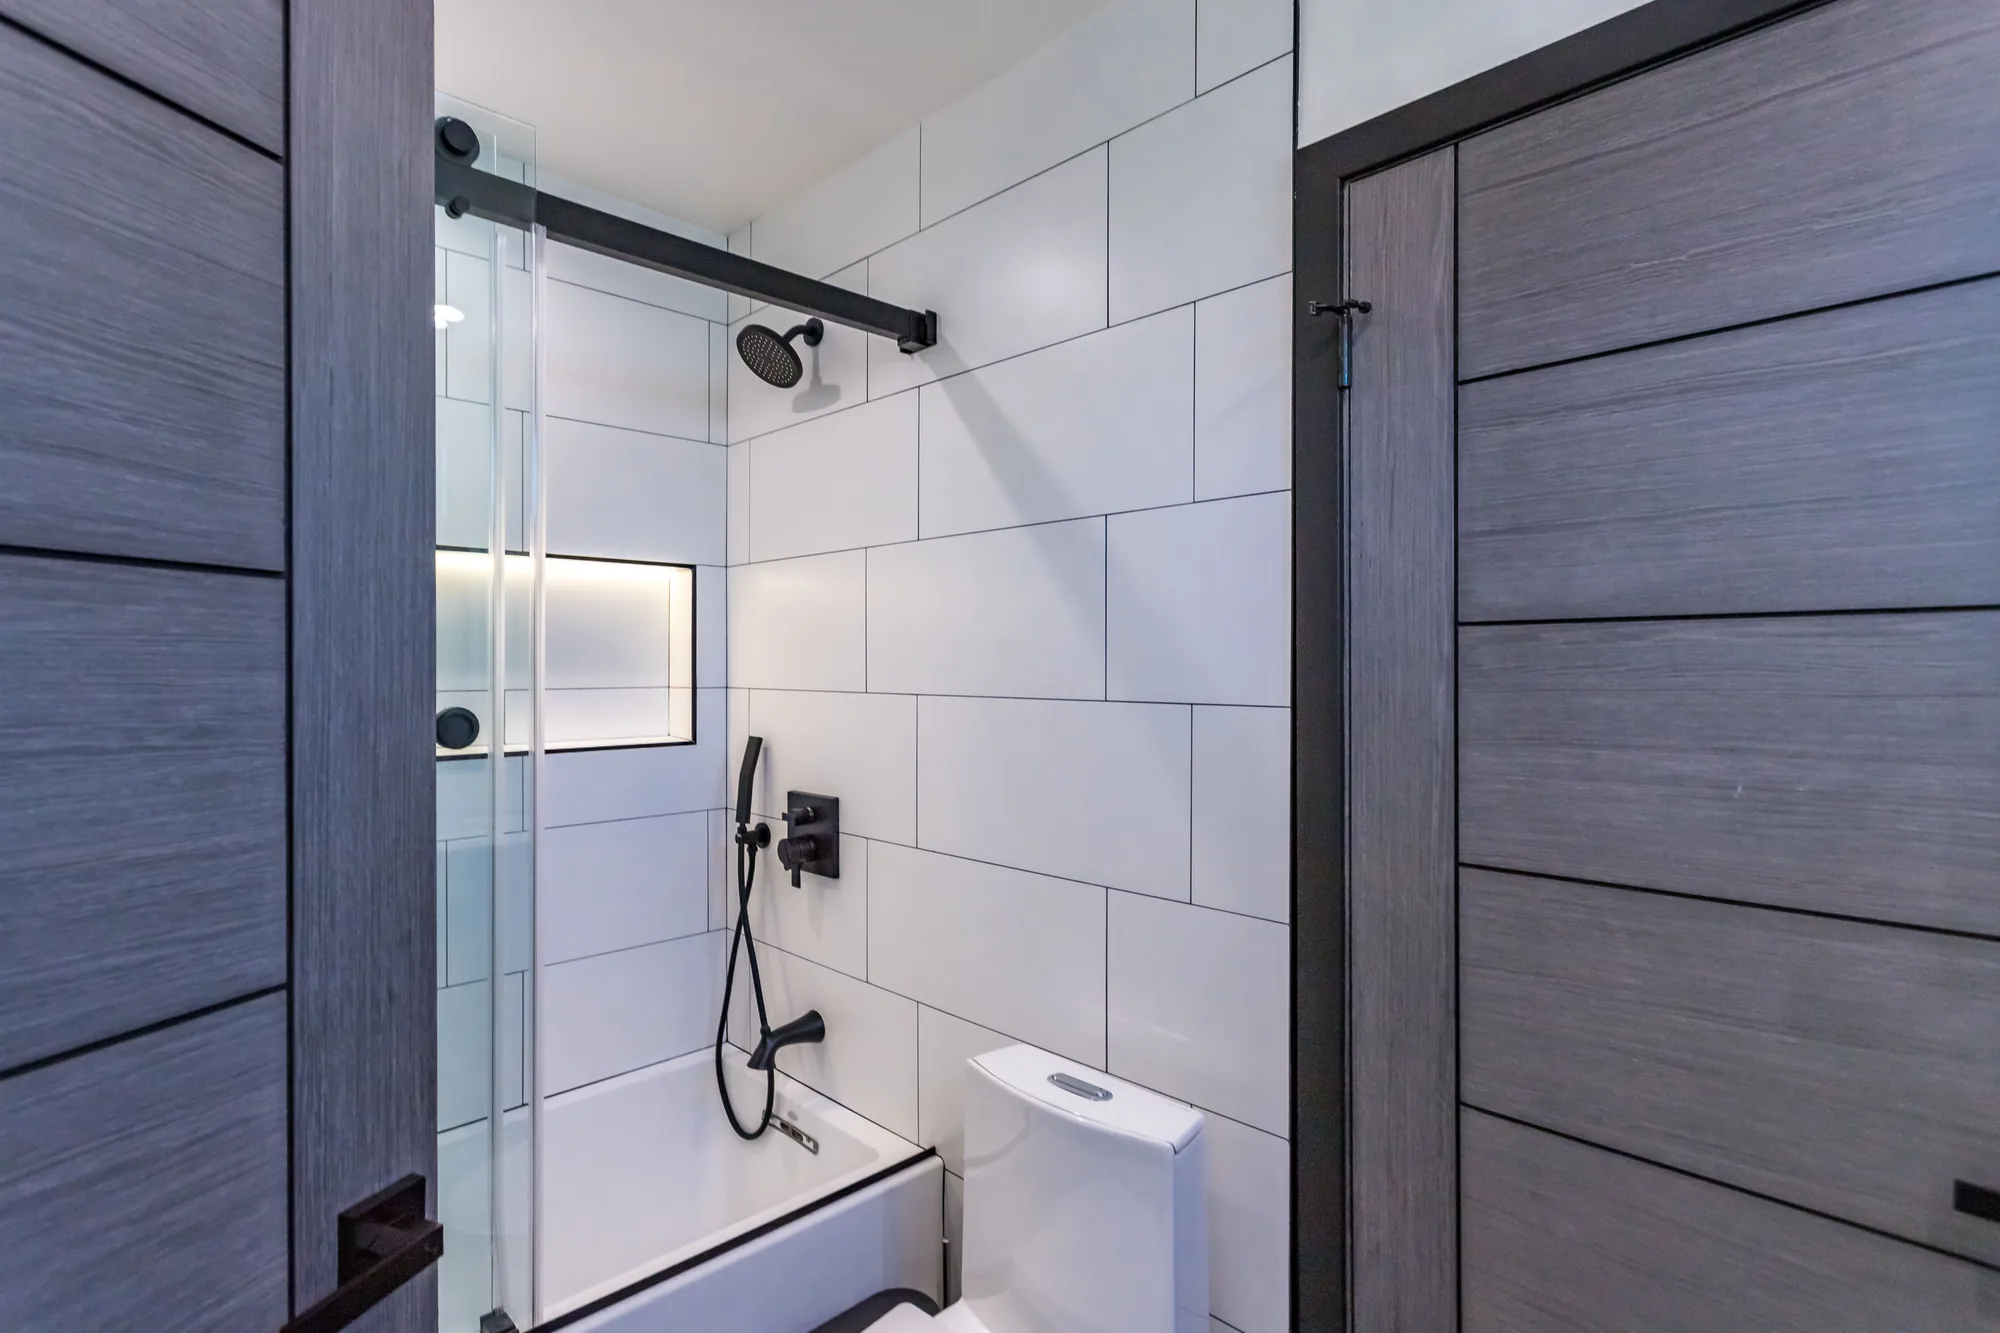
Style: Transitional
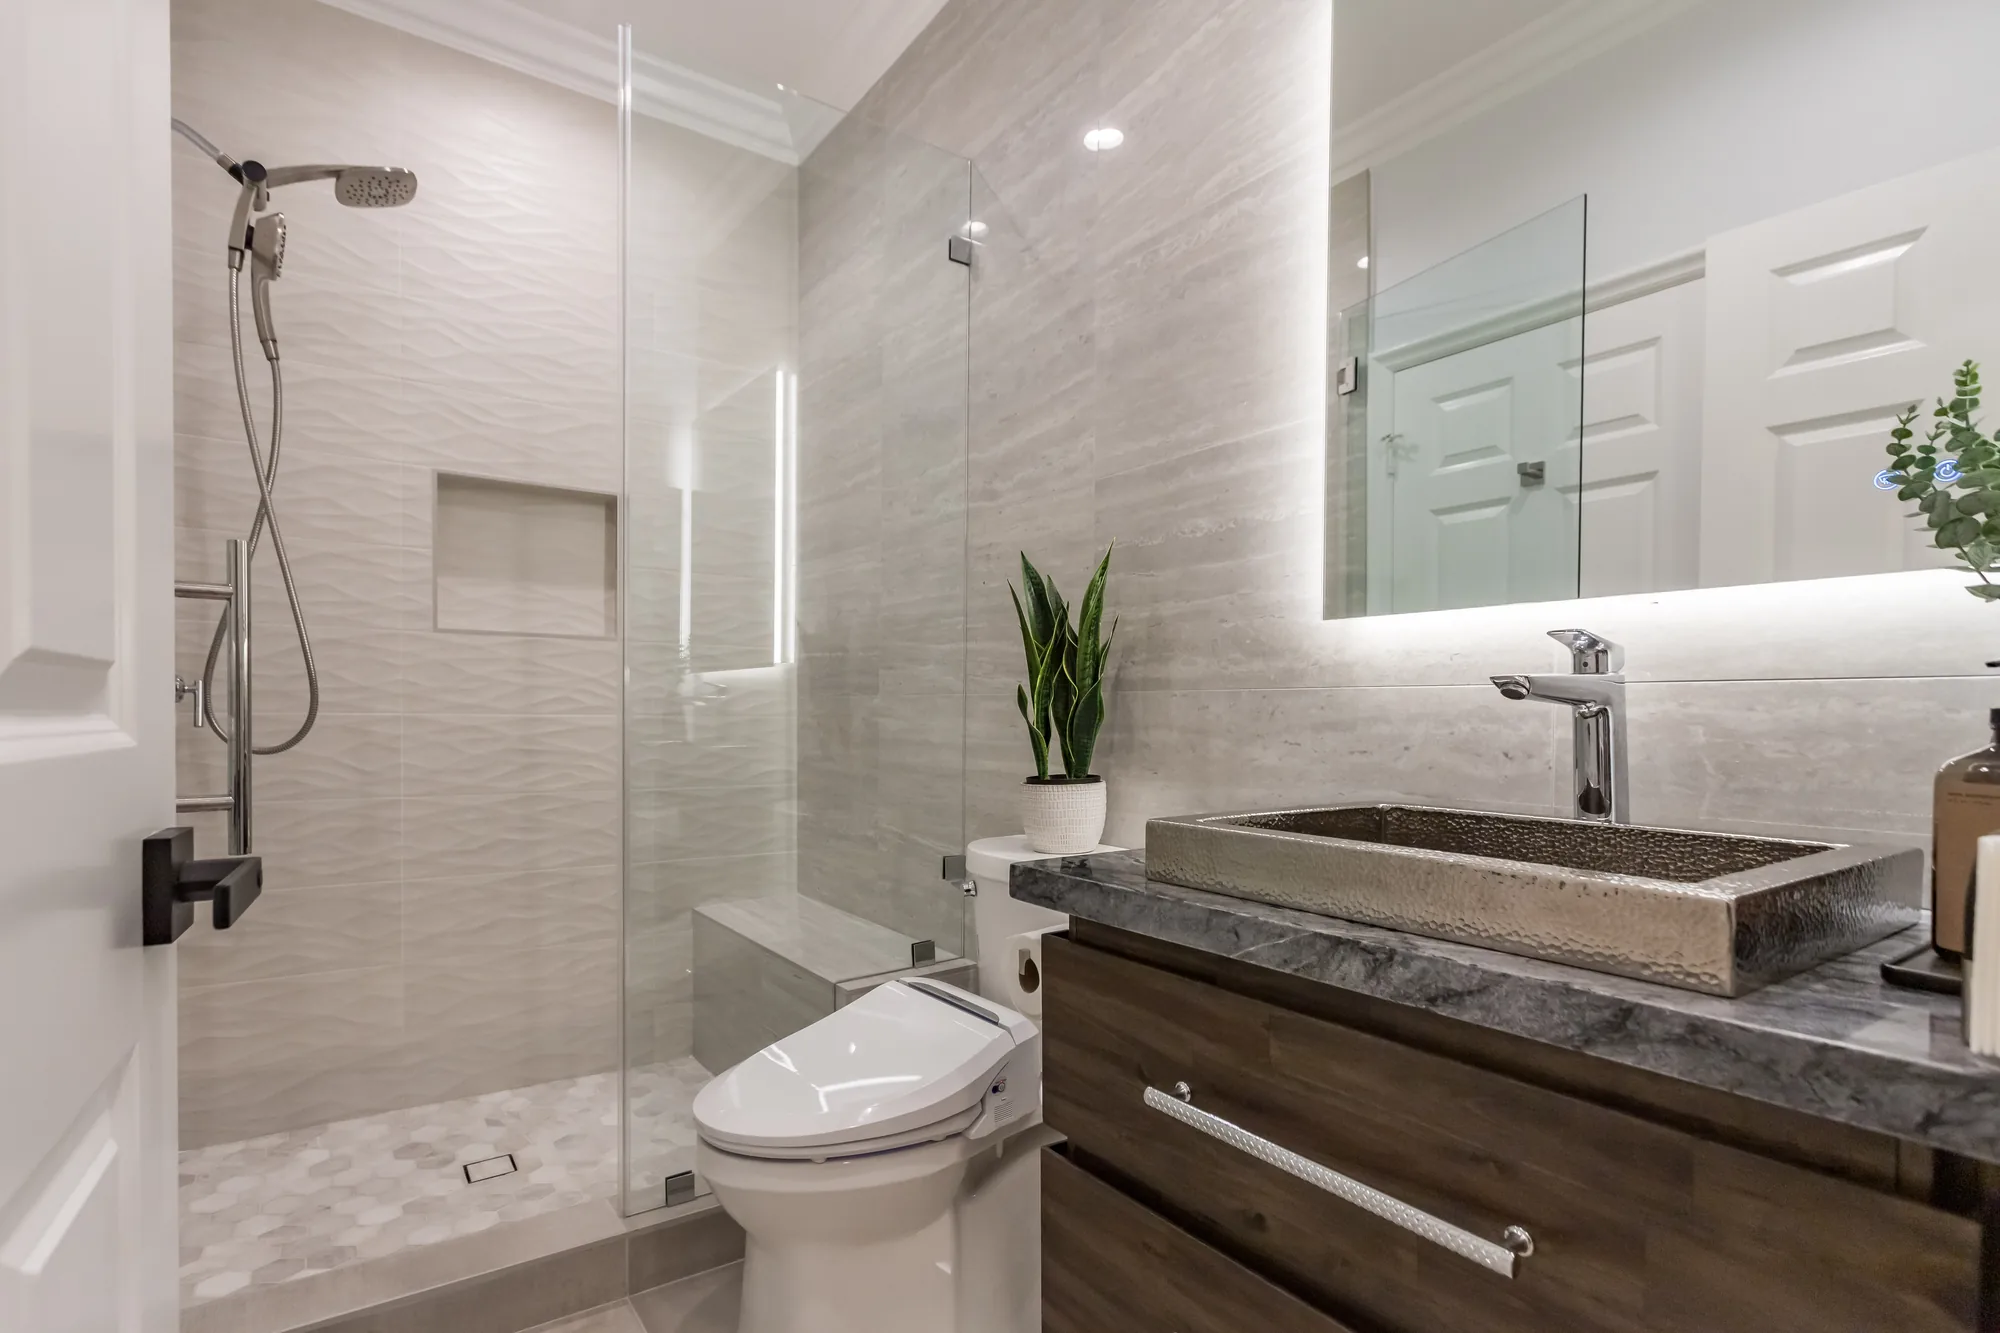
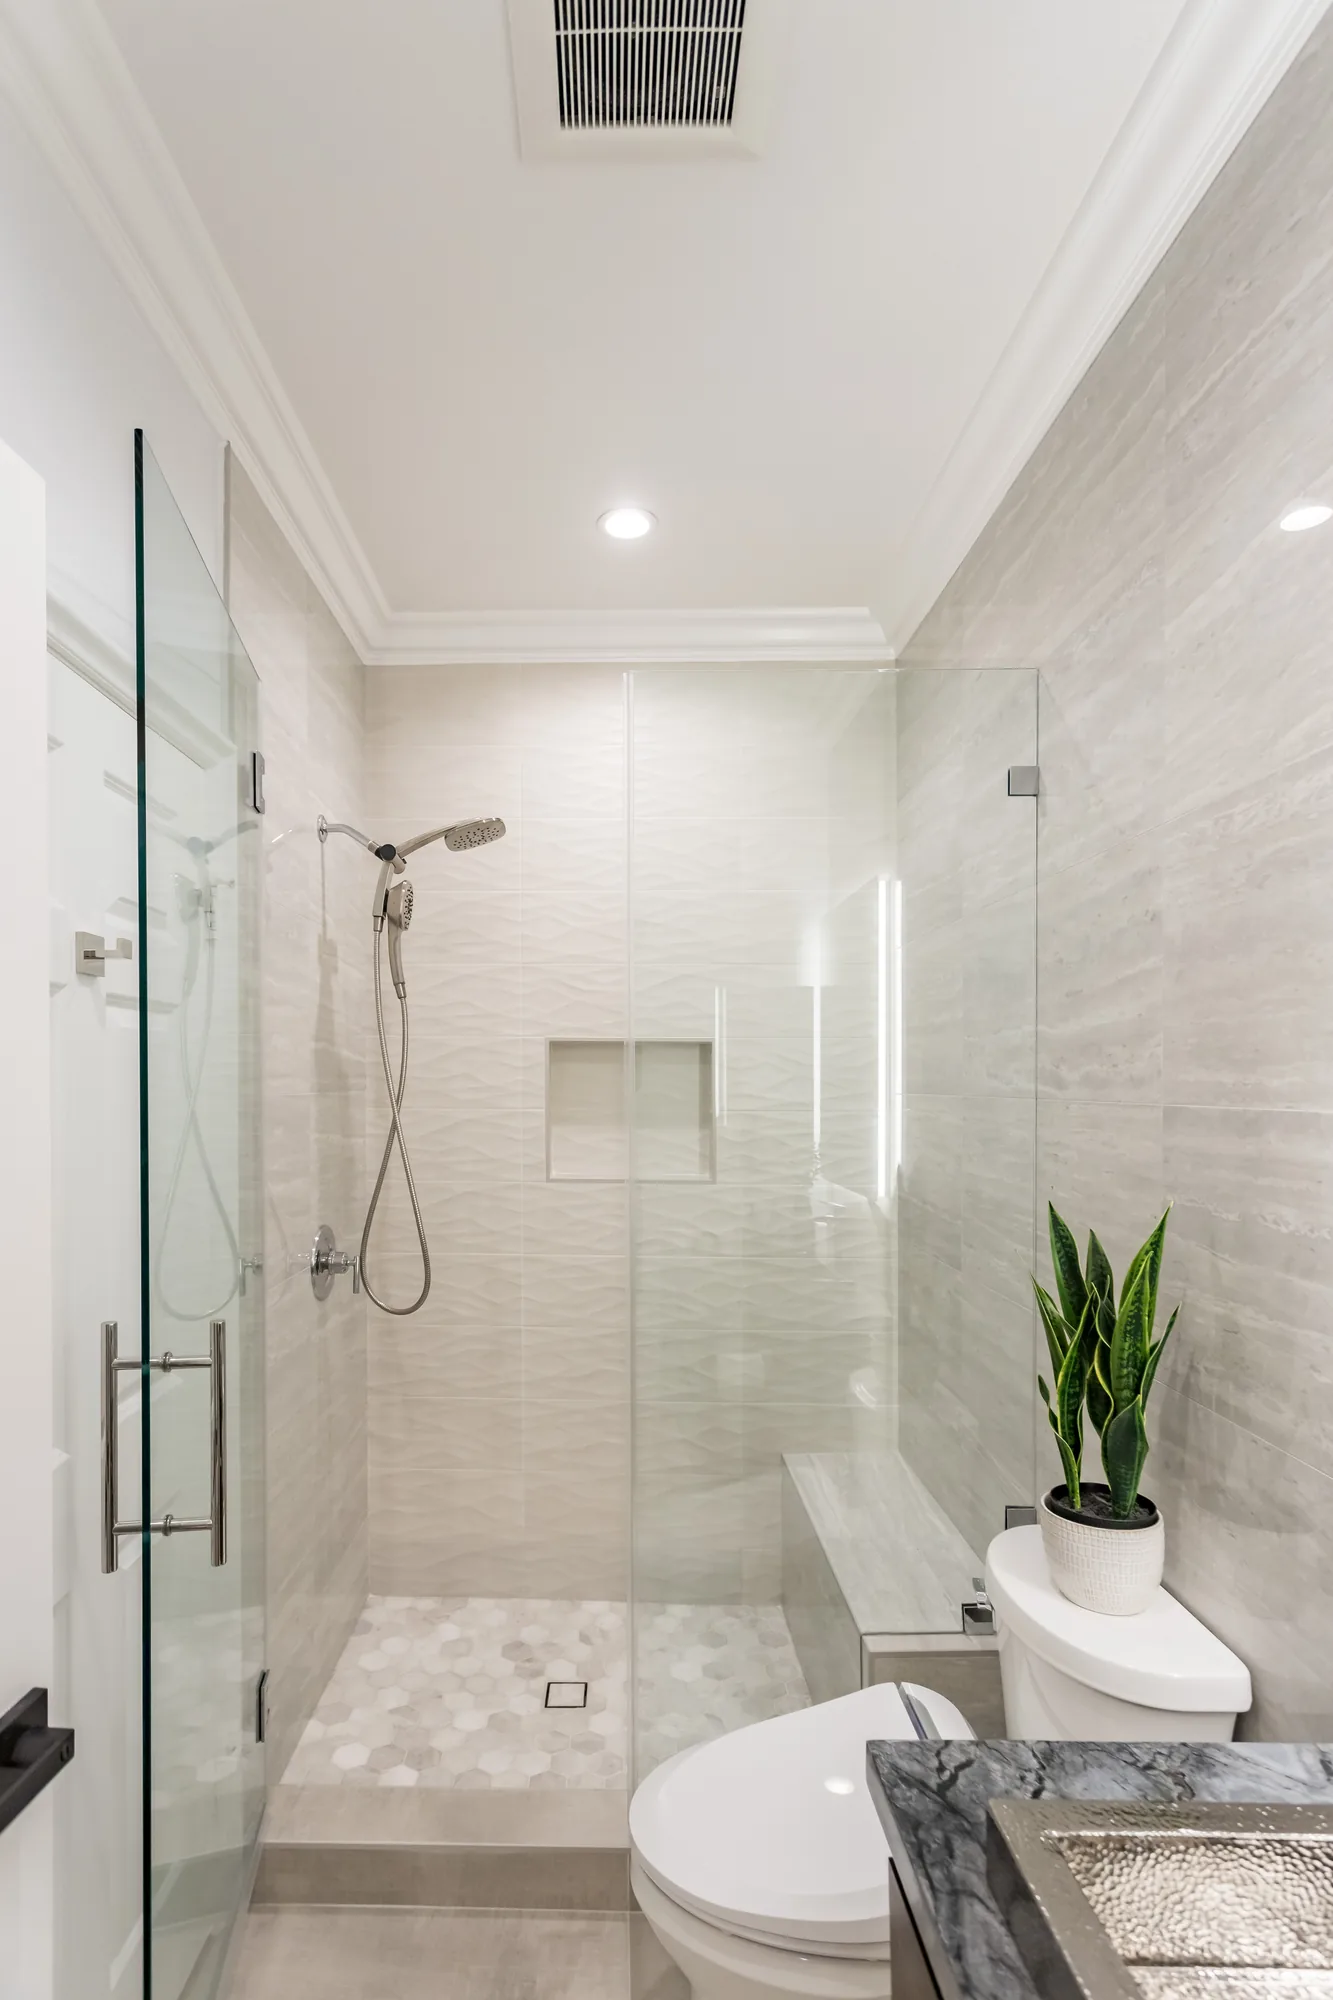
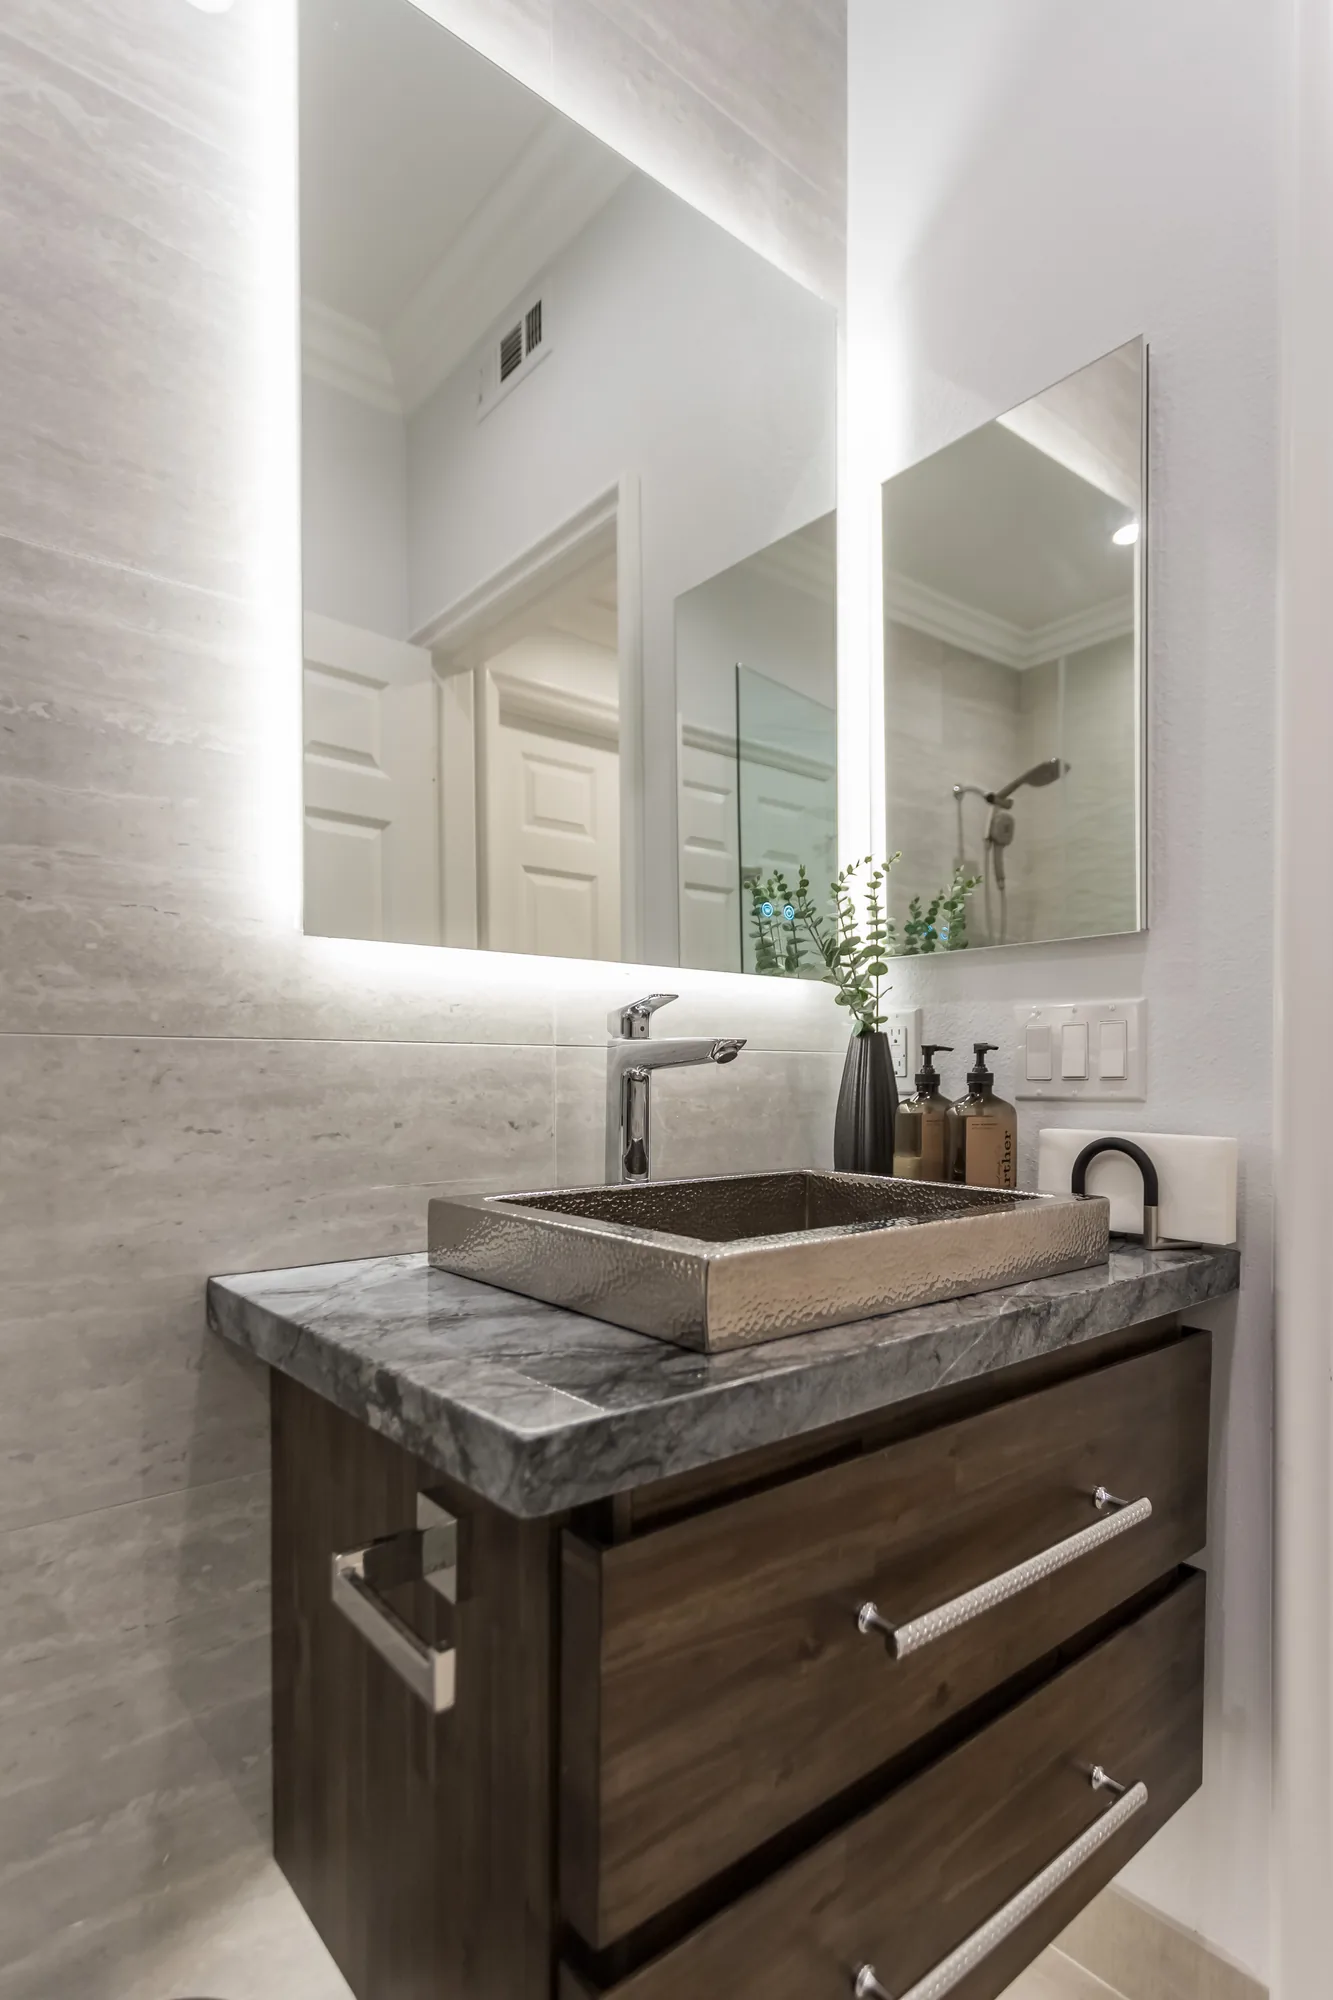
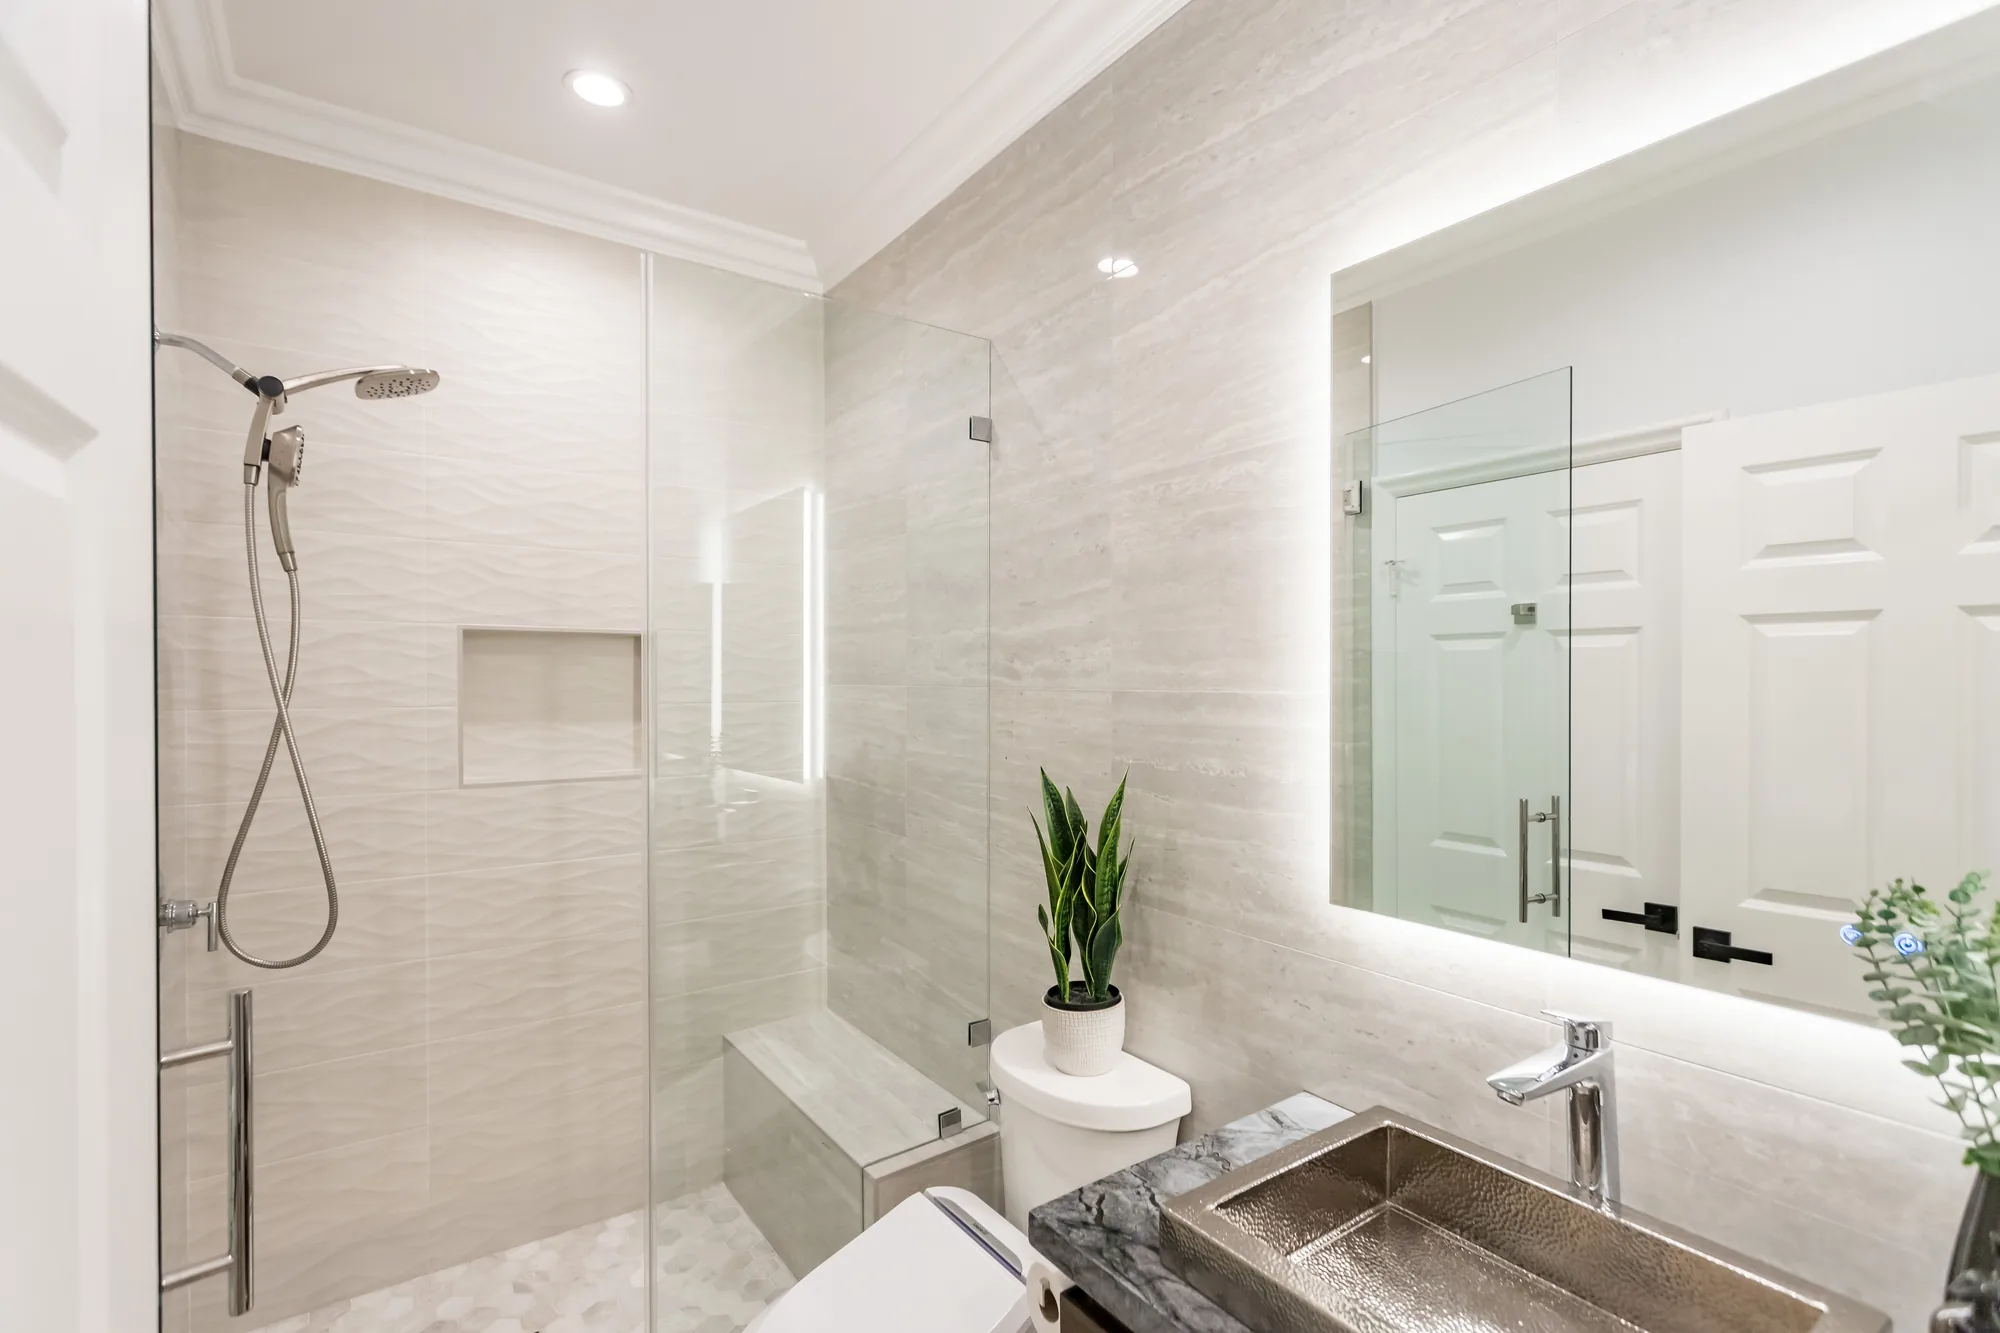
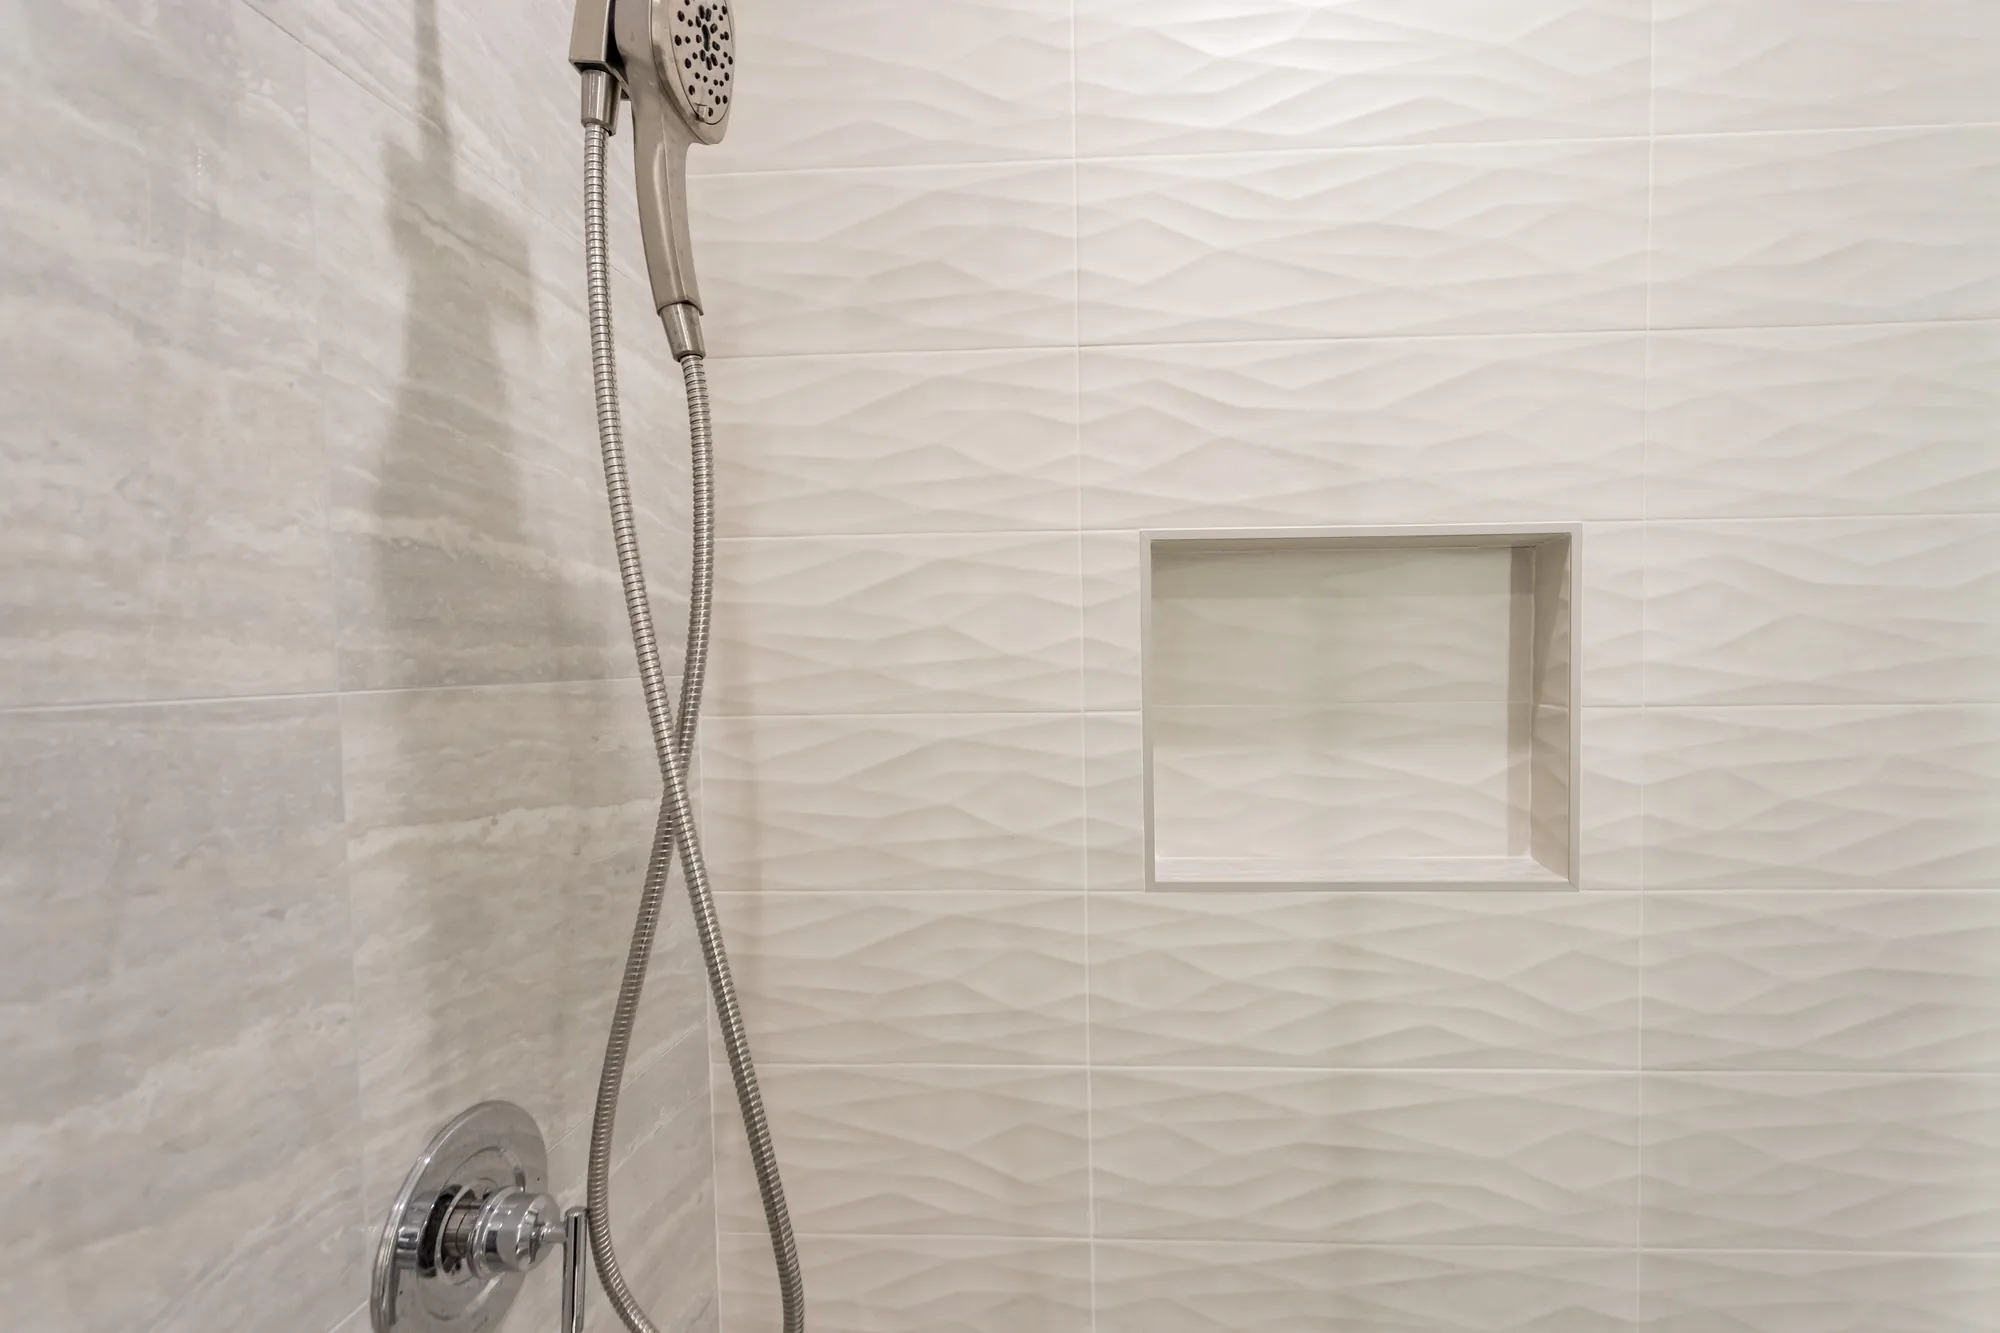
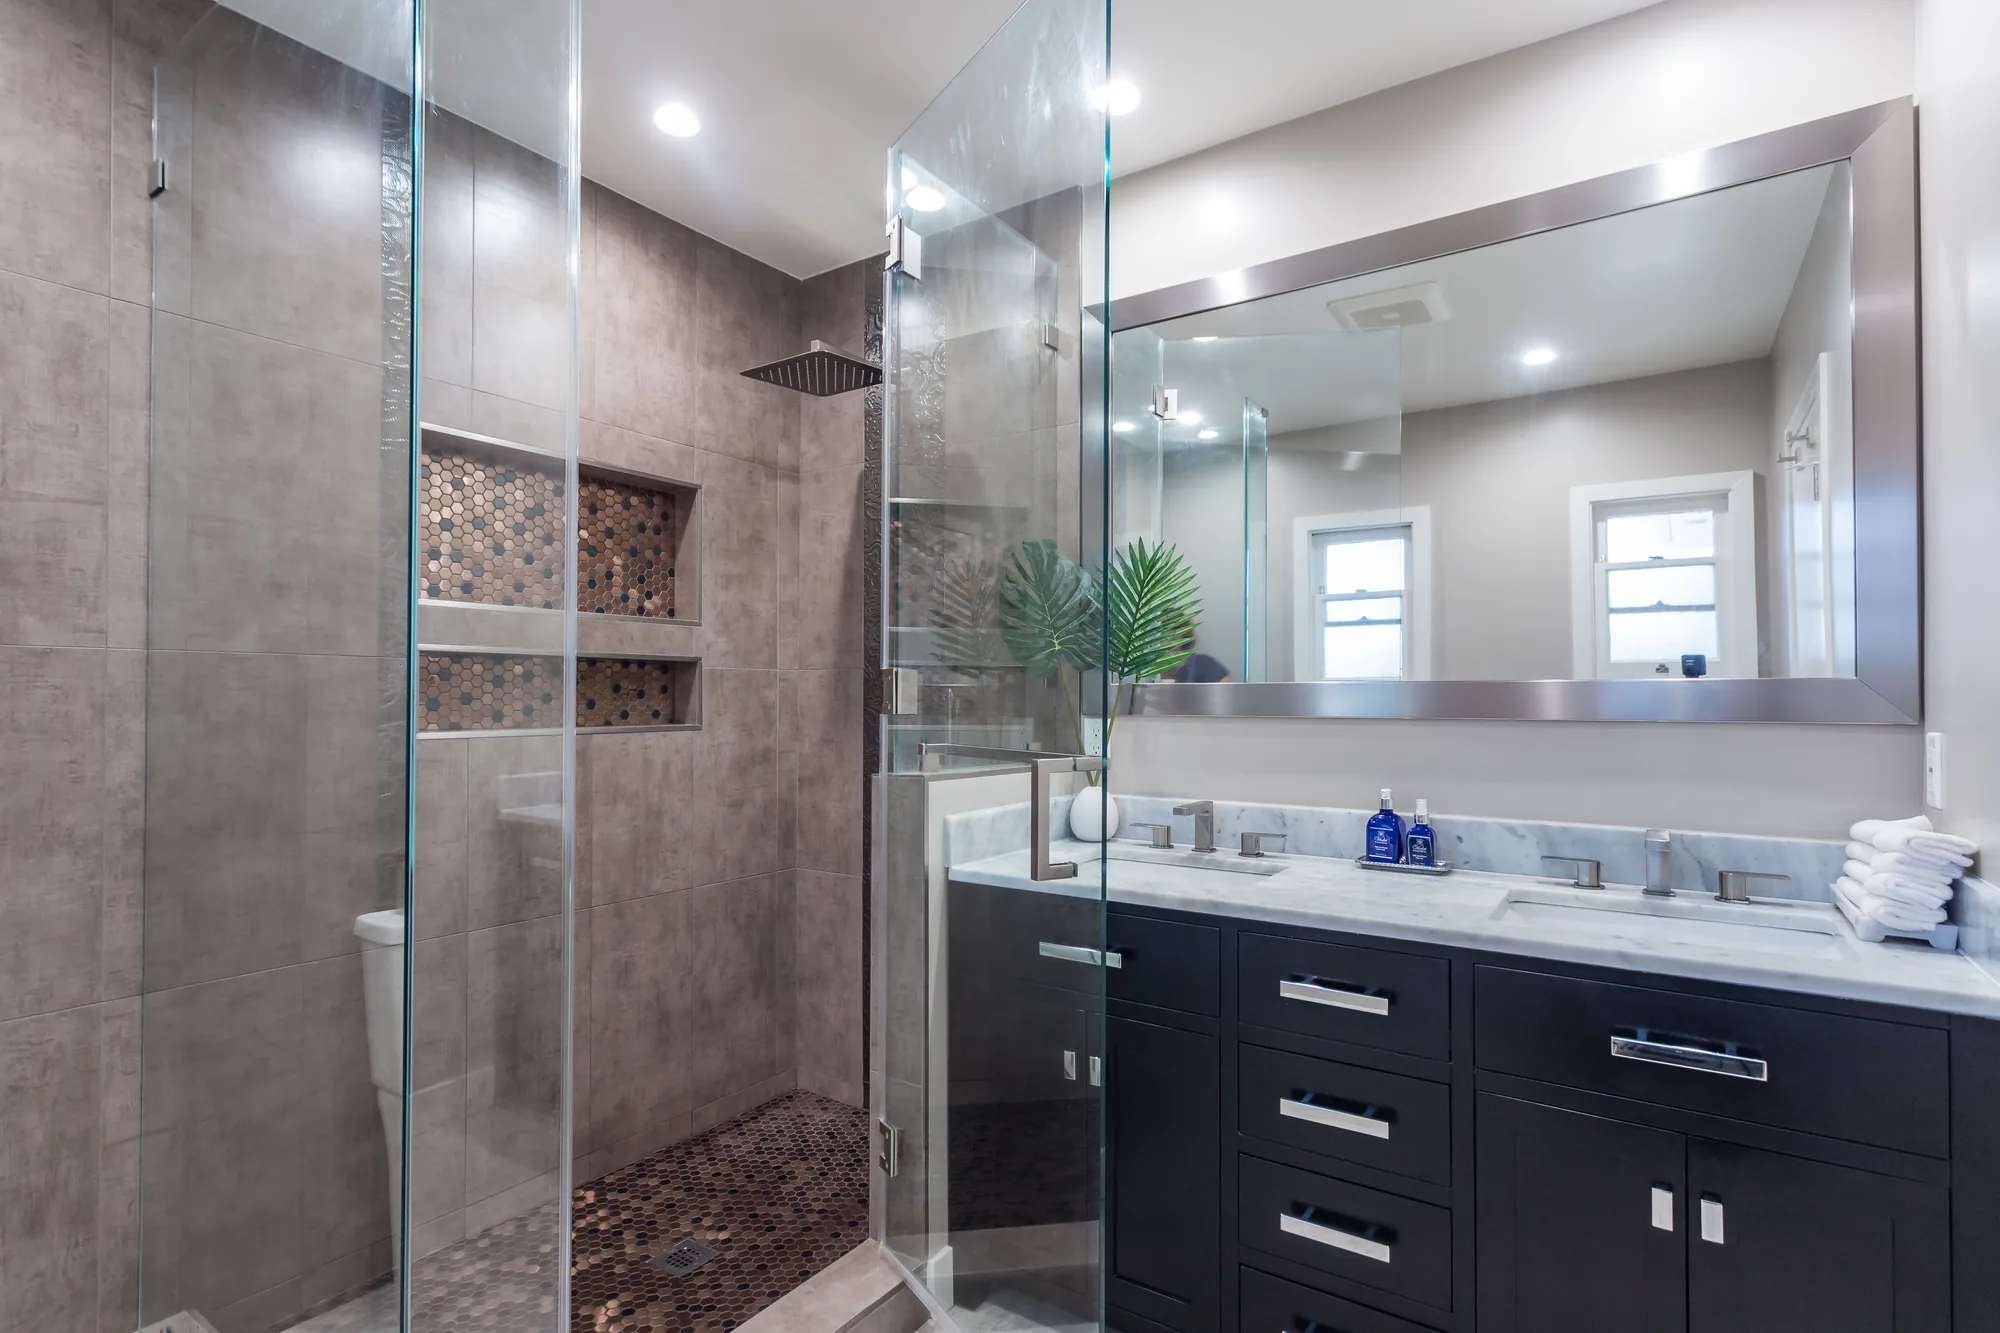
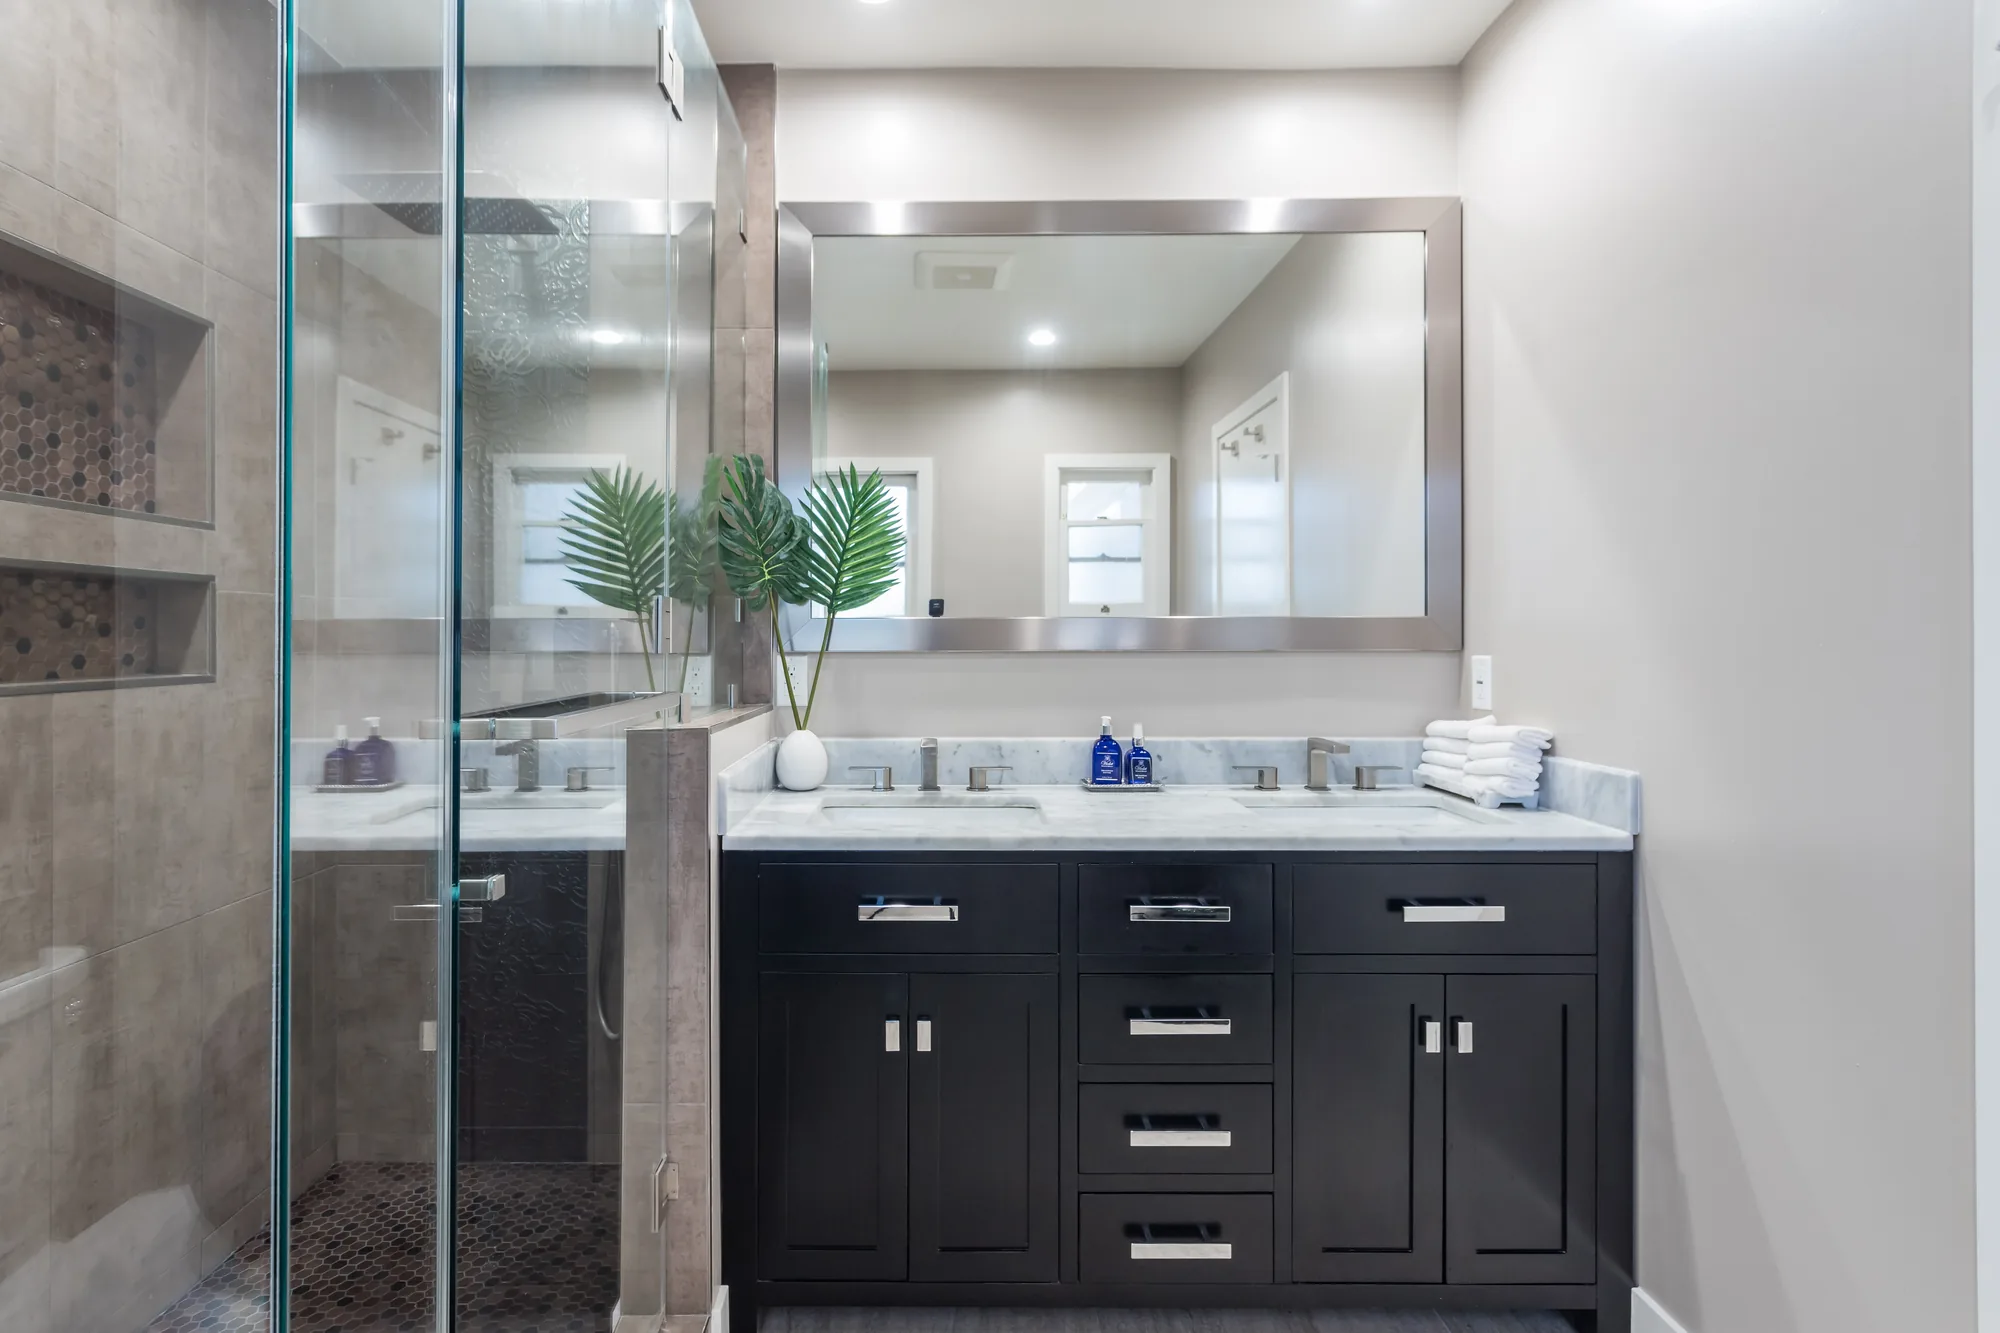
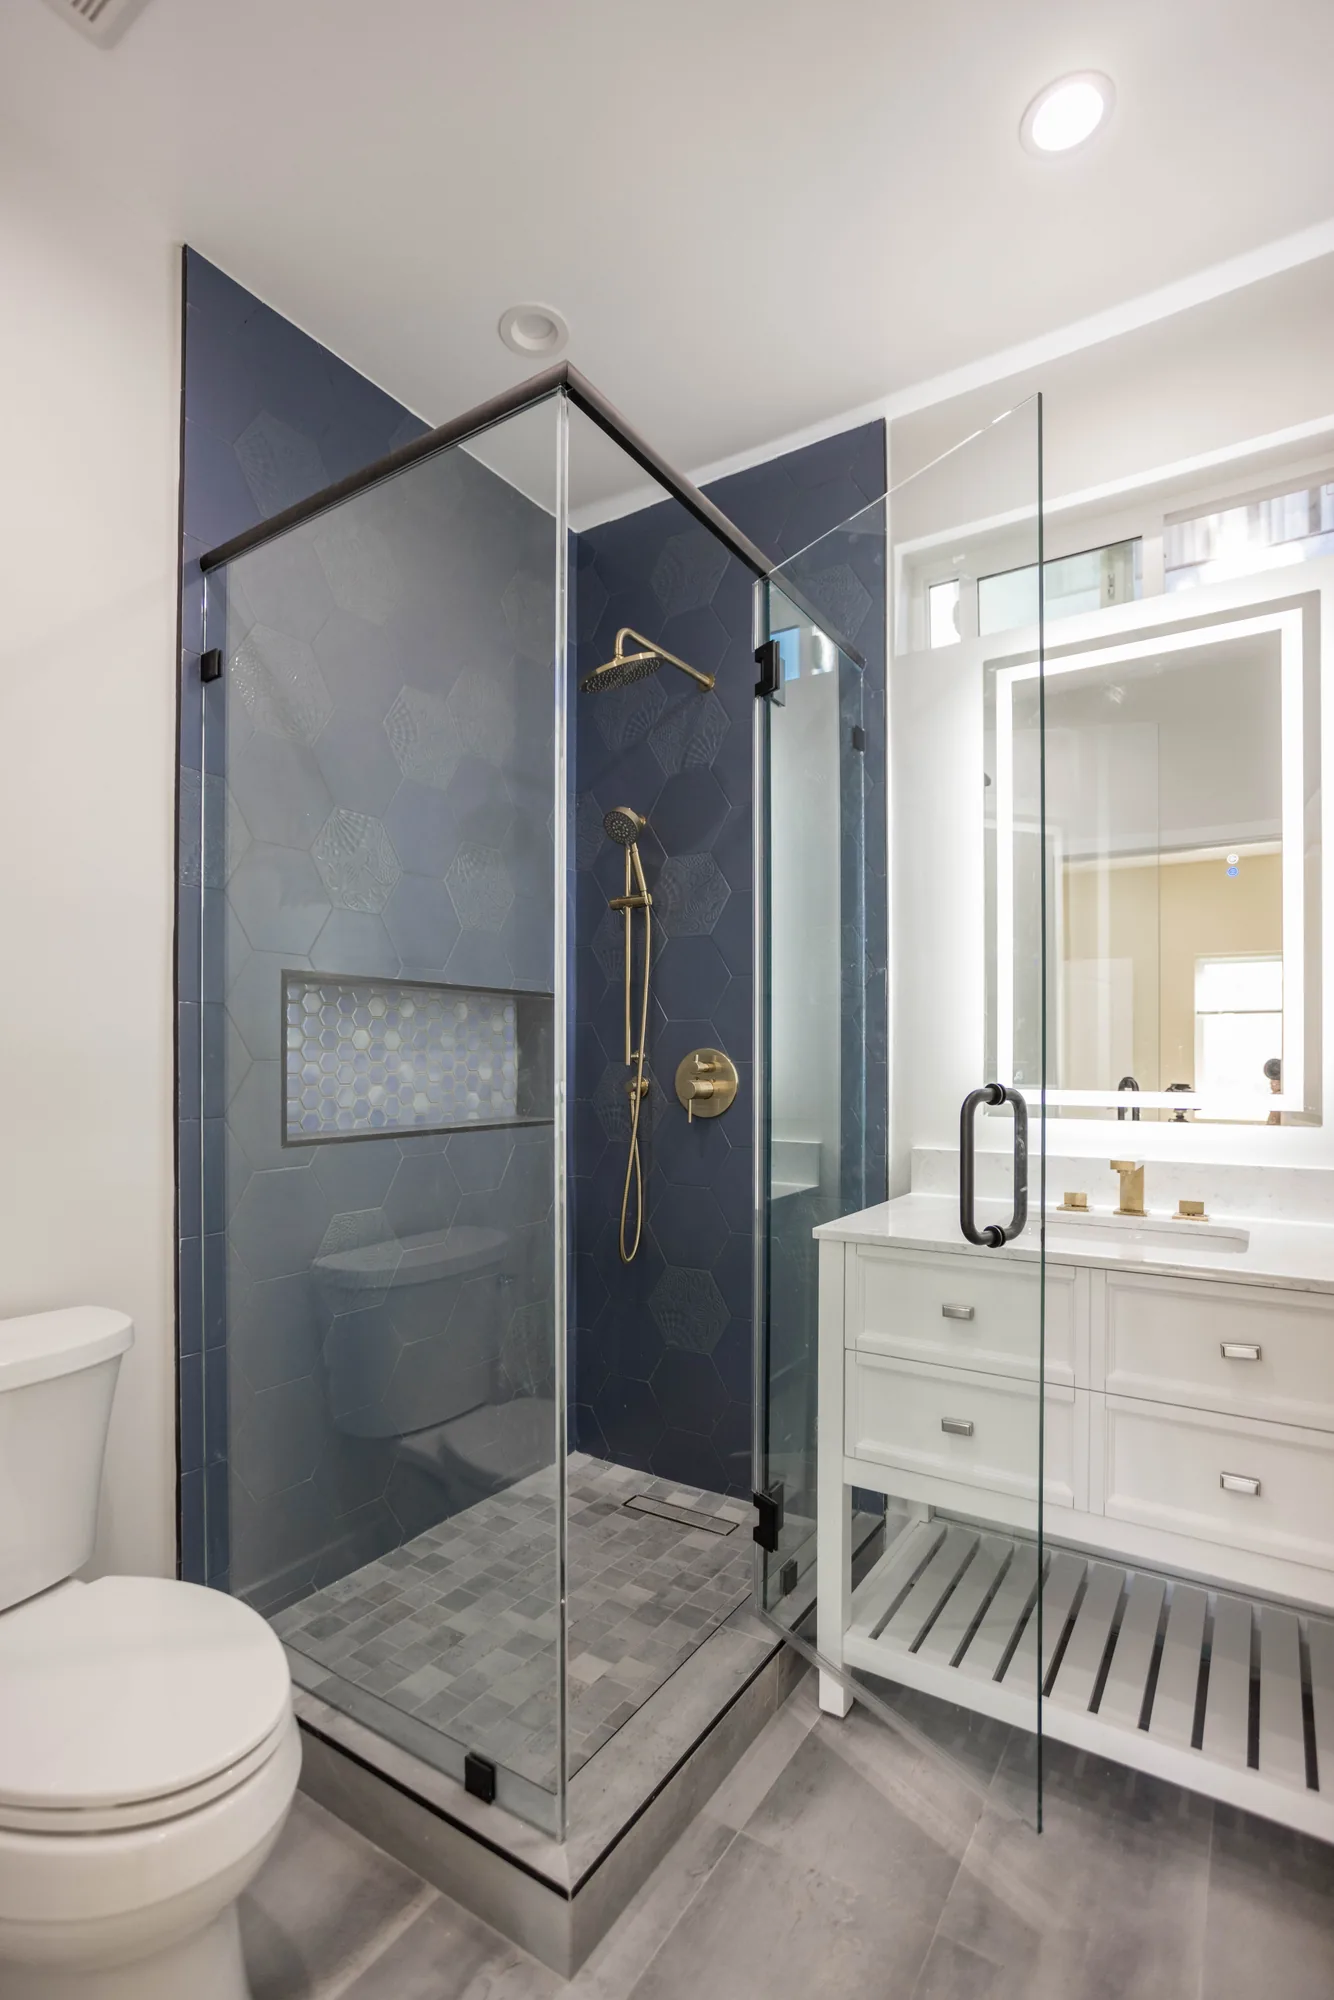
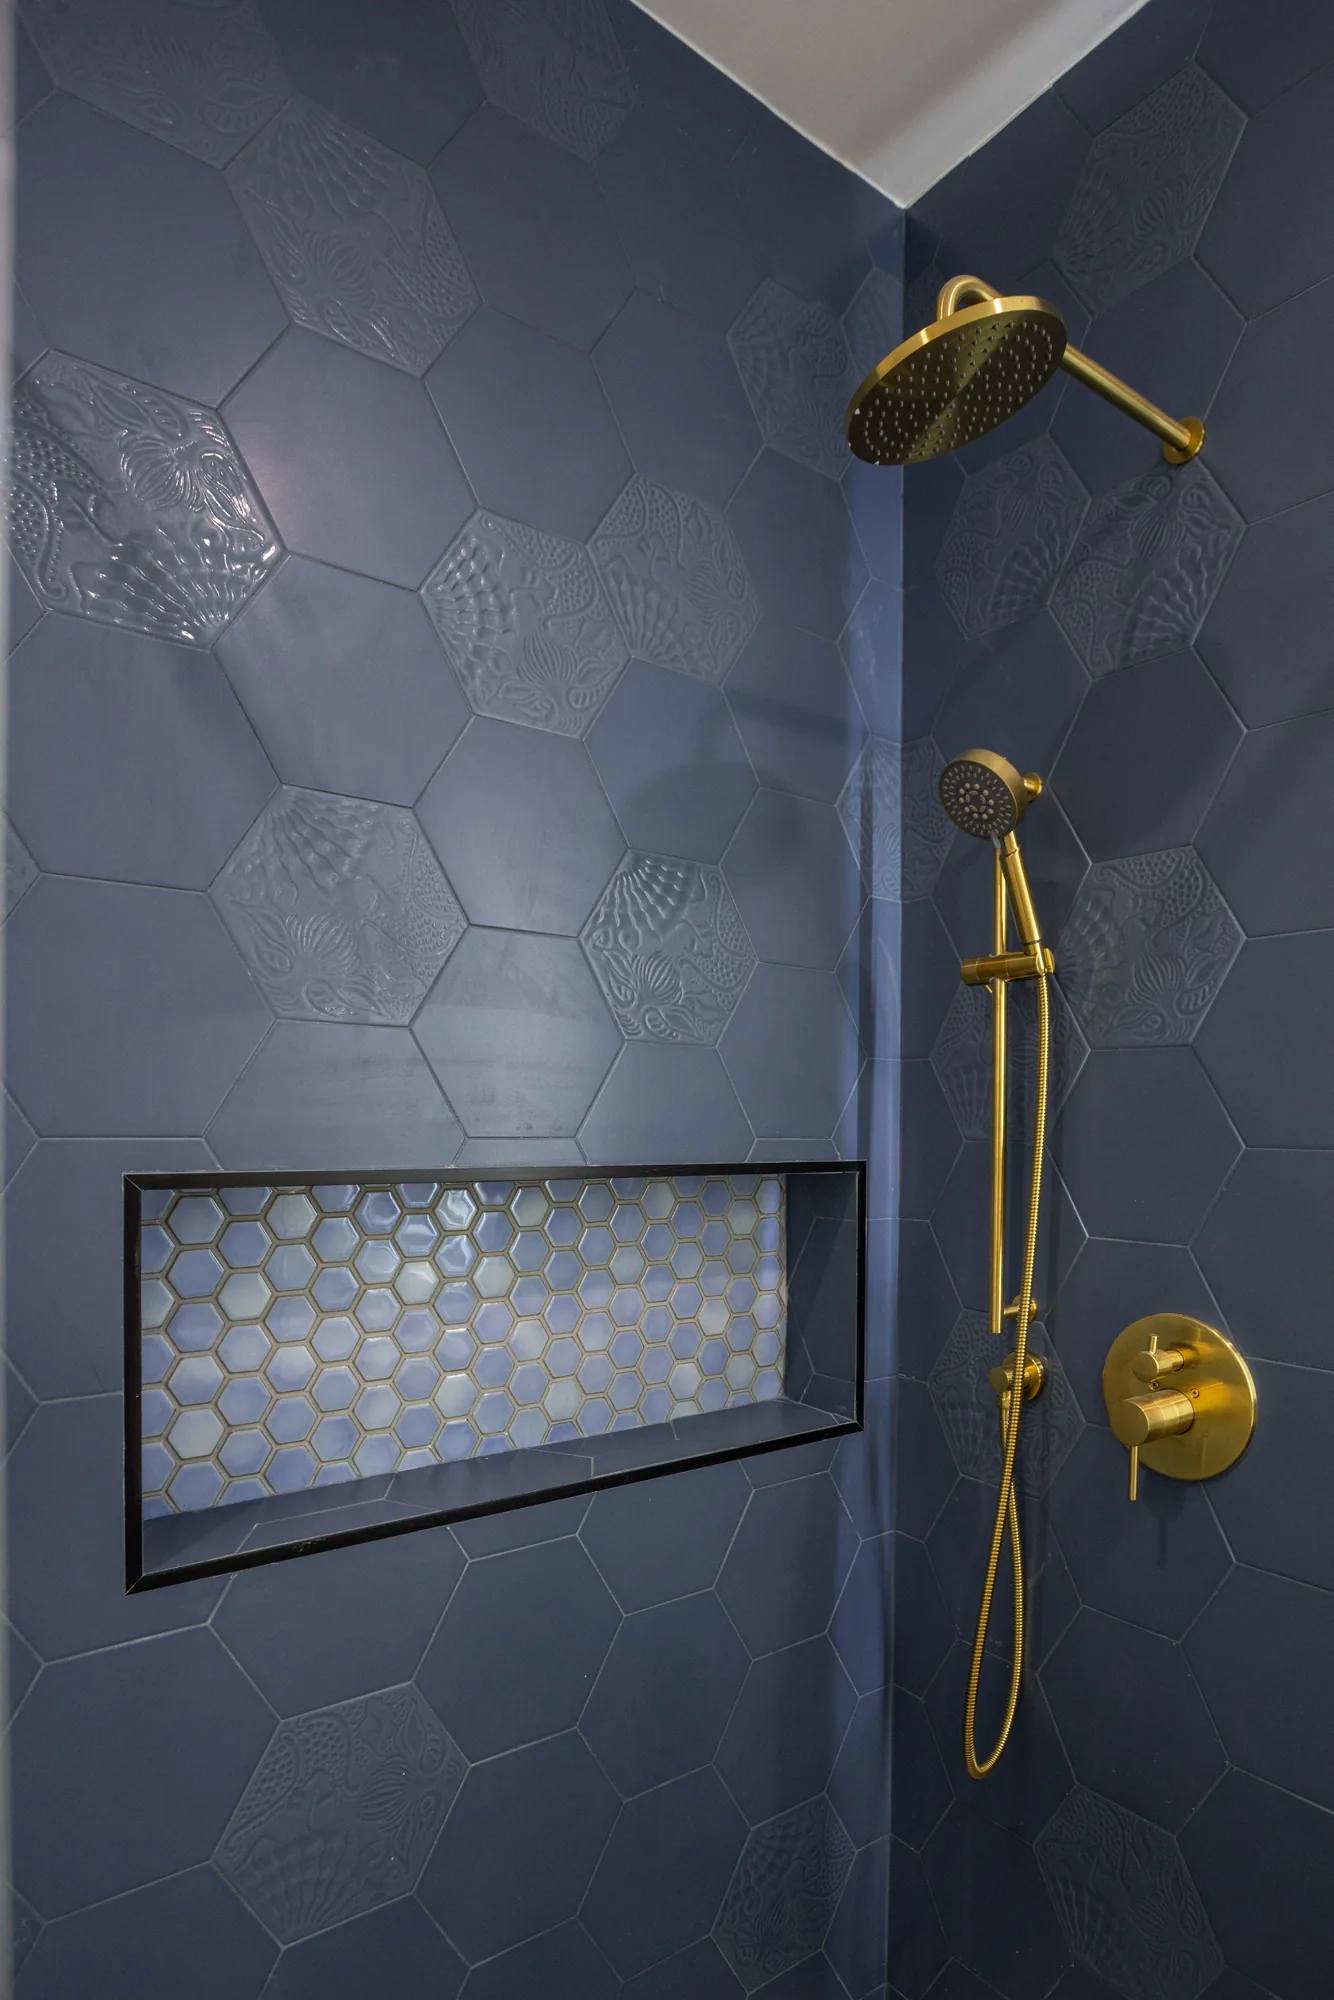
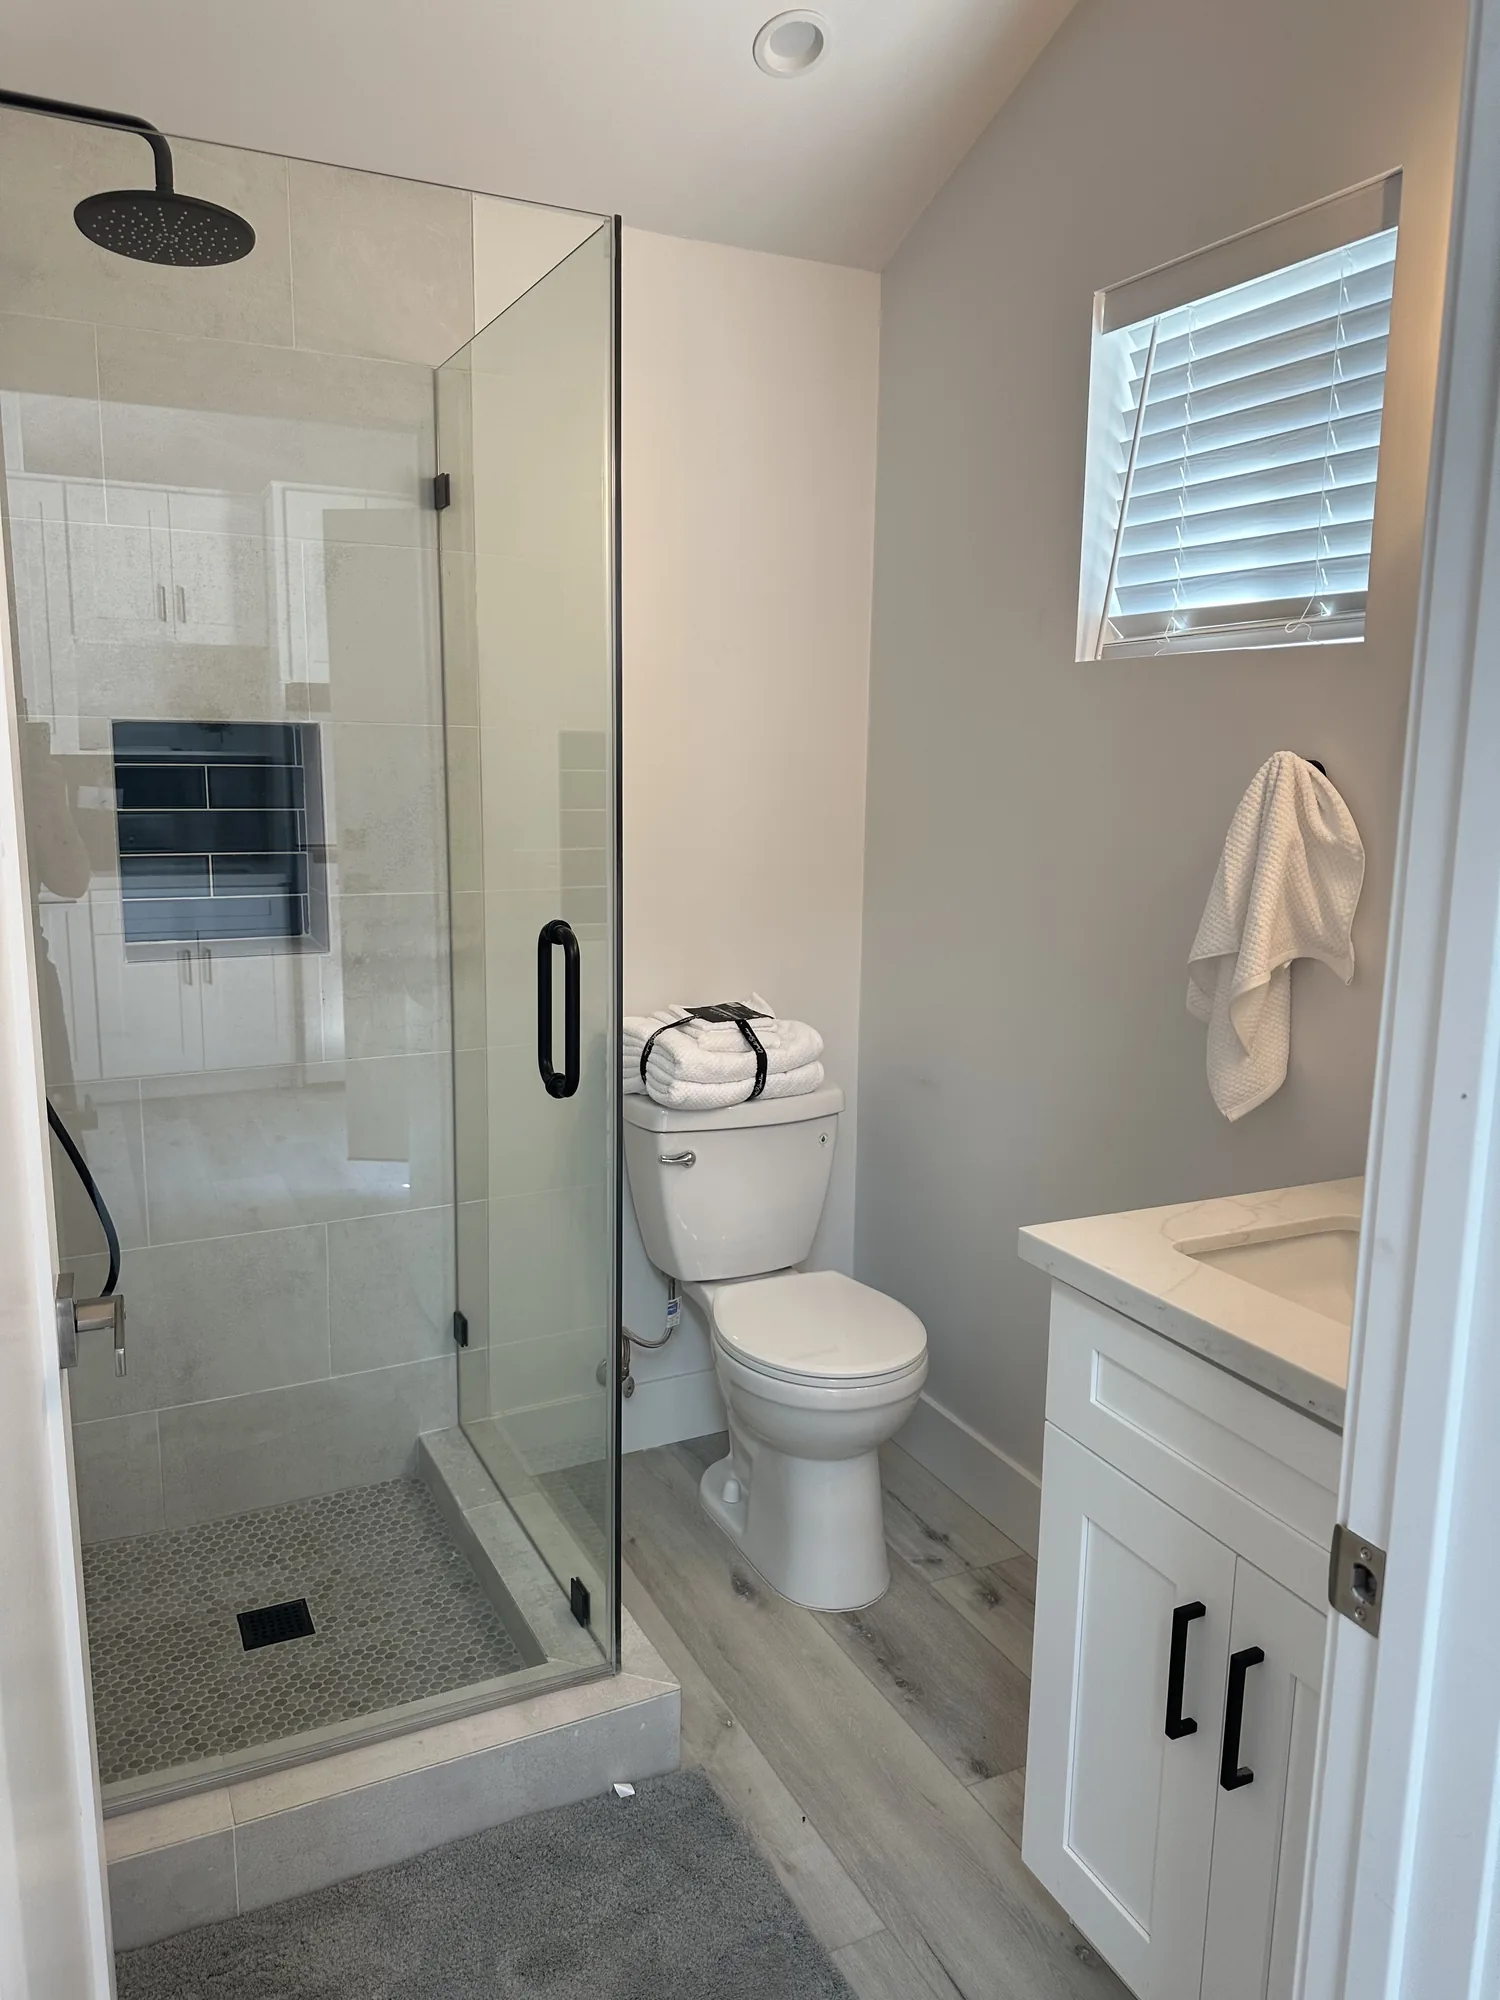
This full bathroom remodel replaced the wet area with a frameless glass walk-in shower built with a low-profile entry, an integrated tile bench seat and a recessed shampoo niche trimmed on all four sides. The shower walls combine a rippled three-dimensional white wall tile with large-format stone-look porcelain, and the shower pan is finished in hexagon mosaic set to a center linear-style drain. On the vanity wall the crew set a dark stained wood cabinet with slab drawer fronts and chrome bar pulls, topped with a thick grey veined stone slab and a hammered metal semi-recessed vessel basin served by a tall chrome single-handle faucet. Finish work includes crown molding carried around the ceiling, recessed can lighting, a ceiling exhaust fan, and a backlit LED mirror wired above the sink. Tile layout is tightly aligned, grout joints are consistent, and the glass panel and door are set plumb against the tile with minimal hardware.
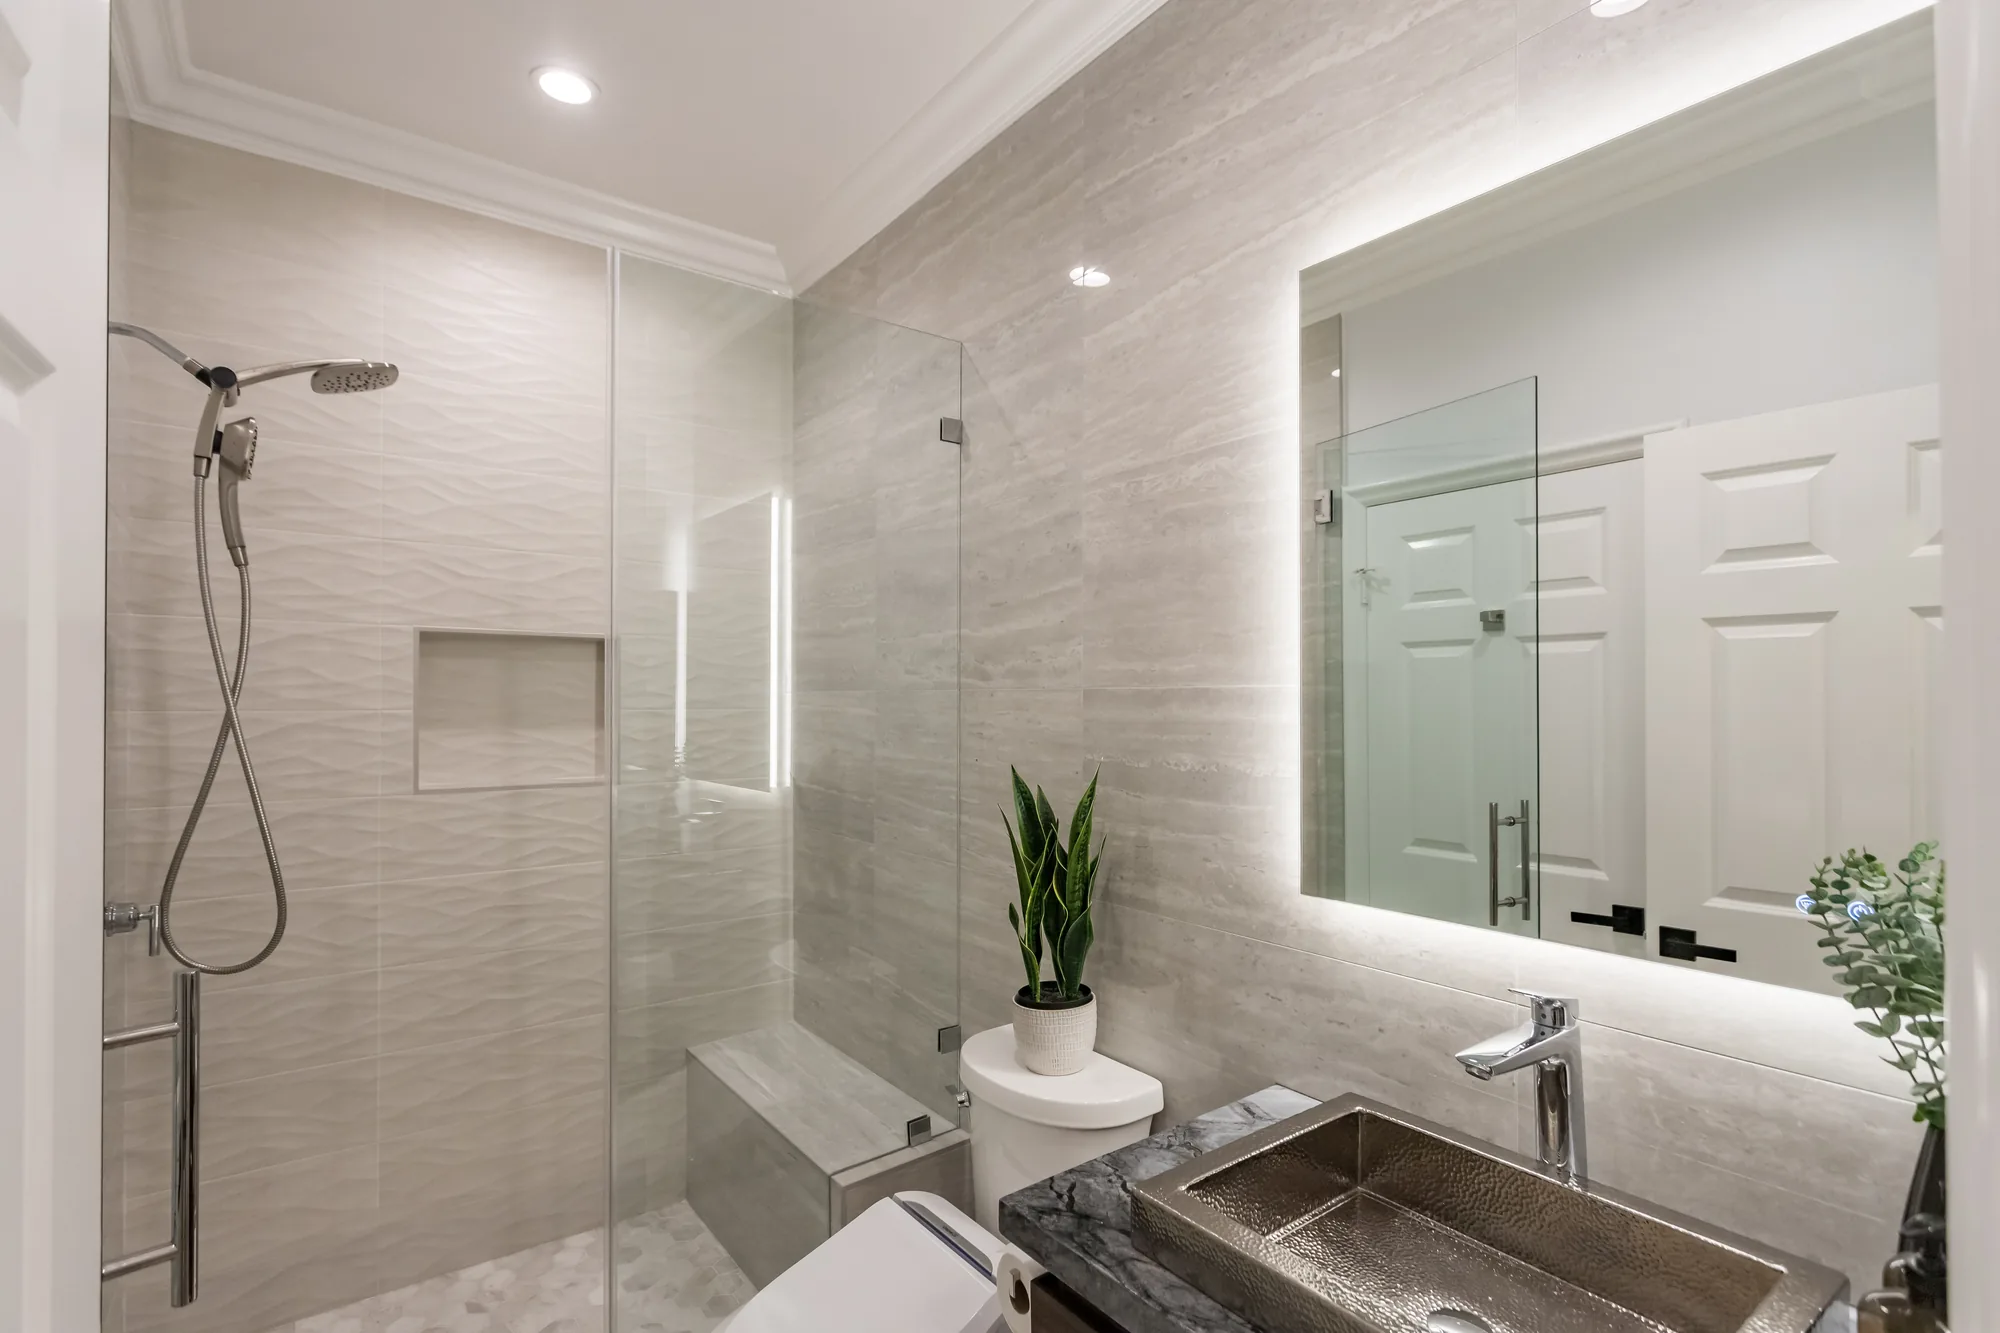
Style: Transitional
Pattern and format change how large a bathroom feels far more than tile color does, and each approach carries its own installation demands.
Rectangular tile in the 12×24 range and up, set in a straight stack with minimal grout lines, produces a calm continuous surface with very few interruptions. It is the strongest choice for a small guest bath because fewer grout lines means fewer visual breaks and the eye reads the wall as one plane. The trade-off is that large format is unforgiving of a wavy substrate, so the flatness work behind it is not optional.
Standard subway tile turned on end and stacked in columns draws the eye upward and makes a standard eight-foot ceiling feel taller. It suits narrow shower alcoves and powder rooms where you want height without a busy pattern. Vertical stacking exposes any variation in tile length immediately, so tight tolerance tile and a laser-checked layout matter more than they do in a running bond.
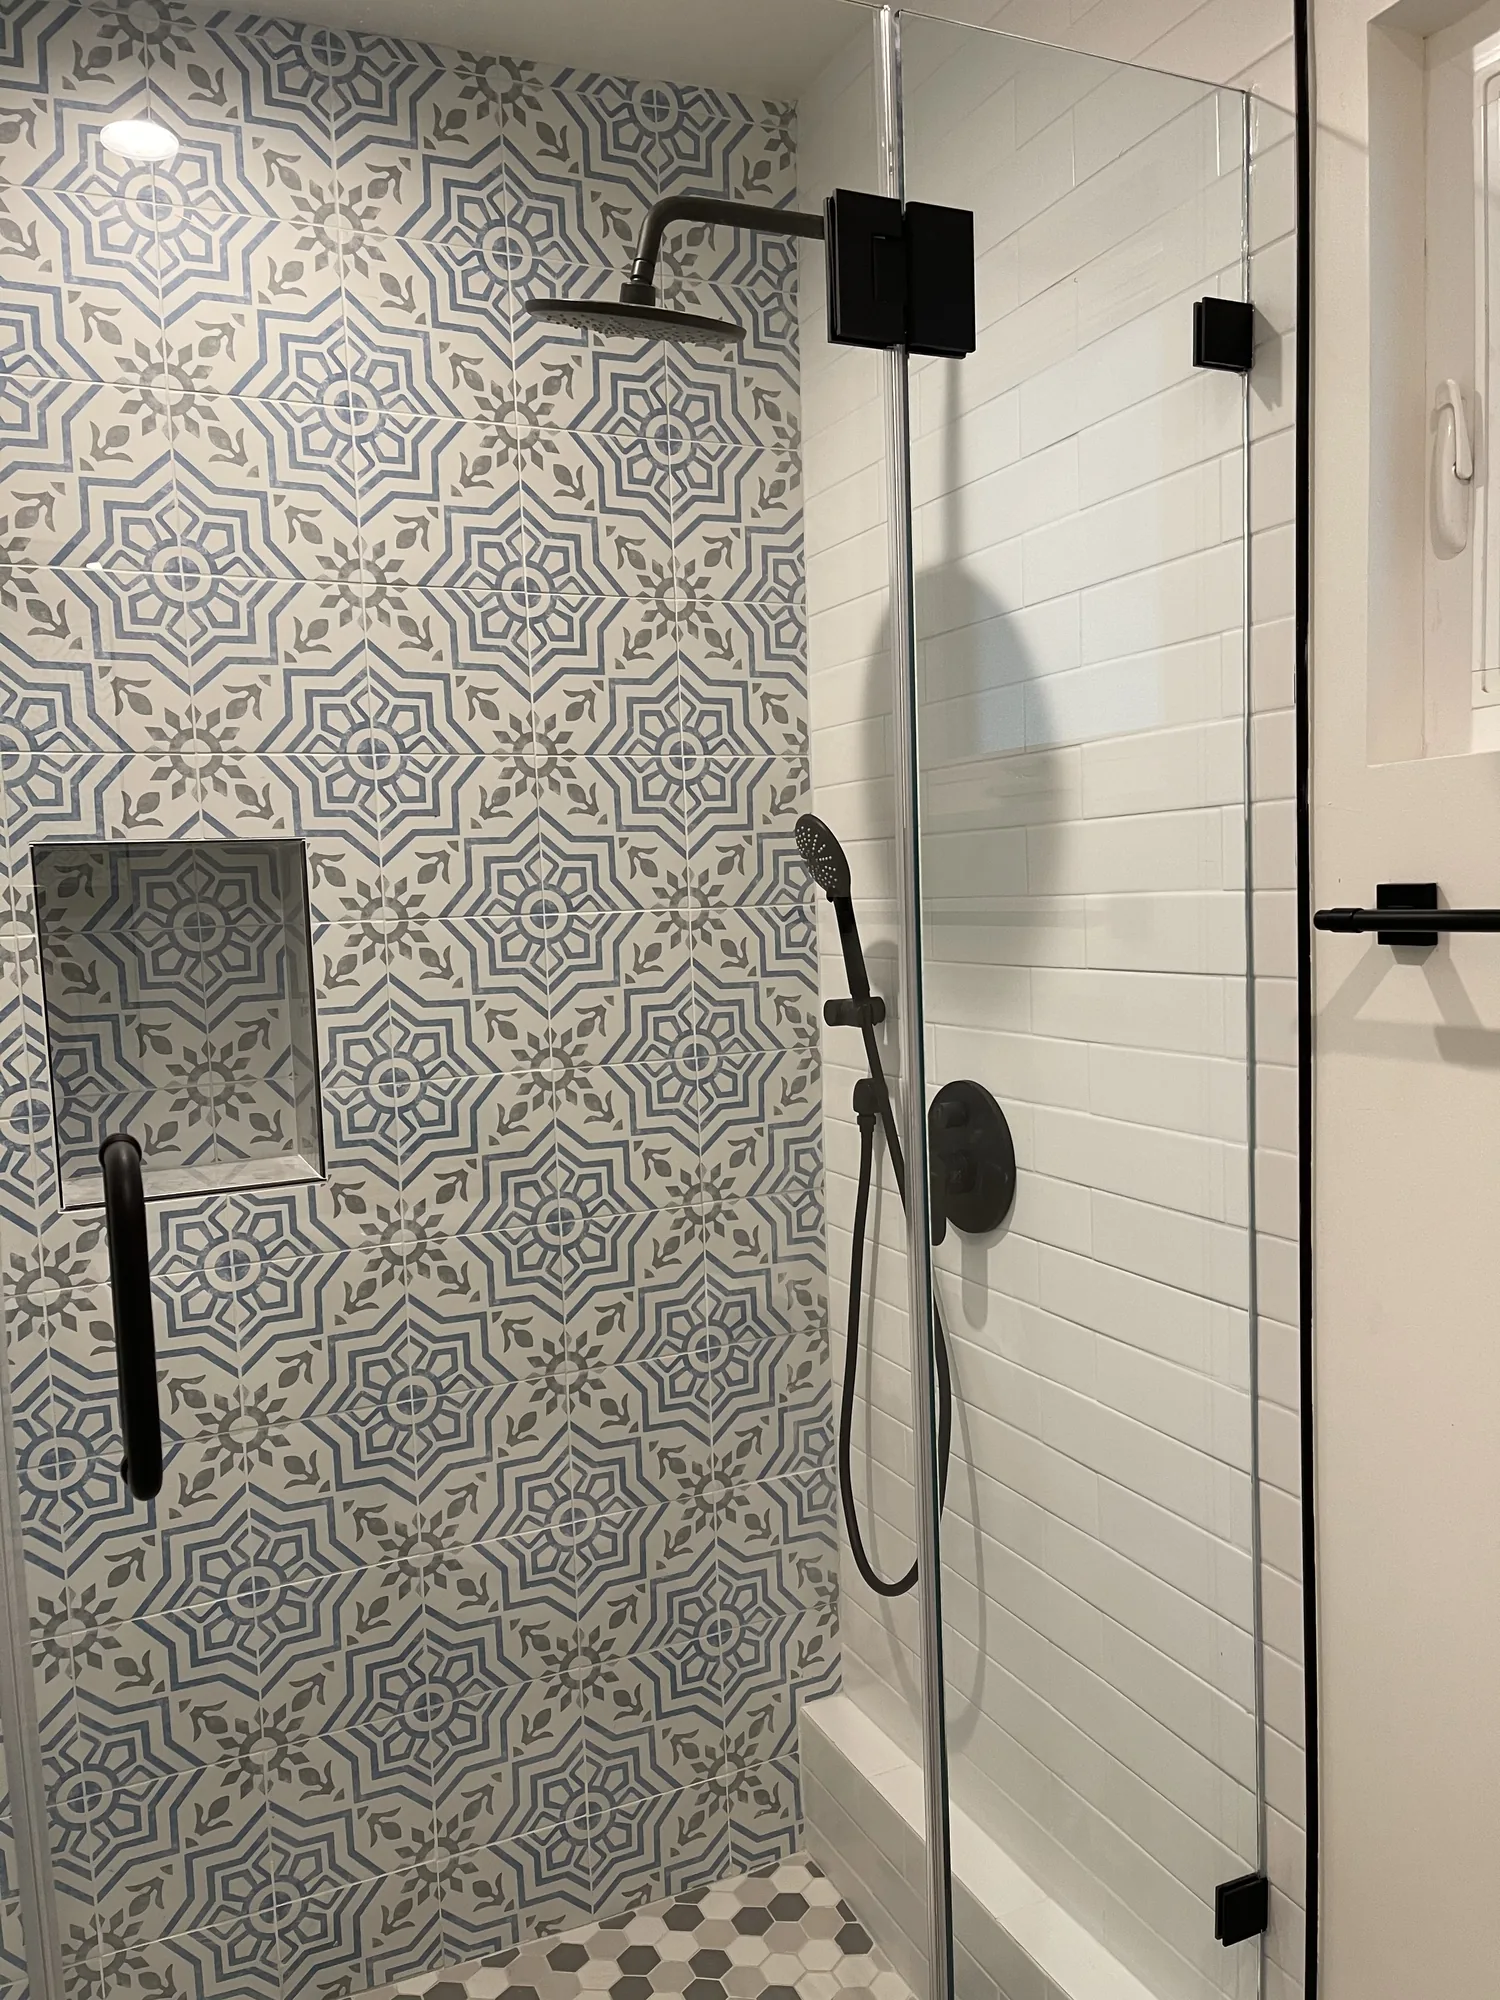
Angled patterns add movement and read as deliberate craftsmanship, which works well on a single feature wall behind a freestanding tub or as the back wall of a shower. They are most effective when the rest of the room stays quiet. Expect substantially more cutting and more waste factor, and expect the perimeter to need a border or trim profile to close the pattern cleanly.
Large porcelain panels run floor to ceiling give you a nearly seamless wall with dramatic veining and almost no grout to maintain. This is the cleanest-looking option and the easiest to keep clean, which appeals to homeowners tired of scrubbing joints. Panels are heavy and fragile until they are bonded, they require specialized handling and cutting, and the wall behind them has to be genuinely flat.
Tile carried to roughly chair-rail or door-casing height with a cap profile above suits traditional and craftsman homes, which are well represented in older Eastside and Seattle neighborhoods. It protects the splash zone around a vanity or toilet without committing the whole room to tile. The critical detail is where the cap meets painted wall above, which needs a clean caulk joint that will not shadow-line as the house moves.
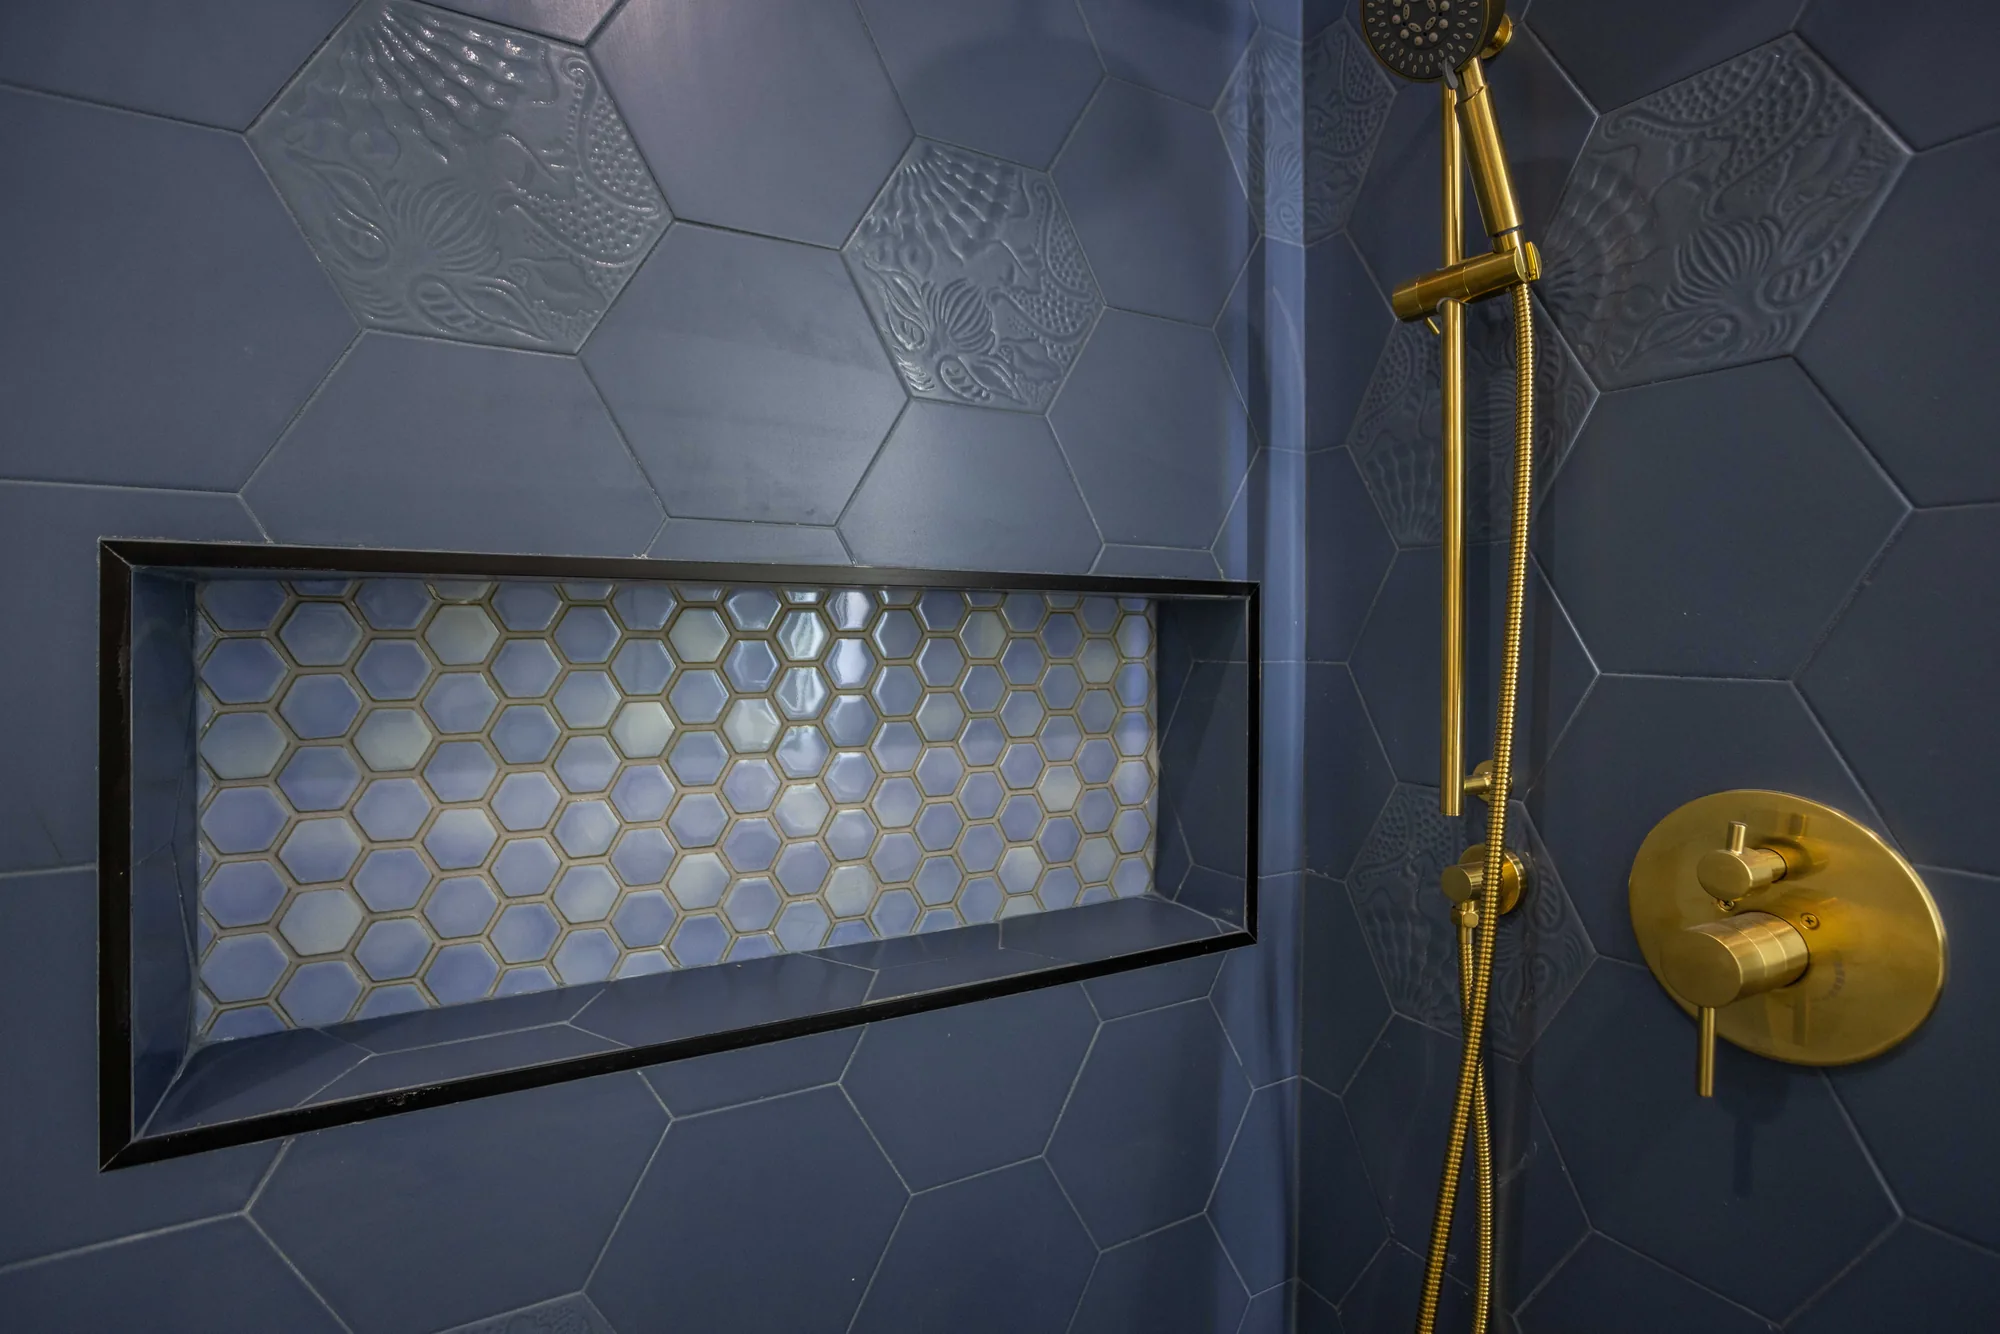
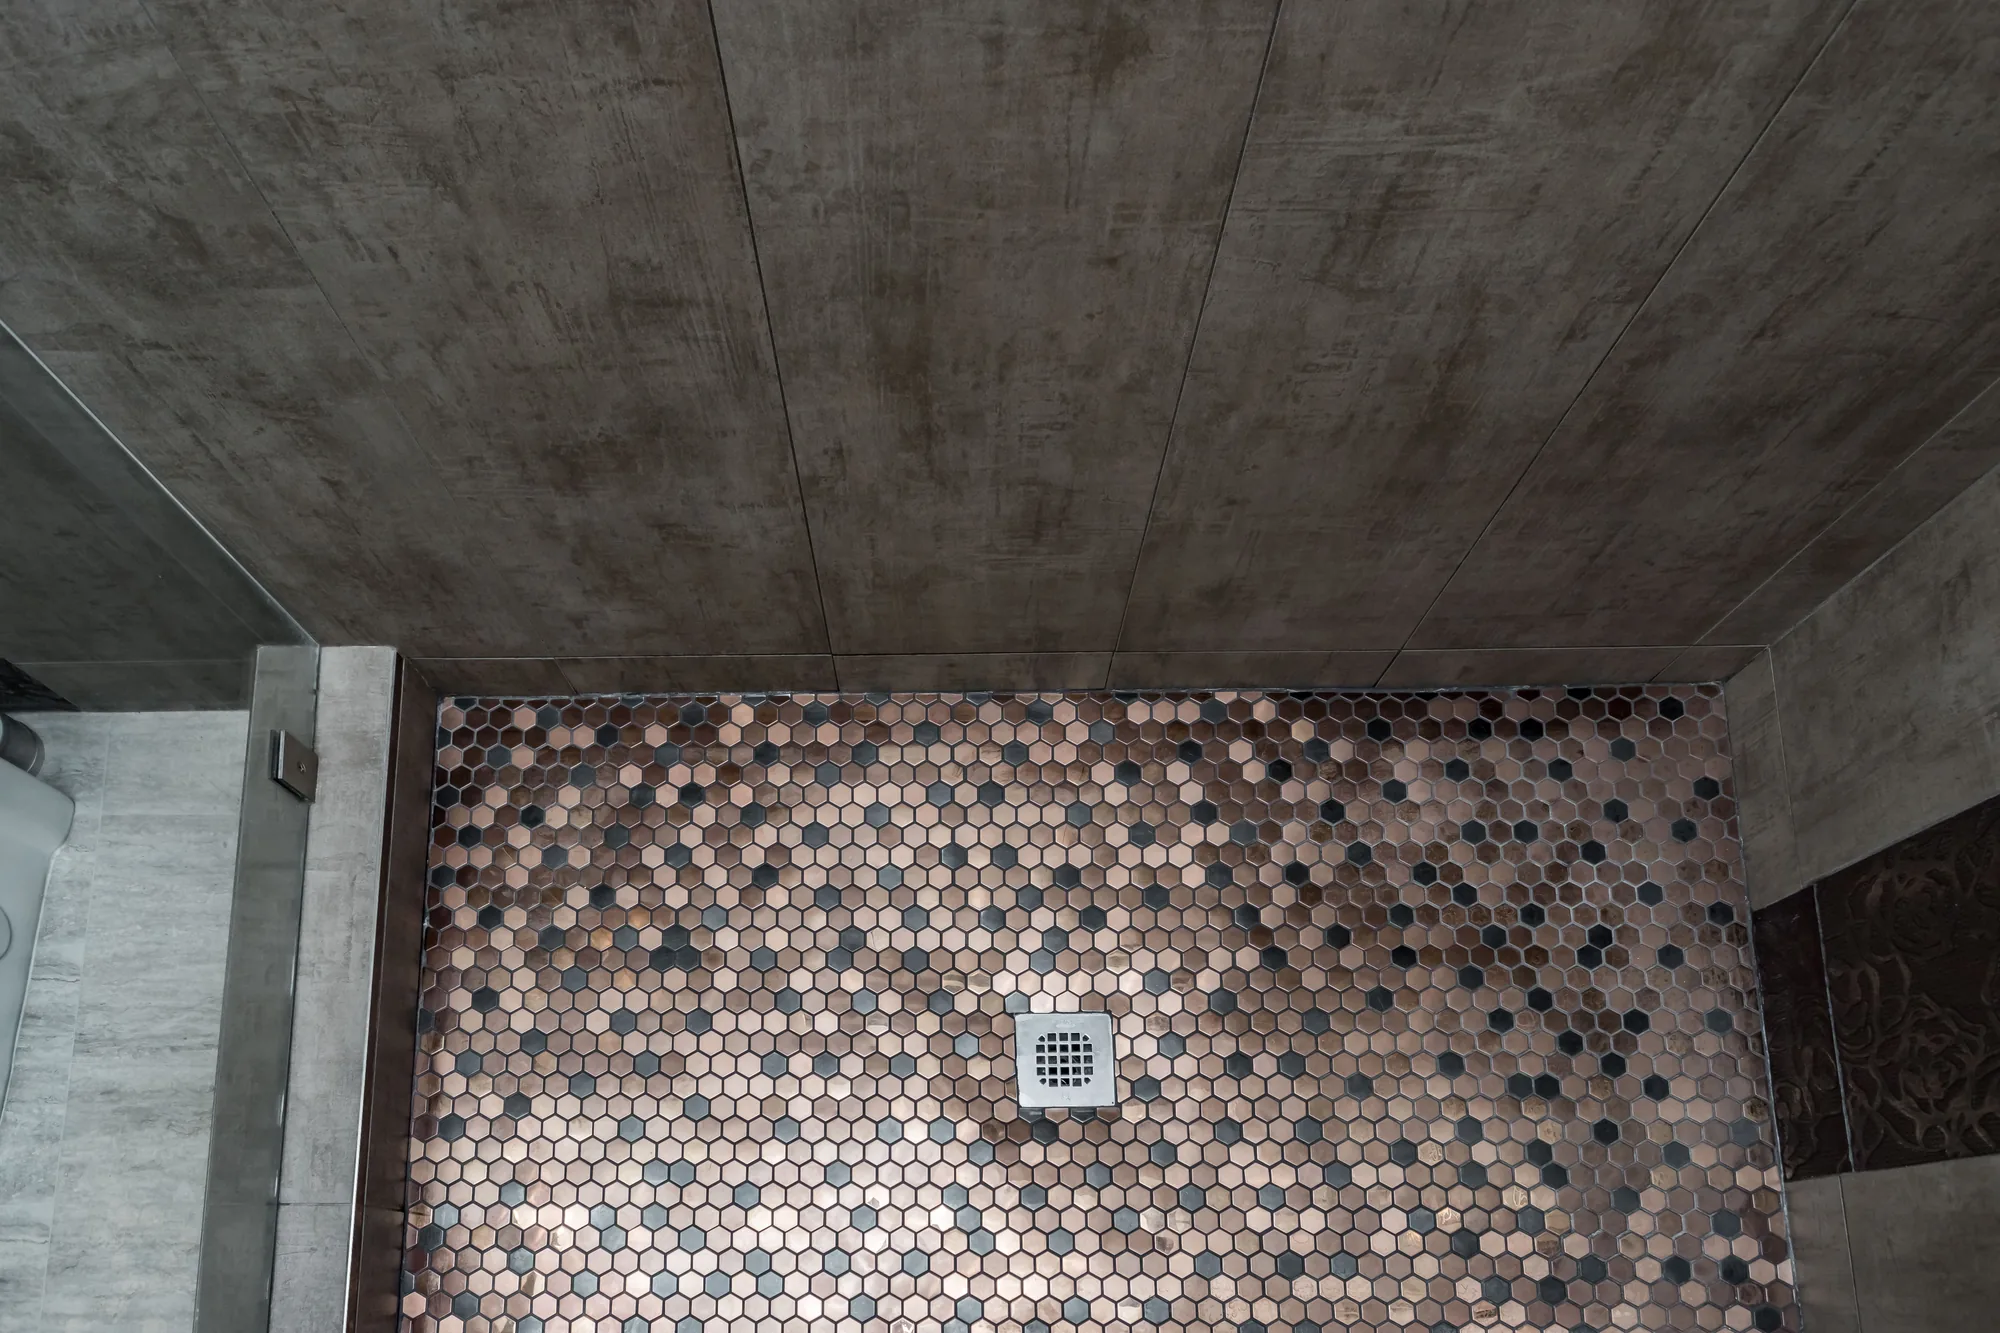
A band of mosaic, or mosaic used only inside the recessed niche, adds material interest at a fraction of the cost and labor of a full mosaic wall. Running the accent into the niche is a good use of it because the niche is where the eye lands anyway. Mosaic has many more grout joints per square foot, so in a shower it is worth pairing with a dense grout that resists staining.
Wall work has a fixed order, and skipping ahead is where most problem jobs go wrong.
We look at the existing wall for the tells that predict what is behind it: soft grout at the base course, staining on the ceiling below, a tub surround that flexes when pressed. We also check the exhaust fan for actual capacity and confirm it terminates outside rather than in the attic, because that single item drives long-term wall health more than most homeowners expect.
You get a documented scope covering substrate type, waterproofing system, tile and grout selections, and trim details. Nailing down tile format early matters because a switch from 4×12 to 24×48 changes the flatness tolerance of the wall and therefore the prep labor.
Floors and pathways are covered, doorways are sealed and the work zone is put under containment before the first tile comes off. We remove wet-area tile, backer and gypsum to the framing and haul the debris out rather than staging it in your driveway.
With the studs exposed we correct any bowed or out-of-plane framing, replace rot, and install blocking for grab bars, glass door hardware and any wall-mounted fixtures. If the valve is being moved or upgraded, or a niche needs a stud bay opened up, that work happens now while everything is accessible and inspectable.
The specified backer goes up with correct fastener spacing, seams are taped and treated, and the waterproofing layer is installed continuously across the wet area. Inside corners, the pan-to-wall joint, pipe penetrations and the niche get reinforcement or preformed corners before the field coating goes on.
Membranes need real cure time before anything is bonded over them, and shower pans get a flood test held long enough to prove the assembly holds water. This is the step that gets compressed on rushed jobs, and it is the step you cannot inspect later without demolition.
Layout lines go on the wall, the field is dry-fit, and then tile is set with the appropriate mortar and full coverage behind each piece. After the mortar cures we grout the field, then cut out and replace every change-of-plane joint with flexible sealant in a matched color.
Edge profiles, fixture escutcheons, shower door hardware and any glass go on last, followed by a full haze cleanup and sealing where the material requires it. We walk the finished room with you under the actual bathroom lighting, since grout and stone read very differently under work lights than under a warm vanity fixture.
Soft grout, a flexing surround or staining on the ceiling below are worth looking at before they become a framing repair. Call (206) 825-2773 and we will come take a look.
A wall project is a sequence of trades stacked on top of each other, and we handle each layer rather than tiling over someone else’s guesswork.
We remove the existing tile, backer and any compromised gypsum down to the studs in wet areas so the framing can be inspected dry. This is also when we find the things nobody could see, such as rotted bottom plates, prior leaks at the valve, or cast-iron drain connections that have been weeping.
Studs in older Eastside homes are rarely in one plane, and large-format tile will telegraph every bow as lippage. We shim, plane or sister studs to bring the wall flat, and add solid blocking wherever a grab bar, shower door jamb, floating bench or wall-hung fixture will later be anchored.
We install the specified backer, tape and treat every seam and fastener head, then apply a continuous waterproofing layer as either a bonded sheet membrane or a liquid-applied coating built up to full thickness. Corners, changes of plane and the pan-to-wall transition get reinforcing band before anything else goes over them.
Recessed niches are framed between studs with a sloped sill so water drains out rather than pooling on the shelf. Benches and curbs are built from foam board or mortar, wrapped fully in membrane, and detailed so the top surface pitches back into the shower.
We snap layout lines and dry-lay the field before any mortar is mixed, so cuts land where they read well and slivers do not end up at the most visible corner. Tile is set in the mortar the manufacturer specifies for that body and format, with the coverage and back-buttering that large tile and stone require.
Field joints are grouted to a consistent depth and every change of plane, inside corner and fixture penetration gets flexible sealant instead of grout so normal building movement does not crack the joint. Edges are finished with metal profile, bullnose or a mitered return depending on the look you want.
Every option below performs on a bathroom wall, but they differ sharply in maintenance, weight, and how they behave under our grey winter light.
| Option | Best For | Considerations | Relative Cost |
|---|---|---|---|
| Glazed ceramic wall tile | Guest baths, wainscot, budget-conscious full surrounds | Light and easy to cut, but the glaze can chip to a visible white body and it is not rated for floors | Lowest |
| Through-body porcelain | Shower surrounds and any high-traffic wet wall | Dense and low-absorption, chips do not show a contrasting body, harder and slower to cut than ceramic | Low to moderate |
| Marble and natural stone | Primary bath feature walls where a soft classic look is the goal | Porous and etches from acidic cleaners and some shampoos, needs sealing and a rebonding process for weak slabs | High |
| Glass tile and mosaic | Accent bands, niche interiors, small reflective feature areas | Bounces our limited winter daylight around the room, but shows every trowel ridge so it demands a white setting mortar and a flat wall | Moderate to high |
| Large-format porcelain slab | Seamless floor-to-ceiling walls with minimal maintenance | Almost no grout to clean, but heavy, requires two or more installers and specialized tooling, and any substrate deviation shows | Highest |
| Handmade and zellige-style tile | Character-driven baths in craftsman and mid-century homes | Intentional variation in size, thickness and glaze means slower setting and a wider grout joint; not every installer enjoys it | Moderate to high |
| Solid surface or acrylic panel | Fast turnarounds, rentals, and accessible or grab-bar-heavy layouts | Very few seams and simple to clean, but limited design range and panel joints must be sealed exactly as the manufacturer specifies | Low to moderate |
Final material choice depends on site conditions and a written estimate.
Two bathrooms of identical square footage can differ enormously in cost, and it is almost never the tile alone that explains the gap.
Cost tracks surface area, not floor area, so carrying tile to the ceiling instead of stopping at a standard shower head height can add a meaningful share of the field. Tall walls also add scaffolding time and make cuts at the top course slower.
Small mosaic and very large slab both cost more to install than mid-size tile, for opposite reasons. Mosaic multiplies the number of pieces and grout joints, while slab requires more hands, specialized cutting equipment and a much tighter substrate tolerance.
A straight stack has minimal cuts, while herringbone, chevron and mitered outside corners multiply them. Every additional cut is time at the saw plus material waste, and intricate patterns typically carry a higher waste allowance on the order.
This is the single largest source of variance. Rotted plates, a leaking valve, mold in the cavity or framing that is badly out of plane all add work that no one can price accurately until demolition exposes it.
A liquid-applied membrane over cement board and a full bonded foam board system are both valid, but they differ in material cost and labor. The right specification depends on the shower configuration, whether the wall is exterior, and how much movement the assembly needs to tolerate.
Keeping the valve, drain and fixture locations where they are keeps the project confined to finish trades. Moving a shower valve, adding body sprays, or converting a tub alcove to a curbless walk-in brings plumbing, framing and often permitting into the job.
We do not quote bathroom wall work sight unseen. Accurate pricing requires an on-site inspection of the existing assembly, ventilation and framing, followed by a written estimate that lists scope, materials and allowances in detail.
Wall and tile work is where shortcuts hide best, so it is worth knowing how a contractor approaches the parts you will never see again.
Backer, membrane, mortar and grout are chosen together as a system that suits your specific wall, rather than defaulting to whatever is on the truck. That decision is documented in the estimate so you know exactly what is going behind your finish.
We correct out-of-plane framing rather than trying to bury it in thick mortar, which is the usual field workaround and the usual cause of lippage. This matters most with large-format tile and slab, where a bowed stud shows up as a shadow line across the whole wall.
Homes here span original mid-century ramblers, 1970s and 1980s split-levels and newer builds, and each generation has its own wall detailing quirks. Knowing what to expect behind a 1962 tub surround means fewer surprises and a more realistic schedule.
A wall assembly can only do so much if humid air has nowhere to go, which is why we look at fan capacity and duct routing rather than ignoring it. In our climate, correcting the fan is often the cheapest durability improvement in the whole project.
We set the layout so full tiles land at the sightlines that matter and the awkward cuts go where nobody looks. That is a planning decision made before mortar is mixed, and it cannot be fixed afterward.
Demolition, framing, waterproofing, tile and trim are coordinated under one schedule instead of handed between disconnected subs. You know who is in the house each day and who is accountable for the finished result.
A short look at what goes on behind bathroom tile and why the layers underneath determine how long the finish lasts.
On-site footage from a completed bathroom remodel showing tile, fixtures and finished detail.
Bring us your selections, or start from a blank slate and we will walk you through format, pattern and grout. Reach us at (206) 825-2773 to set up an on-site visit.
EXCELLENT Based on 57 reviews Posted on pinnyTrustindex verifies that the original source of the review is Google. Didn’t know what to expect at first but these guys blew the winds off my hat I mean seriously, I had a bathtub renovated to a built in shower and my God am I satisfied with their work. If anyone is considering going with these guys for a remodel I’d vouch for sure.Posted on Nathaniel CardenasTrustindex verifies that the original source of the review is Google. They did a good job on my Deck remodeling project, finished in such a short time and gave me a professional run-down on the material and labor cost. Highly recommend.Posted on Natalie GalvanTrustindex verifies that the original source of the review is Google. I usually don’t trust these companies but Sky Pro blew my expectations out of the water. I seriously am so glad they contacted me, I have 2 bathrooms in my home that both needed to be completely remodeled and they nailed my vision down for both. I couldn’t be happier with this and can recommend them to anyone, even locally.Posted on Samantha RoblesTrustindex verifies that the original source of the review is Google. I ended up going with Sky Pro for my roof project, they did an amazing job and the team didn’t fail to keep me assured the entire process through. 🙏🏽Posted on SophisticatedTrustindex verifies that the original source of the review is Google. Sky Pro came to do my concrete driveway project a couple weeks ago and, they were very respectful and easy to communicate with, very satisfied with their work.Posted on Tanner JacobsTrustindex verifies that the original source of the review is Google. These guy did a great job extending out our back patio. We have existing exposed aggregate and they matched the design perfectly. From the start Ben always made sure we were happy and all our questions were answered. We will definitely use them again for future concrete projects.Posted on Christian BlancoTrustindex verifies that the original source of the review is Google. Sky Pro came out and gave me a quote for my flooring project, they sent a wonderful contractor and he explained to me what was best regarding material costs. Definitely will be going with them! Contractor was actually really cool with the process and showed me some previews on how it should lookPosted on Pablo Blanco foloresTrustindex verifies that the original source of the review is Google. Got my deck looked at by SkyPro, ended up going with them for repairs and they did an amazing job. We made a deal with the pricing as well so I'm actually looking forward to booking with them soon when I wanna get my other project done.Posted on Sidney ArchieTrustindex verifies that the original source of the review is Google. SkyPro did my kitchen remodel project and I am so glad I went with them because now I’m walking into a palace every time I’m home. Really appreciate them!Verified by TrustindexTrustindex verified badge is the Universal Symbol of Trust. Only the greatest companies can get the verified badge who has a review score above 4.5, based on customer reviews over the past 12 months. Read more
No, not as the substrate for a wet area. Moisture-resistant gypsum, the green board people remember from older bathrooms, resists incidental humidity but is not a waterproof panel and is not appropriate directly behind tile in a shower or tub surround. A shower wall needs a cement backer board, a foam or fiber-cement panel, or an equivalent product, combined with a dedicated waterproofing membrane. Green board still has a legitimate place on the non-wet walls of a bathroom, just not inside the enclosure.
Sometimes on a dry wall, almost never in a shower. Tiling over existing tile buries whatever condition exists underneath, adds thickness that throws off door casings and fixture escutcheons, and gives you no way to verify the waterproofing behind it. In a wet area we strongly recommend taking the wall back to framing so the substrate and membrane can be built correctly. On a dry accent or wainscot wall with sound, well-bonded existing tile, an overlay can be a reasonable option after we test the bond.
Plan on several days after grouting, not hours. Setting mortar and grout both need to cure, and sealants need to skin and fully set before they are exposed to standing water and steam. Rushing this is a real risk because water that gets into partially cured grout can leave permanent efflorescence and weaken the joint. Your installer should give you a specific date based on the actual products used and the temperature and humidity in the house that week.
Cosmetic tile replacement generally does not require a permit, but the work around it often does. If the project involves moving plumbing supply or drain lines, altering framing, adding or relocating electrical, or changing the layout of the room, permitting through the City of Bellevue or the applicable jurisdiction usually comes into play. Requirements differ between Bellevue, Kirkland, Redmond, Sammamish, unincorporated King County and the City of Seattle. We confirm what applies to your specific scope before work starts rather than assuming.
Because grout was used where flexible sealant belongs. Every inside corner, every change of plane, and the joint where the wall meets the tub or shower pan is a movement joint, and rigid cementitious grout will crack there as the building expands, contracts and settles. The correct detail is a color-matched silicone or urethane sealant in those locations. If your corners are cracking repeatedly, the fix is to cut the grout out of the movement joints and re-detail them properly rather than regrouting the same way again.
Not bad, but it asks more of you than porcelain does. Marble is porous and calcium-based, so it etches from acidic products and can absorb staining if left unsealed, and in a shower that sees daily heavy use it will patina over time. Many homeowners genuinely like that aged look; others do not and are happier with a porcelain that convincingly reproduces the veining. If you want real stone, a good compromise is using it on a feature wall or vanity backsplash where it stays visible but sees less direct water.
Fewer grout lines and a light, low-contrast palette do most of the work. Larger-format tile with a grout color close to the tile color lets the eye read the wall as one continuous plane instead of a grid, which visually enlarges the space. Carrying the same tile from the shower onto adjacent walls or to the ceiling also removes visual stopping points. Under our overcast winter light, a satin or lightly polished finish returns more light into the room than a heavily textured matte will.
On an interior wall whenever possible, sized to the stud bay and to the products you actually use. Putting a recessed niche in an exterior wall means cutting into insulated cavity depth, which creates a cold spot and a condensation risk that is worth avoiding in our climate. Height is typically set so the shelf sits comfortably below shoulder level on the wall opposite or adjacent to the shower head, out of the direct spray. The sill should be pitched slightly forward so water drains out instead of standing in the niche.

A practical look at current bathroom design directions and how wall treatments fit into the overall scheme.
Learn more
Useful if you are weighing tile size, grout contrast and wall height in a compact guest bath or powder room.
Learn more
Covers how our regional climate should influence material selection, which applies directly to wet wall surfaces.
Learn moreWe take bathroom wall and tile projects throughout Bellevue and the surrounding Eastside communities, including Kirkland, Redmond, Sammamish, Issaquah, Newcastle, Mercer Island and Bothell, as well as Seattle proper. The housing stock changes noticeably as you move between these areas, and knowing whether you are likely to open up plaster and lath, 1960s mud-set tile or 1990s green board shapes how we plan the project.
Do not see your neighborhood? Call (206) 825-2773 — we regularly work throughout King County.
Tell us about your bathroom, what is bothering you about the current walls, and roughly when you would like the work done. We will follow up to arrange an on-site inspection and a written estimate.
Let us know how we can help you!